You obviously want to connect to the fastest Wireless connection when multiple network hotspots are available at your workplace. Windows 10 is not configured to auto-switch to the strongest internet but you can manually do so. Therefore, you will see 2 ways to automatically Switch to Strongest WiFi in Windows 10.
Basically, you need to modify the value of Roaming Aggressiveness for your Wi-fi adapter for auto switching. This action will set the signal strength at a limit after which the Wi-Fi adapter starts scanning for another candidate AP. Sometimes, the laptop doesn’t connect to strongest WiFi; this article will also help you in that situation.
Automatically Switch to Strongest WiFi in Windows 10
Here is how to automatically Switch to Strongest WiFi in Windows 10 –
1] Using Windows Settings app
Wireless network adapter includes a property that allows the device to continuously scanning for a network available within the range. Earliest possible after tracing out a signal the adapter suggests the system connecting to the network.
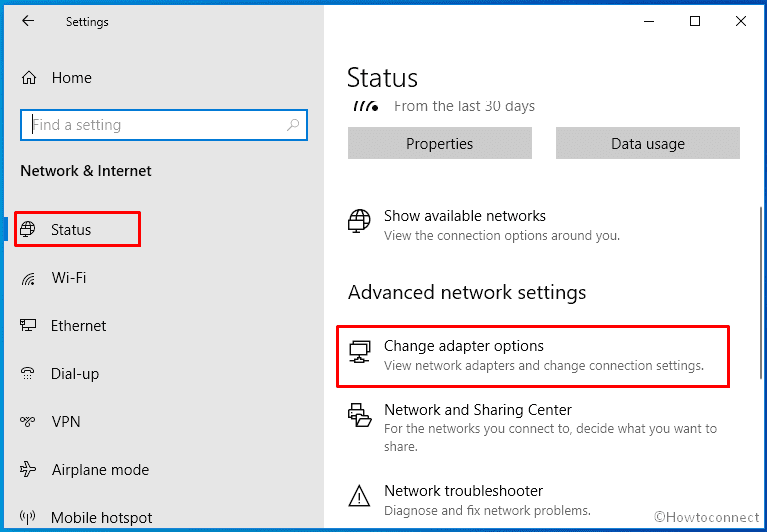
- Press – Windows + I.
- Click – Network & Internet.
- Move to the right of the dedicated settings page.
- Click – Change adapter options.
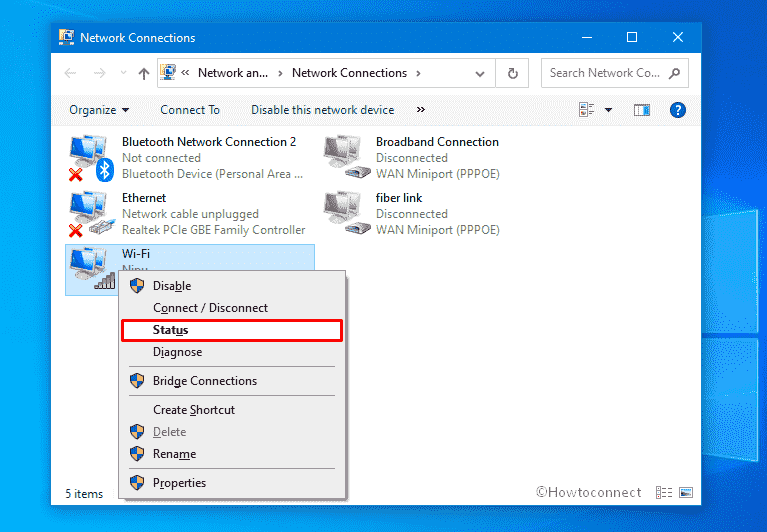
- From the appeared window, right-click on your Wi-Fi adapter and choose – Status.
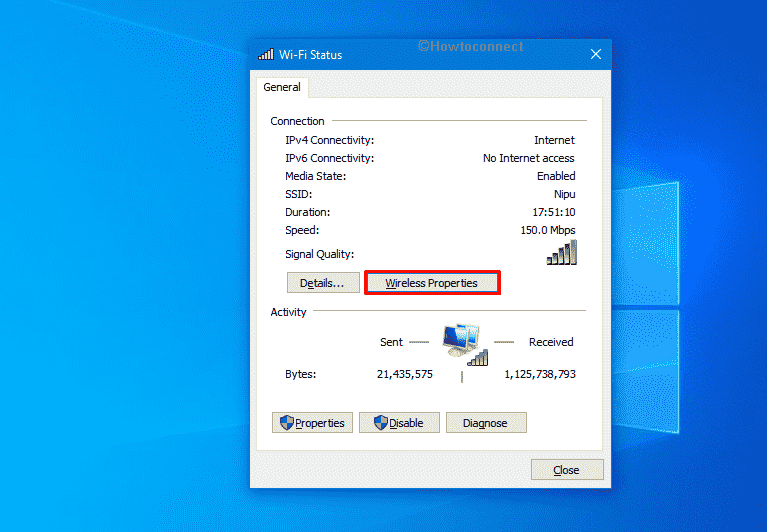
- Hit – Wireless Properties.
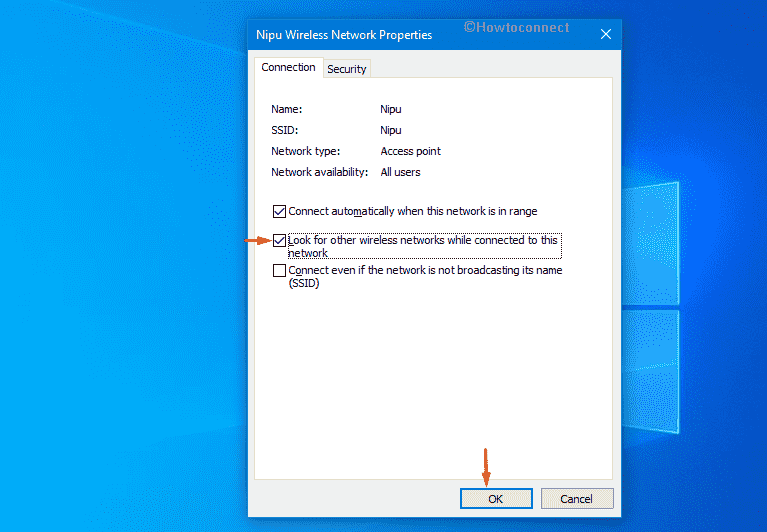
- Check the box set before Look for other wireless networks while connected to this network.
- To save the changes, click – OK.
2] Through Adapter properties
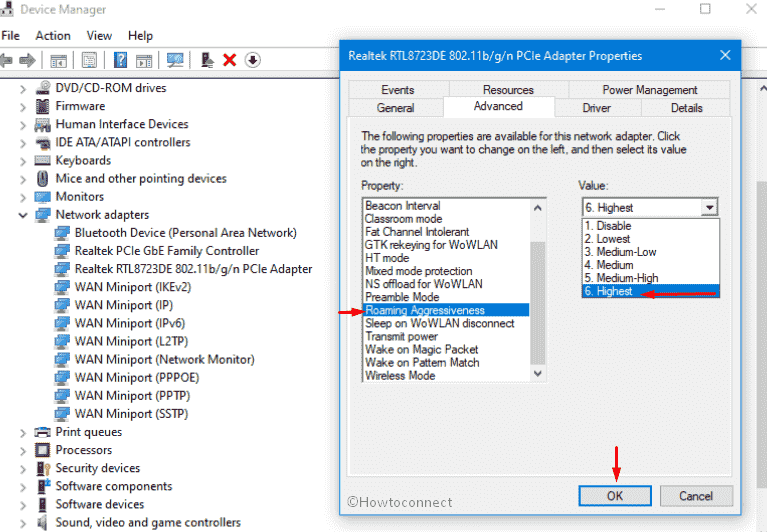
The mechanism of Roaming Aggressiveness is to modify the signal strength threshold when the adapter begins scanning for extra candidate Access Point. Choosing the highest value will trigger roaming scan for additional candidate AP even when the running AP signal strength is good enough. This Setting wor as an auto switcher WiFi so follow the method to change the value –
- Press – Windows + S.
- Type in – devmgmt.
- Hit – Enter.
- When Device Manager shows up, double-click – Network adapters.
- Right-click on your WiFi adapter and choose – Properties.
- Shift to Advanced tab of appearing wizard.
- Select Roaming Aggressiveness located under Property.
- Set the Value to Highest.
- Click – OK to make your system automatically Switch to Strongest WiFi.
3] Via a third-party tool WiFinian
Wifinian is a utility found in store to enable you to actively control Wireless connections. This tool has provided an option on the interface to auto switch to your desired network. Additionally, you can manage Rush 30, Engage 50, and organize the known networks using WiFinian.
See more posts on Wireless network-
1. How to Enable Mistakenly Disabled Adapters in Windows 10
2. Jugaad: When WiFi Would Not Work on Windows 10
3. Disable WiFi When LAN Cable Is Connected To Windows 10 PC
Methods list:
1] Using Windows Settings app
2] Through Adapter properties
3] Via a third-party tool WiFinian
That’s all!!
Great post. Thank you
You are a genius man.