You will find here few easy to completely Disable Windows 10 Timeline. While working on your systems, many a time you forget which site or app you were using or where you have saved an important file. But with Timeline starting with build 17063, you can close the items without bothering as it lets you reopen past activities. The feature enables you to easily switch between currently running apps and past activities, thus, enhancing the Task View. But few users have a concern about Privacy and want to disable it.
Windows 10 will track your past activities across devices connected with same Microsoft Account so it can be an issue for highly private people. In such a scenario, disable Windows 10 Timeline option can help but the OS doesn’t provide a direct switch for the same. Fortunately, there are few methods that allow in remove this Task View feature.
List of ways to Disable Windows 10 Timeline –
1. Using Windows Settings application
2. From Group Policy Editor
3. Via Registry Hack
How to Disable Windows 10 Timeline
Here are the 3 ways to disable Windows 10 Timeline –
Way-1: Using Windows Settings app
You will need to switch off the Activity history on Windows 10 to disable this feature –
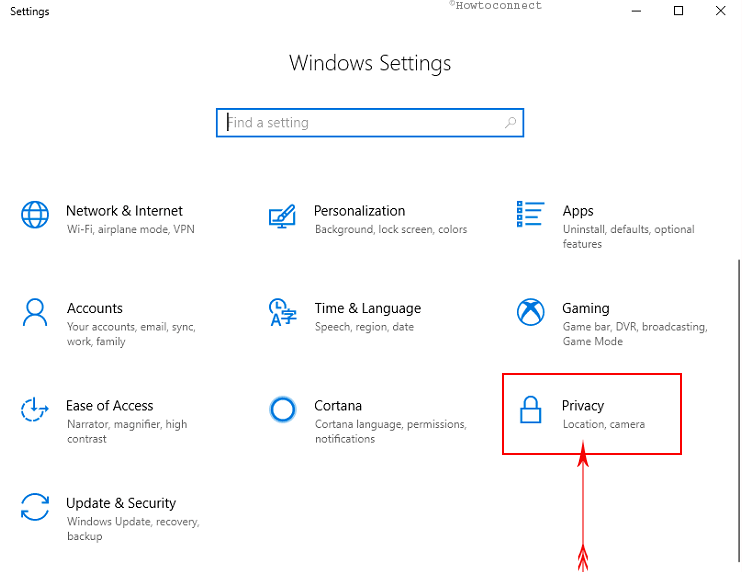
Step-1: Launch Settings (Win+I) and Click on the Privacy option.
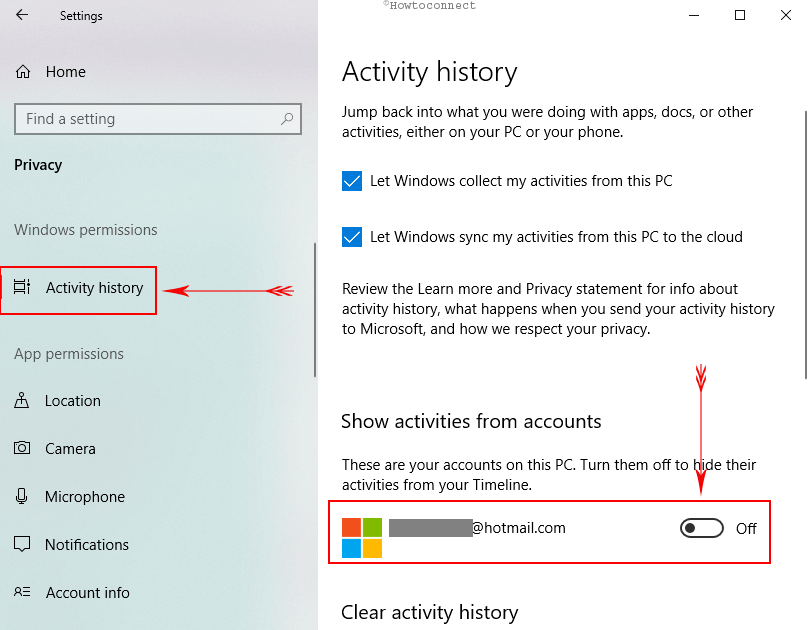
Step-2: Click on the Activity History from the left pane. On the right, turn off Show activities from accounts option for your Microsoft Account.
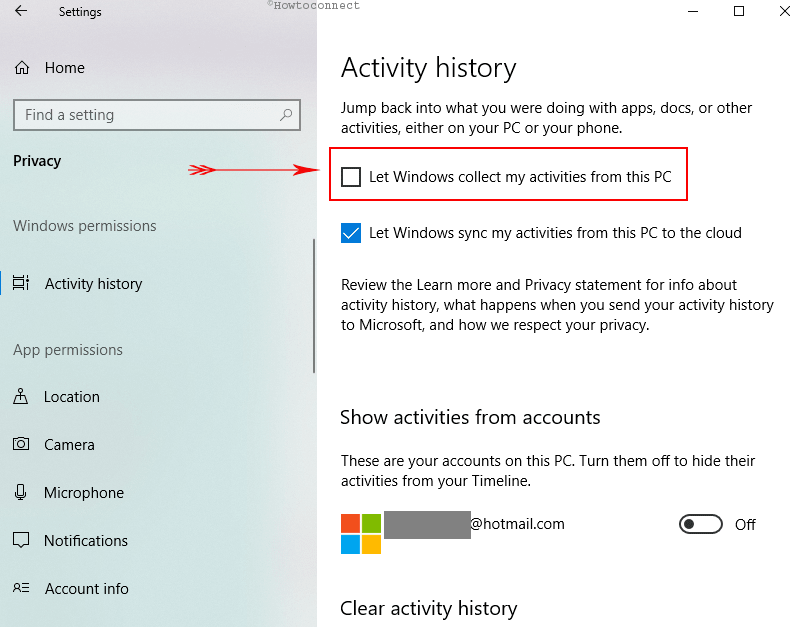
Step-3: Now deselect the box adjacent to the “Let Windows collect my activities from This PC” option.
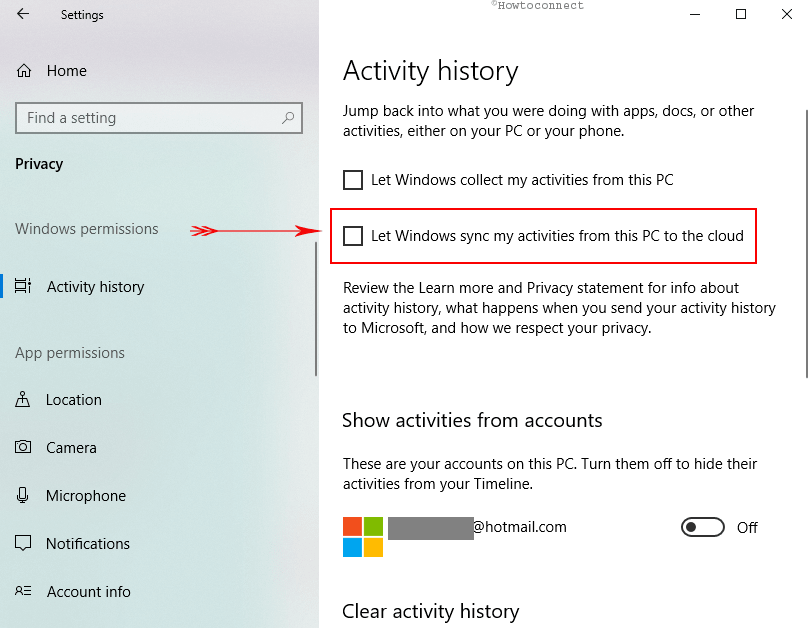
Step-4: Also, disable the ‘Let Windows sync my activities from this PC to the cloud’ choice.
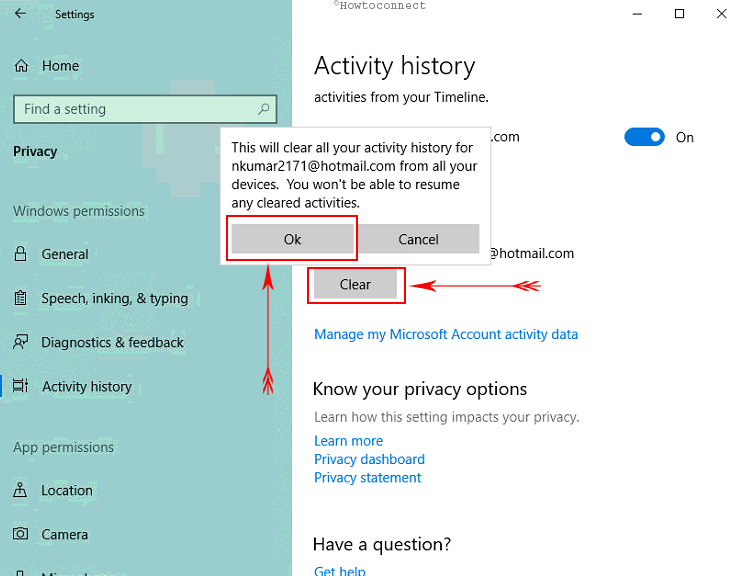
Step-5: Now move to another settings page and then return to the activity history page to refresh it and go to the option to delete your available “history”. Just click the Clear Button under the Clear activity history option and in the end, select the OK button to confirm.
Windows 10 will stop the tracking of all the activities on your devices.
Note: Disable option doesn’t clear the data that Microsoft has collected about you rather the ‘Activity History’ only erases your browsing data from applications or other sites.
Way-2: From Group Policy Editor
Do a click on the search on the taskbar, type gpedit.msc, and then press the Enter key.
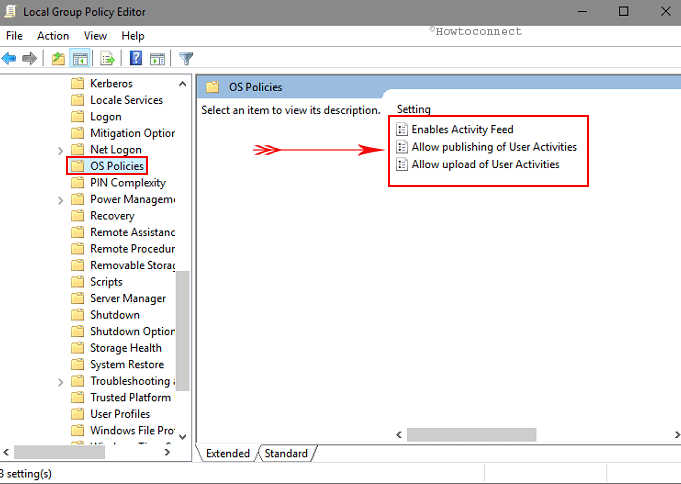
Access to Computer “Configuration\Administrative Templates\System\OS Policies“ in the Group Policy Editor.
You will find 3 Policies in the right pane –
Enable Activity Feed
Allow publishing of user activities
and, Allow upload of User Activities
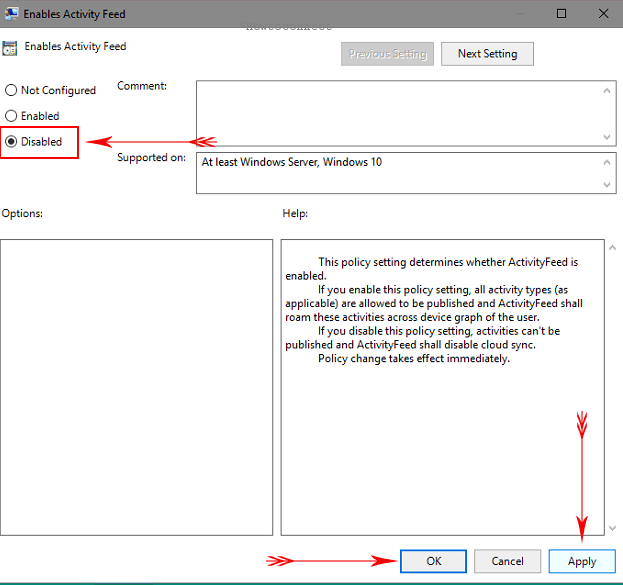
First of all, double click on Enables Activity Feed to open. Select the radio button “Disable” and press Apply and then OK to Disable Windows 10 Timeline.
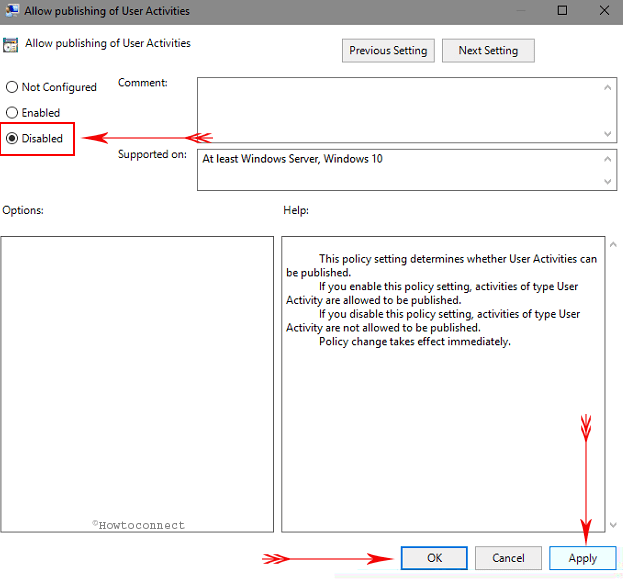
In the same way, open Allow publishing of user activities. Select Disable round cell button, click on Apply furthermore OK.
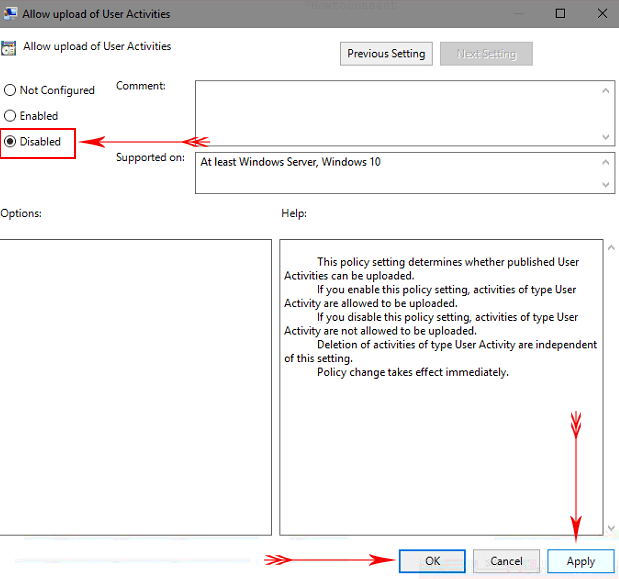
Lastly, select Allow upload of User Activities from there and click on the option Edit policy setting.
Choose Disable option and save by hitting Apply thereafter OK.
Way-3: Via Registry Hack
Come over to the last way now to Disable Windows 10 Timeline via Registry Hack –
Step#1: Open the Run Command using the “Windows key + R” hotkey.
Step#2: After typing regedit.exe, click OK to open the Registry editor. Deal with the UAC by selecting Yes on the Pop up.
Step#3: Now browse the following path:
HKEY_LOCAL_MACHINE\SOFTWARE\Policies\Microsoft\Windows\System
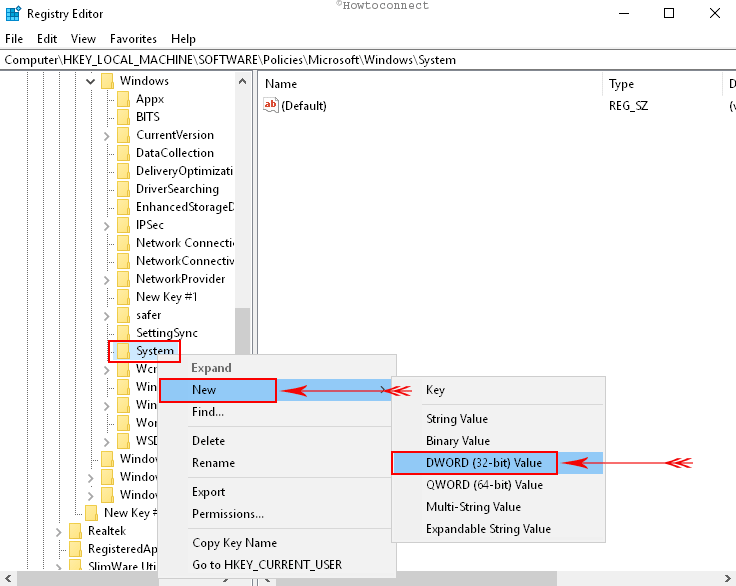
Step 4: Make a right-click the System (folder) from the left pane, choose “New” and then press “DWORD (32-bit) Value” on the extended menu.
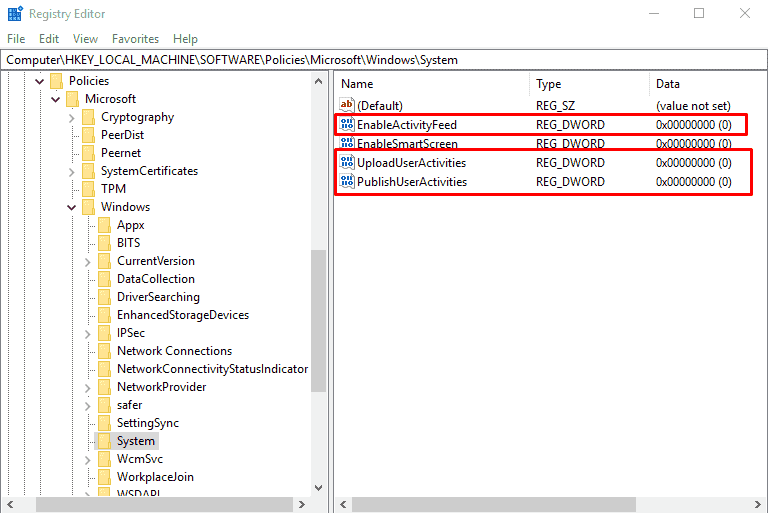
Step#5: Name the key EnableActivityFeed.
Step#6: Double-click the newly created key and maintain its value to 0.
Step#7: Again perform a right click the ‘System’, select New and click on the DWORD (32-bit) Value.
Step#8: This time name the key PublishUserActivities.
Step#9: As done in step 6, again double-click the newly created key and make sure its value is to 0
Step#10: once more, perform a right click the ‘System’ (folder) key, pick New and hit the “DWORD (32-bit) Value”.
Step#11: Give it the name UploadUserActivities.
Step#12: Double-click this new key and make sure to keep its value to 0.
Having done this, exit the registry editor, restart your system and now your Timeline should be disabled.
Furthermore, if you feel like enabling it anytime in the future, switch to same steps outlined above except Step 4, where you will have to right-select Delete for the EnableActivityFeed, PublishUserActivities, and UploadUserActivities keys, and then reboot your device.
That’s it!