When you install Windows 11 afresh or upgrade to it from a lower version, the OS automatically generates an administrator account that remains hidden by default. You might want to enable the account for sake of troubleshooting or accomplish administrative tasks. Since this auto-generated built-in profile stays hidden, you won’t get any trace of it on the Windows settings page. However, you can use a series of command lines and User Management tool to enable administrator account in Windows 11.
With the default configuration, you won’t see the option to log in as administrator when you start Windows 11. But after activating the built-in admin account, the system includes an option in the login screen that allows you to log on as the admin. This option will not go away unless you disable administrator account manually again.
Enable Administrator account in Windows 11
Here is how to Enable Administrator account in Windows 11 –
Way-1: Using CMD Command
Most convenient and easiest way to enable the hidden admin account in Windows 11 is using the Command prompt utility. Steps are as followed –
- Press – Windows + S.
- Type – cmd.exe.
- Click – Run as administrator.
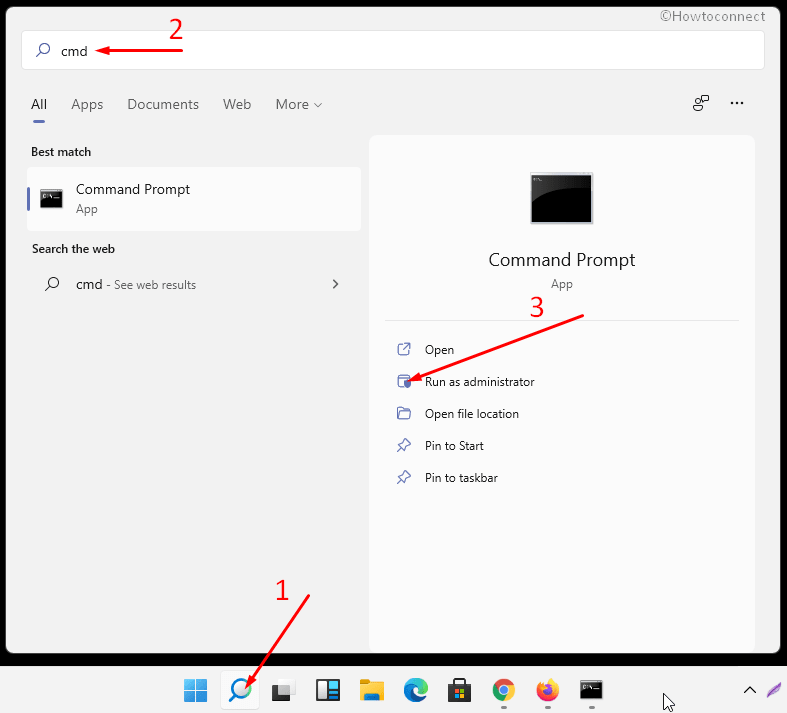
- To allow changes, on User Account Control, click – Yes.
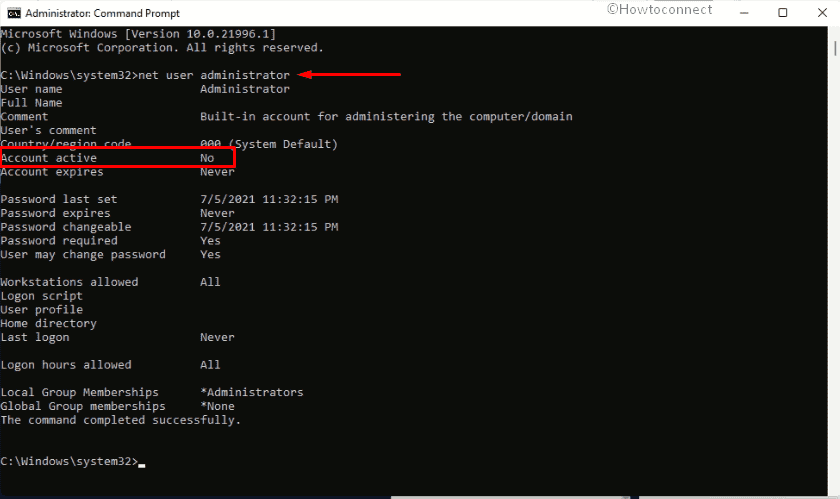
- In the command prompt, insert –
net user administrator. - Hit – Enter.
- Check the value of Account Active. If it says No then you can be sure that the administrator account is disabled.
- Now, type in –
net user administrator /active:yes. - Press – Enter key.
- You will see – The command completed successfully.
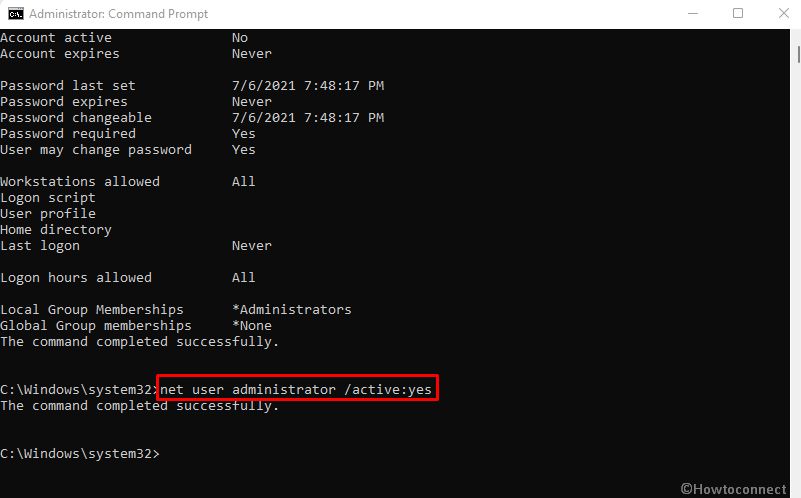
- After getting the confirmation, run net user administrator command line again.
- This time the value for Account Active should now say Yes.
Way-2: Through User Management tool
- Click the – Start.
- Type in – lusrmgr.msc.
- Press – Enter.
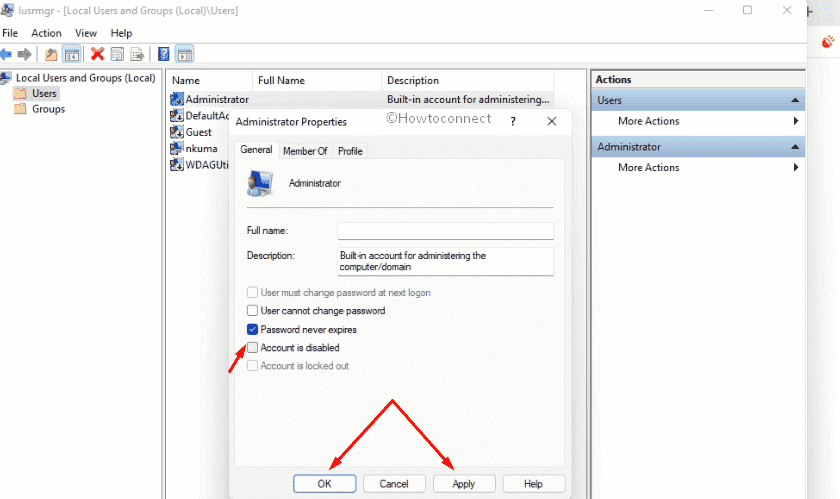
- When the “lusrmgr – Local users and groups (Local)” window shows up, double-click – Users.
- Right-click on Administrator and select – Properties.
- On the “Administrator Properties” wizard, uncheck the box set before Account is disabled.
- Click Apply followed by OK.
Way-3: Via Security Policy
- Hit – Winlogo key + R.
- Type – secpol.msc.
- Hit – Enter or click – OK.
- Once on the Local Security Policy window, navigate to – Security Settings => Local Policies => Security Options.
- Check the status of Accounts: Administrator account policy.
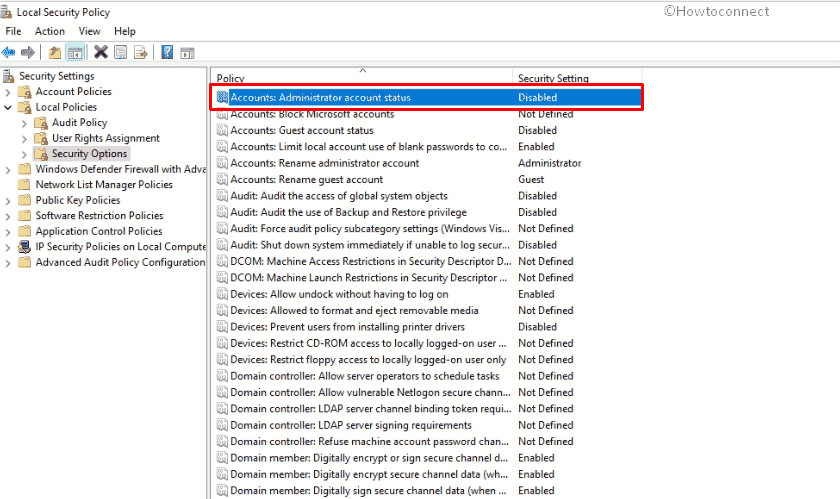
- If it says Disabled, you will have to Enable Windows 11 Administrator account.
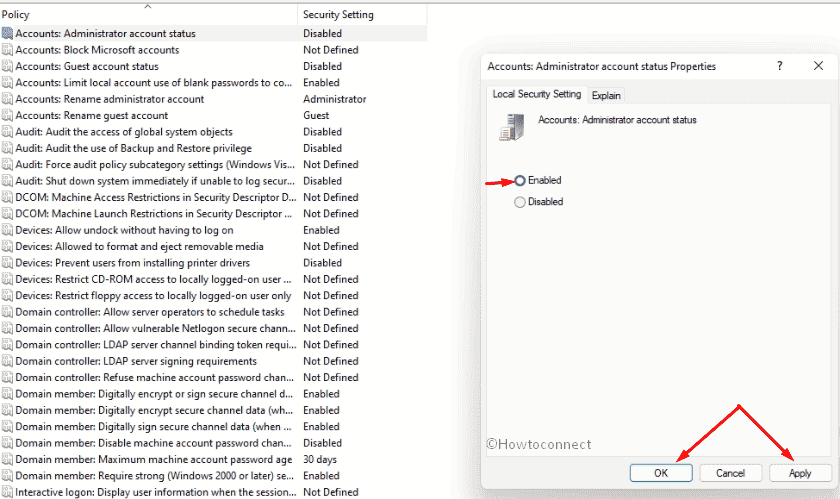
- For that, double-click Accounts: Administrator account.
- Select the radio button of Enabled.
- Click Apply first and then OK.
Way-4: Enable Administrator account in Windows 11 by tweaking regedit Registry
- Press Windows key and type in – regedit.
- From the result, select – Registry Editor.
- If a User Account Control asks for consent, click – Yes.
- Navigate to –
HKEY_LOCAL_MACHINE\SOFTWARE\Microsoft\Windows NT\CurrentVersion\Winlogon\SpecialAccounts\UserList- Move to the right-pane and right-click on an empty space.
- Chosse – New => DWORD (32-bit) Value.

- Name the key Administrator.
- Finally, close the registry editor and restart Windows Explorer or your computer.
Methods list:
Way-1: Using Command Prompt
Way-2: Through User Management tool
Way-3: Via Security Policy
Way-4: By tweaking Registry
That’s all!!