In Windows 11, programs and games don’t get started with administrative privilege by default. Though this happens to stop unauthorized changes in the system, some apps demand admin permission to accomplish their tasks properly. Fortunately, Windows 11 allows users to run programs as administrator without tweaking any settings or enabling/disabling any option. However, you can run an application with admin rights only if it is a desktop app. This context describes how to run any program as administrator in Windows 11 and the ways to give administrator access to programs.
In the beginning, Windows used to have applications with system-wide files or settings. Since this configuration was a security risk, Microsoft included User Account Control for later versions of Windows. This security feature prompts to ask for final consent just before an application is about to launch with admin privilege. If you attempt to run a program application from a non-admin account, the UAC prompt will trigger and ask you to enter the administrator password. Without the admin password, the program won’t launch.
Run Program as administrator in Windows 11
Here is how to run Windows 11 as administrator –
Way-1: Using Windows search
- Press – Windows + S.
- Type in the app name you want to launch as admin.
- Right-click the same on the result and choose – Run as administrator.
- You can also click “Run as administrator” option straight away from the right pane of the Best match flyout.
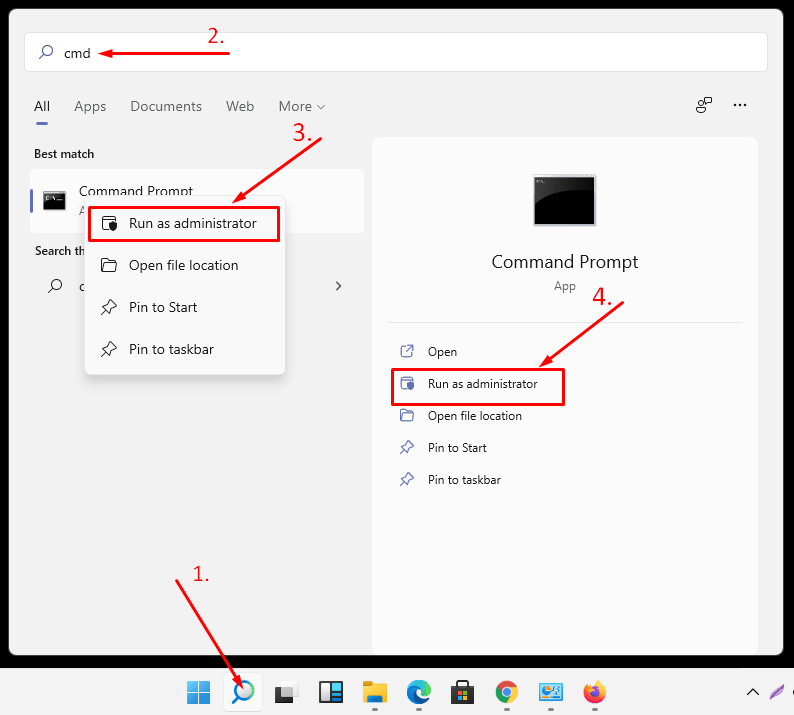
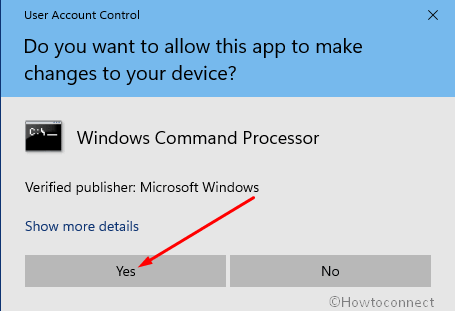
- Finally, allow the appearing User Account Control by clicking – Yes.
Way-2: Via keyboard shortcut
- Click the search icon present on the taskbar.
- Write down the application name you want to run as administrator.
- When you see the wanted item at the top, press – Ctrl + Shift + Enter.

- Doing so will bring User Account Control prompt.
- To give consent on the prompt, click – Yes.
Way-3: Through Run dialog box
- Press – Windows + R.
- In the text field name of the executable file or shortcut of a tool or setting.
- Press – Ctrl + Shift + Enter.
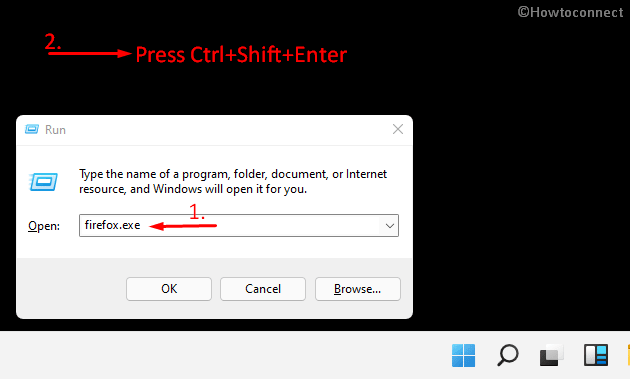
- When User Account Control prompts for asking permission, click – Yes.
Way-4: From the Start menu
- Click the Start button from the taskbar or simply press – Windows key.
- Click – All apps as in the below screenshot.
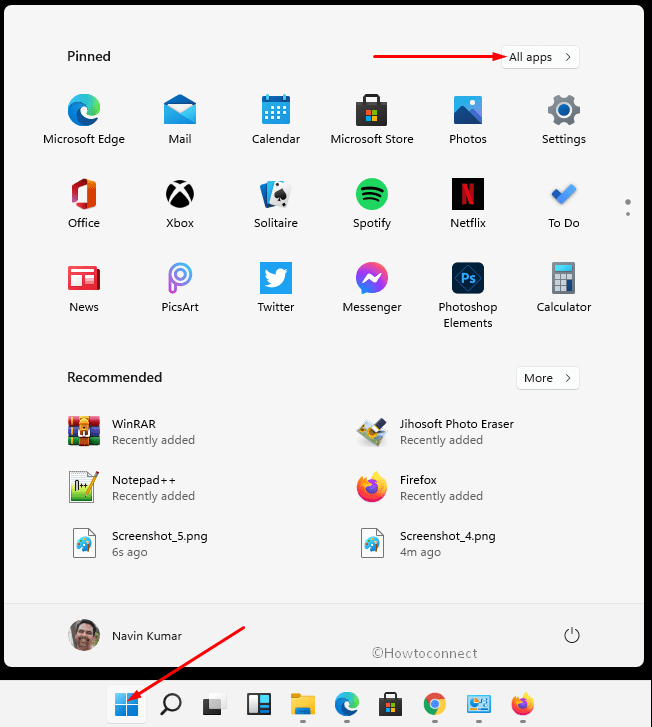
- From the list, find the application you want to open with admin privilege.
- When found, right-click the same and select – Run as administrator.
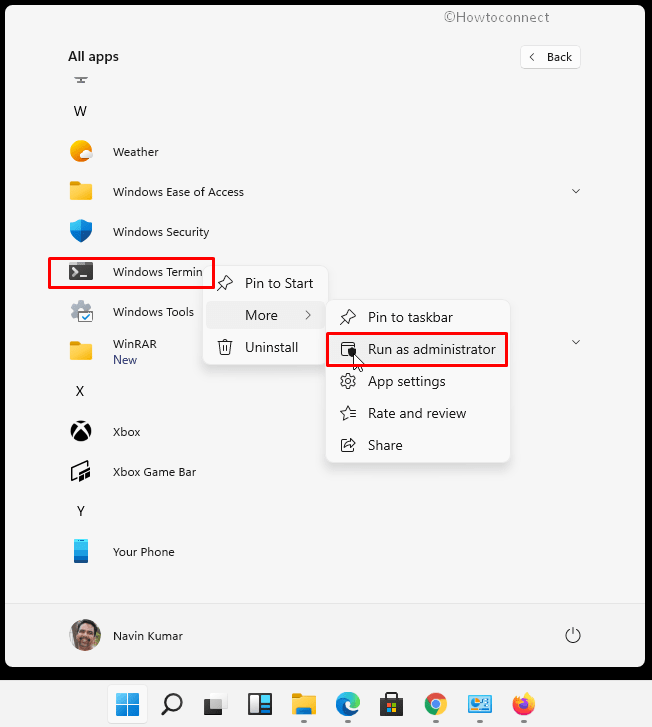
- Give permission to UAC by clicking – Yes.
Way-5: Using desktop shortcut
- Go to the desktop area. To do so, press – Windows + D.
- Right-click the shortcut of the app you want to open with the admin right and select – Run as administrator.
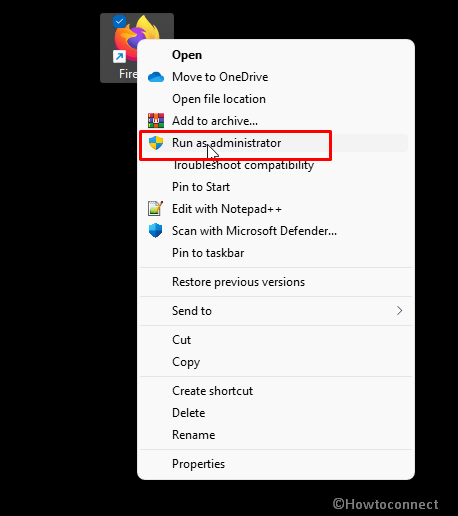
- Lastly, click – Yes for appearing User Account Control.
Way-6: From taskbar shortcut
- Hover the mouse pointer to the taskbar and locate the app you wish to open as admin.
- Press Ctrl + Shift keys together and click the app icon from the taskbar as well.
- When UAC dialog box shows up, select – Yes.
Way-7: Using CMD Command Prompt
Before you can run an app as admin through Command Prompt, you will have to launch the command-line utility with administrative privilege first. Though the whole procedure takes a longer time than others, it works perfectly.
- In windows search, type in – cmd.
- Press – Ctrl + Shift + Enter.
- To give consent to User Account Control, click – Yes.
- When Command Prompt shows up, insert the complete path of the program that you want to run as administrator.
- To get the path, type in the app name in Windows search.
- When the result shows up, right-click the application and choose – Open file location.
- In the location, click on Home menu of File Explorer and select – Copy path.
- Return to Command Prompt and right-click anywhere.
- Hit – Enter.
- If a UAC prompt and asks for the administrator password, provide the same and press – Enter.
Way-8: By context menu
- Press – Windows + E.
- From File Explorer, visit the directory where the app you want to launch with admin right is installed.
- Right-click the executable file of the app and choose – Run as administrator.
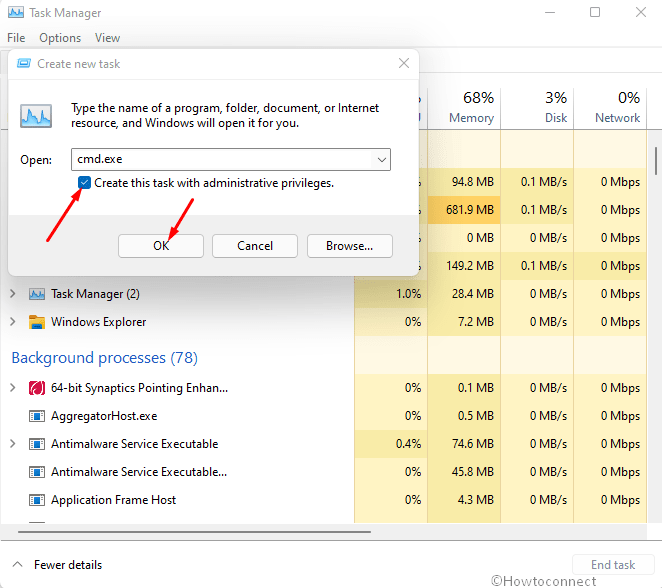
Way-9: Through Task Manager
- Hit Win+X and choose – Task Manager.
- If the tool shows up in compact view, click – More details.
- From the menu bar, click File => Run new task.
- In the given text field, insert the path to the program.
- You can also click Browse button to look for the desired path.
- Select the checkbox present before – Create this task with administrative privileges.
- Finally, click – OK.
Way-10: From File Explorer
- Open File Explorer by pressing – Windows + E hotkey.
- Navigate to the directory where you will get the program’s main executable.
- Select the exe file of the desired application.
- From the menu bar, shift to Application Tools tab.
- Click – Run as administrator icon.
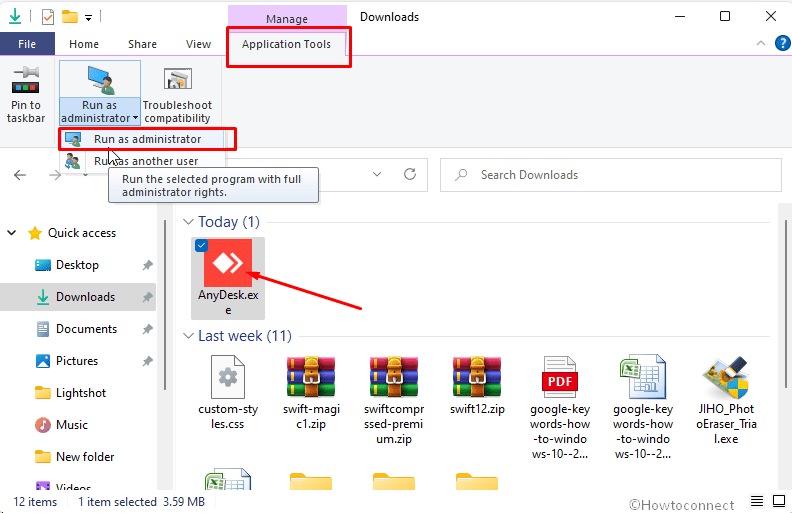
- Give consent to User Account Control, hit – Yes.
Way-11: Via PowerShell
- Press Windows key and type in – powershell.
- Opt for – Run as administrator.
- Grant UAC by choosing Yes button.
- In the elevated PowerShell window, insert the complete path of the program you want to run as administrator in Windows 11. The process is exactly same as we described in Method – 7.
- Hit – Enter.
Way-12: By tweaking the compatibility settings
To run any program as administrator in Windows 11 usually you need to use one of the above methods every time you try to launch the app. You can avoid this constant procedure by setting a program to always run with administrative privilege. For that, go through the steps described below –
- From File Explorer, visit the directory where the main executable file of the program exists.
- Right-click the exe file and choose – Properties.
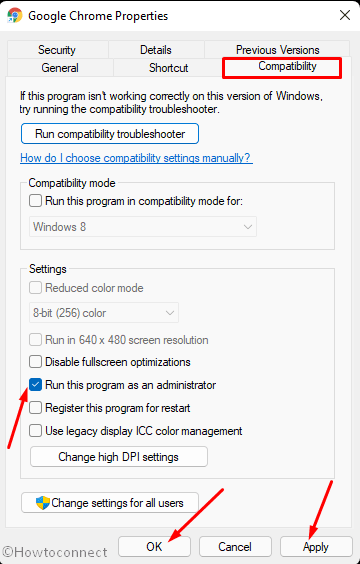
- Once in the dedicated wizard, shift to Compatibility tab.
- Select the checkbox present before Run this program as an administrator.
- Click Apply followed by OK.
- Once the change is applied, the program will run as administrator automatically every time you launch it.
Methods list:
Way-1: Using Windows search
Way-2: Via keyboard shortcut
Way-3: Through Run dialog box
Way-4: From Start menu
Way-5: Using desktop shortcut
Way-6: From taskbar shortcut
Way-7: Using CMD Command Prompt
Way-8: By context menu
Way-9: Through Task Manager
Way-10: From File explorer
Way-11: Via PowerShell
Way-12: By tweaking the compatibility settings
That’s all!!