We are going to provide here direction for How to Enable Disable Antivirus Protection in Windows Security on Windows 10 (Specifically after 1809 version). Microsoft launched Windows Defender with an aim to safeguard your computer from threats such as Trojan virus, ransomware, and spyware. But in this Windows 10 October 2018 update they convert this to Windows Security. This application includes Virus & threat protection, App & browser control Device performance & health and some more. So in the new scenario, you will have to turn off the Antivirus Protection from a different interface.
After the arrival of Windows 10 1809 version, Windows Defender Security Center turned to Windows Security in the Settings application. However, all the Settings are same in this section so this is quite easy to enable disable Antivirus Protection. Here, you will explain 2 ways – using normal method (from Windows security) and by manipulating an entry in registry editor.
Ways to Enable and Disable Antivirus Protection in Windows Security in Windows 10
Here is How to enable disable Antivirus Protection in Windows Security in Windows 10 –
Way-1: Use Windows Settings app
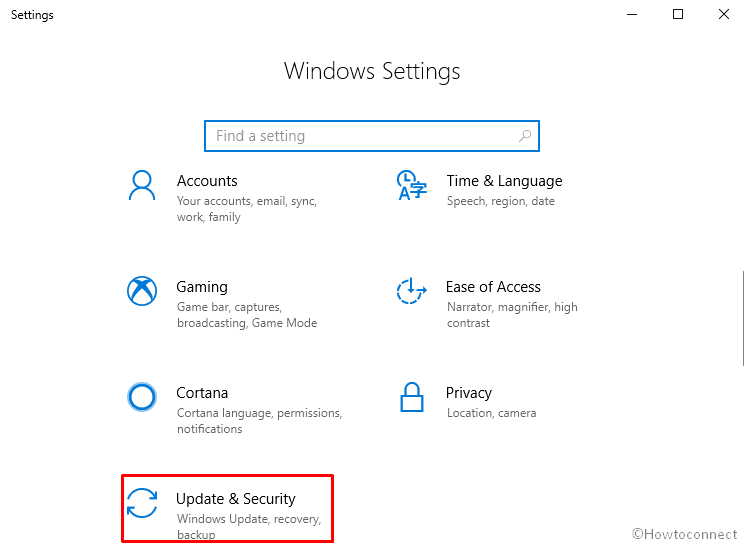
Step-1: Press Win+I to launch the Windows Settings app and when it appears, do a click on Update & Security.
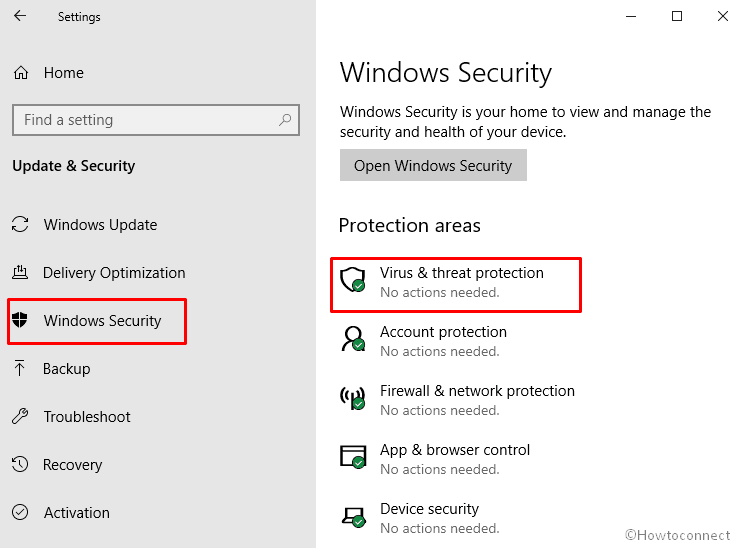
Step-2: On the following page, select Windows Security from the left column. Then shift to the right pane and click on Virus & threat protection.
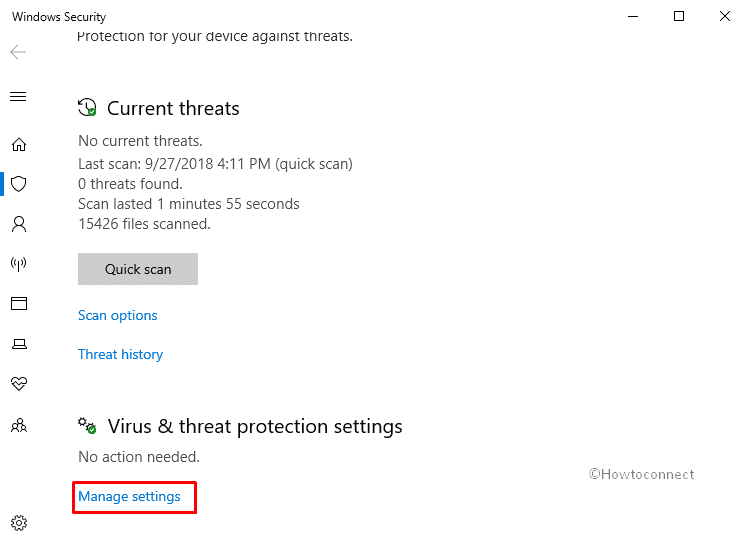
Step-3: Once “Windows Security” application rolls in on the display, click on Manage settings located under Virus & threat protection settings.
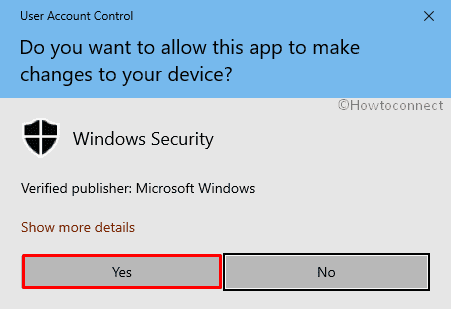
Step-4: Next, drag the toggle switch located under Real-time protection towards left. While doing so, when you view a UAC click on Yes to give permission.
That will Disable Antivirus Protection in Windows Security in Windows 10.
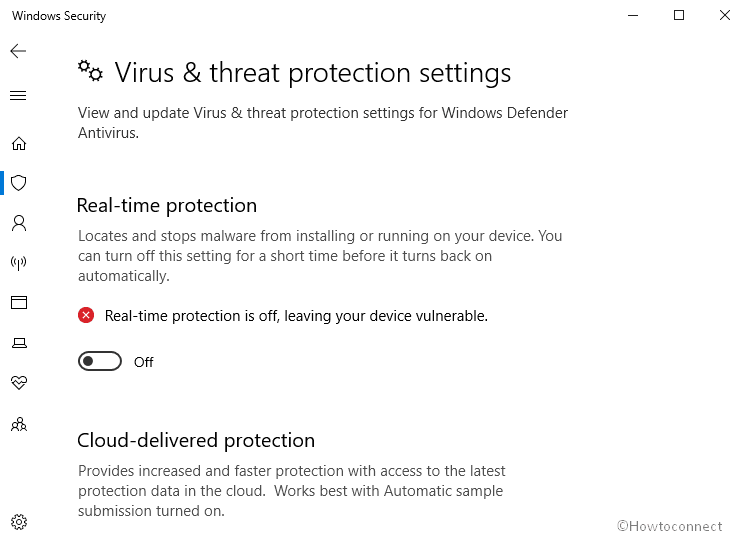
If you want to Enable Antivirus Protection in Windows Security in Windows 10, just pull the toggle switch to the right.
Way-2: Enable Disable Antivirus Protection through Registry Editor
You have the ability to Enable Disable Antivirus Protection through Registry Editor too. However, any modification in this tool is quite risky so we suggest to import the regedit before starting. You may follow the instructions in – How to Import and Export Registry Editor on Windows 10.
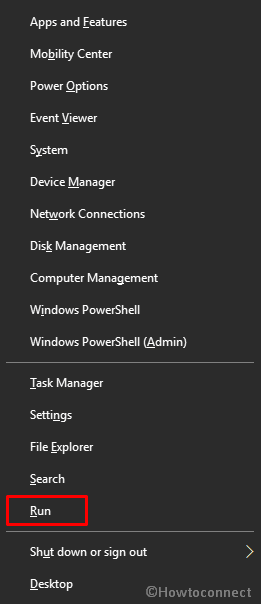
Do a right-click on the Start button and Select Run from the visible list.
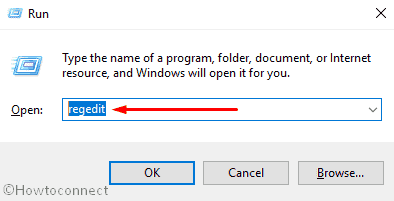
Once the Run Dialog appears, type regedit.exe in the void text box and then hit Enter.
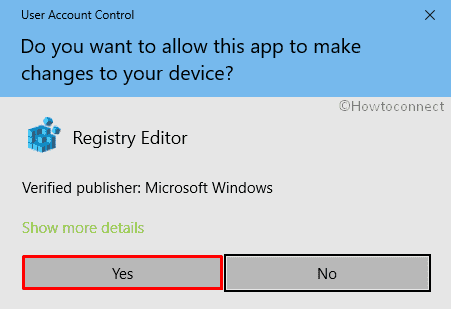
If a UAC prompts up, click on Yes to give your affirmation.
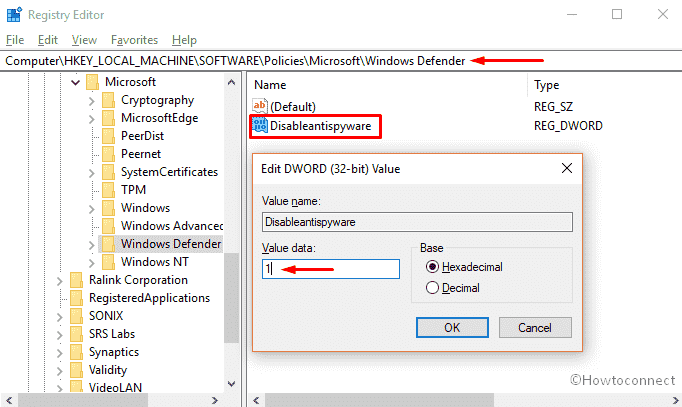
Now, navigate the following path in Registry Editor Window –
HKEY_LOCAL_MACHINE\SOFTWARE\Policies\Microsoft\Windows Defender
Go to the right pane, Create a DWORD (32-bit) value and name it Disableantispyware.
Make double-click on Disableantispyware and put 1 in the value data box. Press OK button to save the changes.
Once you are done, Restart your PC. In case, you want to Enable Antivirus Protection in Windows Security in Windows 10 again, change the Disableantispyware value to 0.
That’s all!