Windows 10 build 18282 lets automatically adjust Active Hours to install Windows update. This Setting helps your machine to identify your activity and determine a time depending on it to restart after receiving an update. Previously you need to Set active hour manually This allows you to avoid any system interruption such as reboot during the working period.
Enabling automatic adjustment of active hours in Windows 10 is pretty easy as you just need to switch a toggle button. In addition, you can set it also with a REG file for the same. Usually, after getting updates PC needs a restart but if you turn on this feature, the scenario will occur only beyond the set active hours. Even if you set a custom restart time to override this, the Windows will turn that one off automatically after committing restart for that once. The idiosyncrasy would be the part of the major release Windows 10 1903 coming in May 2018.
Ways to Automatically Adjust Active Hours in Windows 10
Here are How to Enable Disable Automatically Adjust Active Hours in Windows 10 –
Method-1: Through the Settings app
It’s a simple, no-nonsense method. Here is what you need to do –
Step-1: Press Win+I simultaneously to bring up Settings.
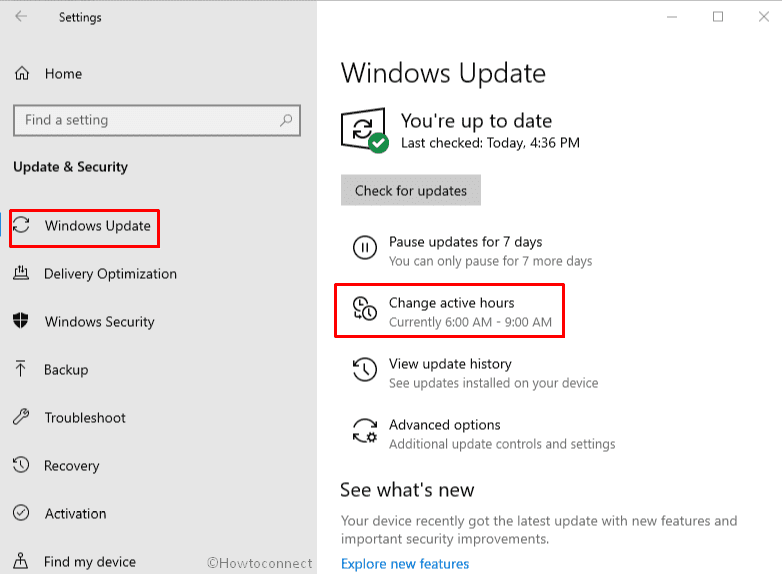
Step-2: Click on Update & Security.
Step-3: On the following window, click on Change active hours.
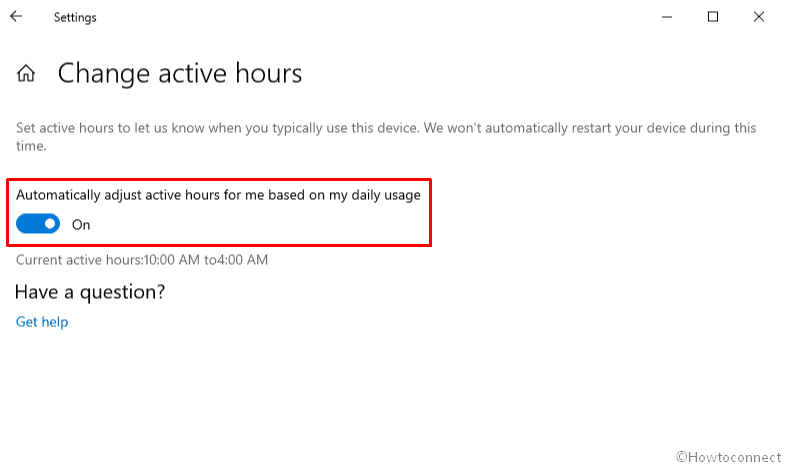
Step-4: In order to enable the feature, turn on the toggle button of Automatically adjust active hours for me based on my daily usage. If you want to disable it, simply switch the toggle button off.
Method-2: Enabling or disabling using REG file
This method is usable if the method through settings isn’t working or, for any reason, you prefer operating the trickier way.
- Right-click on the Start button and select Run.
- When it shows up it the display, type down regedit in the void box next to Open and hit Enter.
- If a UAC prompts up, click on Yes to give consent.
- On the Registry Editor window, navigate the following path –
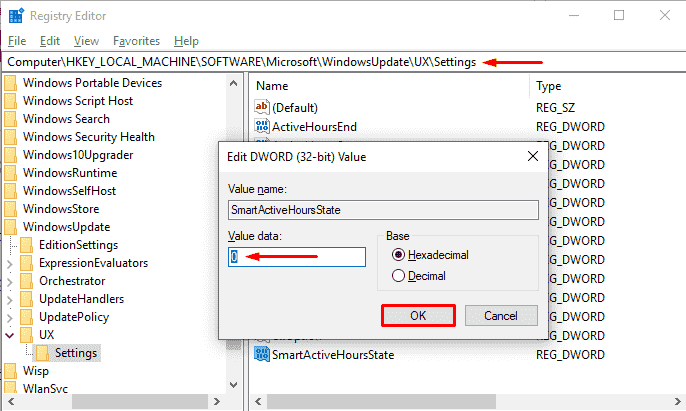
HKEY_LOCAL_MACHINE\SOFTWARE\Microsoft\WindowsUpdate\UX\Settings
- Once you reach there, move to the right side and create a 32-bit DWORD value. Name it SmartActiveHoursState.
- Double-click on the key you just created and set the value to 0 to enable Automatically Adjust Active Hours in Windows 10. In order to disable the same, put the value 2.
- Finally, click on OK to save the changes.
That’s all!!