Enabling or Disabling Push to Install service on Windows 11 or 10 ensures whether you will be able to install Store apps remotely or not. Talking about the service, Microsoft brought a new idea of allowing the applications to make available over all devices in Version 1809 and 1903. Thanks to them for simplifying the work for people who have multiple machines and opt to manage the same using a single device. The feature is useful for users in an organization including home who log in to more than one device and need to install same application globally.
Push to Install Service activates automatically when a user logs in having the same Microsoft credentials over more than one device. There is an option Install on my devices that appears while opening the same program. Despite being one of the most amazing features, some people might not like this as to have some sort of dissimilarities in peripherals. The process to Disable Push to Install service in Windows 11 or 10 might seem a little complex for regular users as it involves tweaking Group Policy Editor and Registry Editor. However, we are presenting the easiest way to do so as we believe to stay by your side. Read and imply the instructions from segment to complete the task perfectly.
Enable / Disable Push to Install service in Windows 11 and 10
Here is How to Enable / Disable Push to Install Service in Windows 11 or 10 –
Through Registry Editor
Users can modify the Value of DWORD in Registry Entry to disable the service. The process is simple but as it involves tweaking Registry, we recommend you to save a backup of the whole system or seek help from skilled professionals before proceeding. The steps are as follows –
Step-1: Hold the Windows key at the same time press S.
Step-2: Type regedit in the search box and choose Registry Editor when appears in the search result.
Step-3: Hit Yes option while UAC prompts you permission to launch it.
Step-4: Once it opens in a new Window, navigate to the following path –
HKEY_LOCAL_MACHINE\SOFTWARE\Policies\Microsoft
Step-5: After reaching there, move aside to the right to modify the value of PushToInstall DWORD. If your machine doesn’t have this, you need to create a new value for that. In that case,
- Make a right-click on Microsoft once reached from the left corner and select New then DWORD (32-bit) Value from the options.
- A new DWORD will be visible on the adjacent right side pane. Rename it to PushToInstall.
Step-6: Now, do a double click on newly created DWORD value and a popup will hang on asking to Edit the value.
Step-7: Proceed to Value data segment and change the value from 0 to 1.
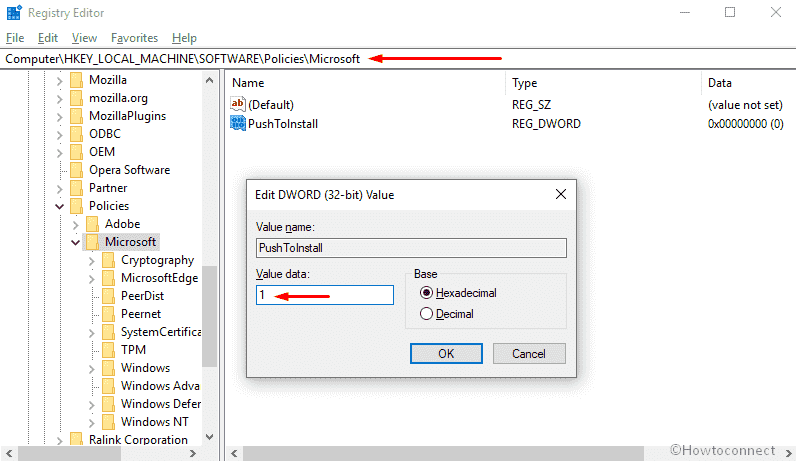
Step-8: Select the OK option from bottom to make save the changes.
Step-9: Reboot the Windows and check for the persistence of this service.
You will no longer see this service in your device after making these changes in your device. However, if you want to enable Push to Install Service in future, follow the same procedure to reach this DWORD and change the value again to 0.
Using Group Policy Editor
Another convenient way to disable the service is to modify through Group Policy Editor. To do so –
- Press Windows +R keys together to open Run dialog.
- Once it appears on display, type gpedit.msc in the empty box and hit the Enter button.
- Once the Group Policy Editor shows up in a separate Window, navigate to the following path from left pane –
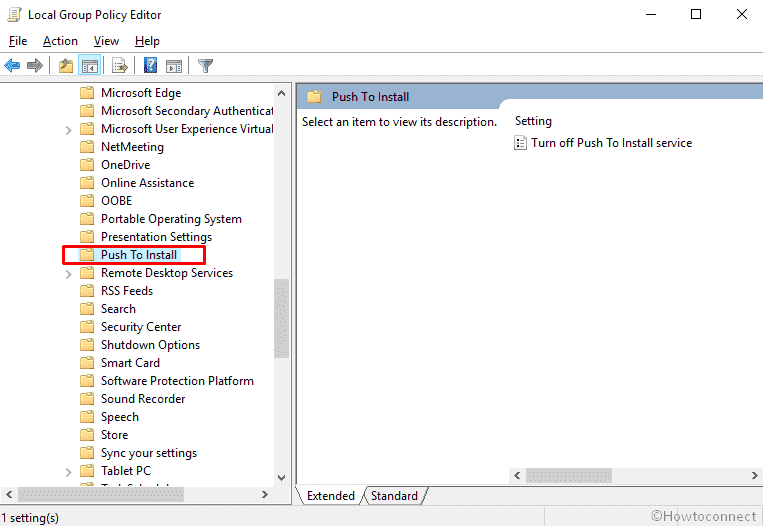
Group Policy Editor > Computer Configuration > Administrative Templates > Windows Components > Push To Install
Note – You can not avail this policy unless you use the Microsoft Windows 10 version 1809 or version 1903.
- After reaching to Push to Install, jump up to corresponding right side and perform a double click on Turn off Push To Install service.
- A new popup will strike on the display and you need to Select Enabled option from there.
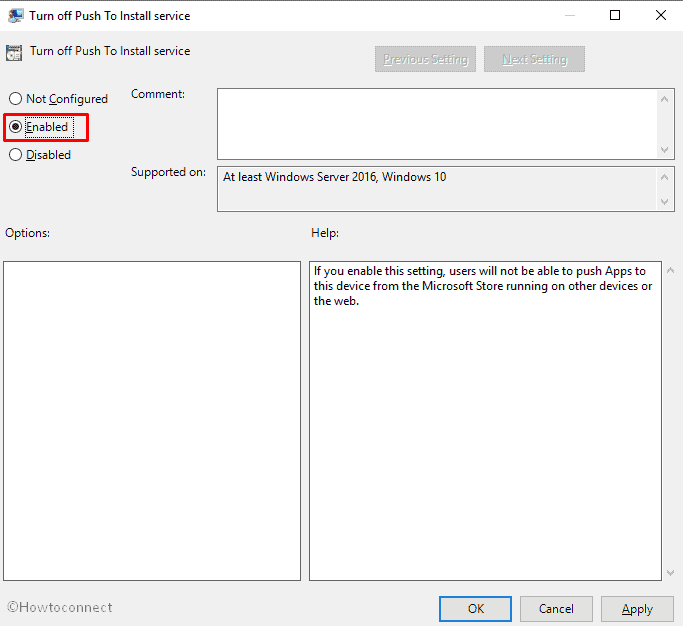
As a default configuration, the policy is set to Not Configured. Switching to Enabled will Disable Push to Install service in Windows 10 since the policy is self-explanatory in the next segment –
“If you enable this setting, users will not be able to push Apps to this device from the Microsoft Store running on other devices or the web.”
- Now, Hit the Apply option and then Ok to save the changes.
- Restart the device and check if the service is available anymore or not.
If you wish to enable the service again, follow the same procedure and this time select Disabled instead of Enabled.
That’s all about disabling Push To Install service in Windows 11 or 10.