Are you getting confused about a Blue Screen of Death issue occurring for no reason? We are talking about the bddci.sys BSOD error that occurs with system crash. bddci.sys is a part of Bitdefender antivirus utility but sometimes the issue takes place even when you haven’t installed it. When this problem starts the system may crash frequently and multiple times followed by restarting of the PC.
What failed: bddci.sys Blue Screen Error may appear with bug checking codes such as Driver_IRQL_NOT_LESS_OR_EQUAL, Kernel_Data_Inpage_Error, SYSTEM_THREAD_EXCEPTION_NOT_HANDLED, KMODE Exception Not Handled, System Service Exception, PAGE_FAULT_IN_NONPAGED_AREA. The issue mostly happens due to collisions between system files and the Bitdefender file.
bddci.sys Blue Screen Error
Here is how to fix bddci.sys Blue Screen Error in Windows 10 or 11 –
Way-1: Uninstall Bitdefender Antivirus
In some cases, users having Bitdefender installed on their PC get this BSOD. If same with you then uninstall the utility completely from your computer to fix bddci.sys error. Windows 10 or 11 provides 2 ways to uninstall the software but in both ways, some leftovers may be left out in the system. This may again cause the bddci.sys blue screen. Furthermore, a better Idea is to uninstall the tool using Revo uninstaller. Butt here is a more convenient method for the removal and this is using Bitdefender Uninstall Tool. This is dedicated to uninstalling the antivirus so obviously, it is the best option for you. We are giving here all the ways –
A] Using the built-in settings app
- Press the Windows logo and I keys together.
- Select – Apps.
- Go to the right hand side and click on Apps & features.
- On the next Settings page, look for Bitdefender.
- Once found, right click on the three dots hamburger menu and choose Uninstall.
- A user account prompt may appear; click on Yes.
- Now follow the instructions being displayed on the screen till the uninstallation of Bitdefender.
B] Through Revo uninstaller
- Download Revo uninstaller.
- Run the setup and install the software following guidelines.
- Revo will show you a list of installed tools.
- Select Bitdefender in the Application section.
- Click on Uninstall.
- The program will prompt a wizard, choose – Uninstall.
- From the next window, click on Advanced.
- Click on – Scan.
- From the coming window, click on Select all and then on Delete.
- Finally, select – Finish.
C] Via Bitdefender Uninstall tool
Bitdefender offers an Uninstall tool to completely remove the applications and its leftovers from the system to neutralize the chance of occurrence of any error due to the antivirus. This is free and you can get and use the tool using the following guidelines –
- Go to this link.
- Locate and download the uninstaller tool and install it.
- Execute the tool and fully uninstall the embroiling Bitdefender.
Way-2: Rename the Sys file
Several users report that the BSOD occurs on their system whereas they don’t have Bitdefender installed. If you are facing the same situation then renaming bddci.sys will potentially work because this might be due to residue of the software. In the past, if you had installed the antimalware and uninstalled it this issue is supposed to happen. In this case, bddci.sys is the trace working rancorously leading to the error code. Once you Rename the file it will not unnecessarily load during the startup and the conflict will be avoided.
- Press – Winkey+E.
- Select This PC from the quick access navigation pane located on the left side.
- Double click on – (C:).
- Next, open System32 and enter the drivers folder.
- Locate bddci.sys.
- Right-click on this file and select – Rename.
- Name this file bddci.old or bddci.bak or something like this.
- Once done restart the computer and check if the blue screen error is fixed.
- The locations where bddci.sys can be found are – C:\Windows\System32\drivers\ and C:\Program Files\Bitdefender Antivirus Free\web\.
- The second location mostly exists when the Bitdefender is installed, despite, you should check the file here and rename if found.
Way-3: Uninstall Windows update
Sporadically Windows update acts oppositely and instead of benefitting the system it causes errors. This means you may encounter bddci.sys Blue Screen error after installing a cumulative update or some patches. One thing to keep in mind is to ensure whether the bug checking started after receiving a Windows update. In this situation, the solution is to uninstall the patch –
- Right-click on the – Start.
- Select – Run.
- Type – appwiz.cpl.
- Press – Enter.
- When Programs & features is launched, select – .View installed updates.
- Move down and reach Microsoft Windows section.
- Right click on the update and select – Uninstall.
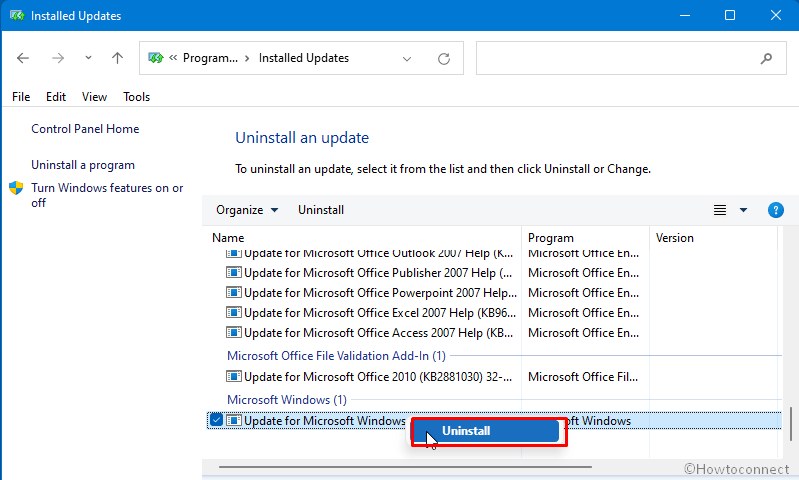
- Click Yes on the Confirmation dialog box.
- Check if the BSOD is fixed.
Way-4: Perform System Restore
Sometimes you may have to run System Restore to get rid of bddci.sys BSOD in Windows 10. This method is required when you have recently installed the Bitdefender antivirus tool and now started getting the Blue screen error. The tool will get your device over to the date when you won’t have installed the antivirus tool. This way the error will no longer occur. Here are the steps –
- Click on the Search icon from the taskbar.
- Type – rstrui.
- Press- Enter.
- System Restore wizard will load; click on – Next.
- From the list of dates and times, select the one after when the BSOD bug check has started to occur frequently.
- Click on Finish.
- Confirm by clicking Yes.
Way-5: Install pending Windows updates
Installing Windows update is an all-in-one solution to almost all the errors you find on your Windows PC. This process will force your computer to receive the most recent patch or update, whichever is pending. An update is supposed to resolve all the problems your system is confronting. Therefore follow the guidelines –
- Click the – Start.
- Type – updates.
- Hit – Enter.
- Windows update settings will open; click – Check for updates.
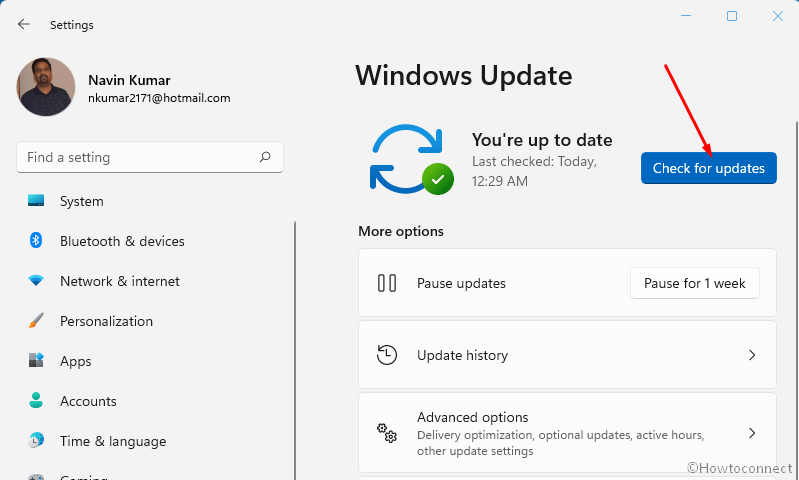
- Windows will soon begin scanning for any updates that have been rolled out.
- If one is pending, it will be automatically downloaded.
- After the process is completed you will see a notification. Select Restart now and give some time to install the update.
Way-6: Run SFC /scannow
bddci.sys Blue Screen Error usually starts because of clashes between the bddci.sys and system files. Collisions, on most occasions, occur when the system files got corrupted or missing due to any third-party program or malware. But don’t be bothered, System file checker is a built-in tool that effectively deals with the issue. Apart from scanning and diagnosing the files, the default tool repairs files involved in the conflict after being executed through command prompt as administrator. Therefore, follow the instructions –
- Press – Windows log key + R.
- Type – cmd.
- Hit – Ctrl + Shift + Enter.
- User account control dialog will come out; click on – Yes.
- Once the Command prompt appears, type the following syntax – SFC /Scannow.
- Next, press the – Enter.
- The command will start scanning quickly for the malfunctioning files and show you the percentage of the execution.
- Once it reaches 100 percent, reboot your PC.
- Blue screen error What said: bddci.sys should be fixed now.
Methods list:
Way-1: Uninstall KB5007189
Way-2: Edit Registry
Way-3: Add a network printer through Static IP address
Way-4: Run built-in Printer troubleshooter
Way-5: Properly Set Print Spooler service
Way-6: Update printer driverWay-1: Uninstall Bitdefender Antivirus
Way-2: Rename the Sys file
Way-3: Uninstall Windows update
Way-4: Perform System Restore
Way-5: Install pending Windows updates
Way-6: Run SFC /scannow
That’s all!!
Hi,
in addition to the above, the bddci.sys could also have been installed as part of the AdAware Web Companion, so esp. if someone is unable to find and uninstall BitDefender via way 1, it might have been installed that way.
I had the issue of Windows crashing with BSODs related to this file sometimes multiple times per day, and since uninstalling this part of AdAware everything runs smoothly for a week now.