You might be wondering about seeing BitLocker screen even when this protection tool was never turned on. Bitlocker is an effective tool to safeguard files and folders from unauthorized access by encrypting the drive in which they are located. However, sometimes, this becomes a matter of concern because of the generation of errors and bugs. One such problem is the topic of this post which keeps displaying BitLocker Recovery screen on startup of the computer or Surface device nevertheless it was never enabled. See – Fix: BITLOCKER_FATAL_ERROR BSOD Windows 10.
BitLocker Recovery screen on Startup is a bug in Windows 10, 11 Microsoft is analyzing however any resolution is not offered till now. The error is commonly found to appear on the devices installed KB5012170 (Secure Boot DBX). Several Windows 11 users also inform that this screen prompted after receiving KB5016629. In forums’ discussions, multiple users have complained that each time they launch Windows 10 or 11, they are required to enter a BitLocker recovery key. This is due to UEFI bootloader’s vulnerability. While encountering the issue you can try How to Get BitLocker Recovery Key from CMD in Windows 11 or 10.
BitLocker Recovery Screen on Startup
Here is how to fix BitLocker Recovery screen on Startup in Windows 11 or 10 –
Way-1: Uninstall Faulty Update
To deal with this issue Microsoft provided a UEFI Revocation List having Secure Boot Forbidden Signature Database (DBX). So Once you come across the problem, first of all, recall whether any update is installed on the device recently. Most people encounter BitLocker Recovery Screen because of faulty Windows updates like KB5016629 and KB5012170. If confused with what ‘update’ then check in the View update history area.
- Press – Windows key.
- Type – Updates.
- Hit – Enter.
- Click – View update history. In Windows 11, select – “Update history“.

- Now, select – Uninstall updates.

- Find the faulty update, then double-click it to uninstall.
- Click Yes on the prompt.

Way-2: Activate the Secure Boot
Typically, the screen, which requires an encryption key, shouldn’t be requested when a PC boots up during a normal startup process. When a motherboard hardware change occurs, a computer crashes, or if the software suspects an attack on the data, Windows may request the BitLocker recovery key, but this shouldn’t happen frequently. Activation of Secure Boot helped many people to get rid off this screen so follow the steps to enable this feature –
- Once you are on the blue screen, Press – Esc. This will bring up additional BitLocker recovery options.

- Click – Skip this drive.

- Choose Troubleshoot from the next screen.
- Then, Select – Advanced options.
- Click on – UEFI Firmware Settings.
- Now, go with – Restart.
- The system will be booted to the UEFI screen; go to Security.
- Select – Change Configuration from the Secure Boot options.
- Choose – Microsoft Only.
- Click – OK.
- Exit the window and then Restart your computer again.
KB4575994 – List of Secure Boot DBX revocation to invalidate vulnerable modules
Way-3: Turn off and then back on BitLocker Protection
Sad thing is the BitLocker recovery screen on startup error may persist occasionally after following the previous method. In this case, try turning off and on your BitLocker protection. However, you must enter desktop in order to perform these tasks which seems impossible at this span of time. Using this trick may help you; log in to Microsoft account on any other device and find the 48-digit BitLocker recovery key. This is also given in – Finding your BitLocker recovery key in Windows. Insert the ‘key’ and reach the desktop.
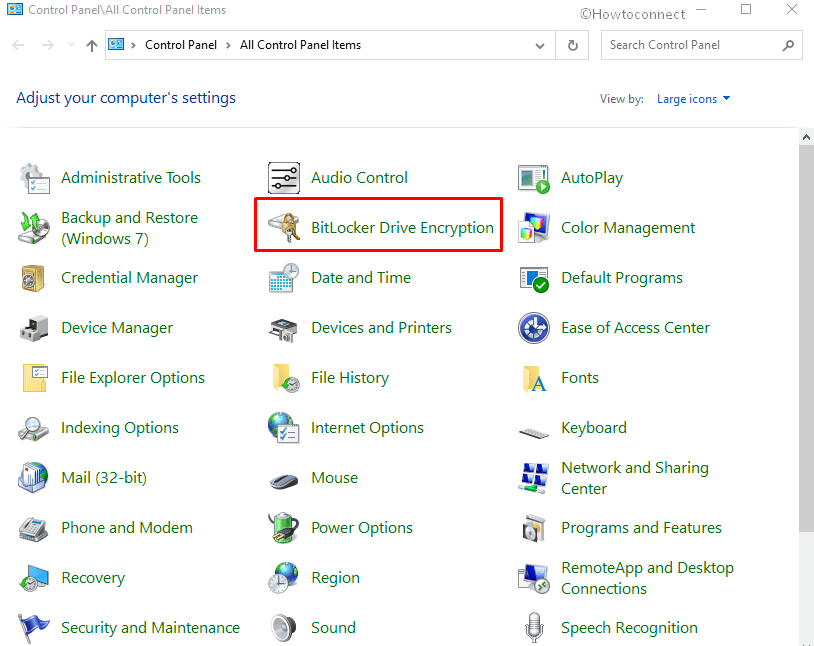
- Click on – Start.
- Type – Control.
- Hit – Enter.
- Change View by to ‘Large icons’ or ‘Small icons’.
- Select – BitLocker Drive Encryption.
- Select “Turn off BitLocker” for the C drive.

- A dialog box window will pop up.
- Select – Yes option to confirm suspension of BitLocker protection.
- After suspending, give it some time (minutes) before selecting Resume protection. This will update BitLocker TPM.
- Select – Change password to reset the unacceptable BitLocker “password”.
- Reboot your computer.
Way-4: Remove Protectors from the Boot Drive
Follow these instructions to exit the BitLocker recovery screen if you have repeatedly input the key but are still unable to move across the ‘screen’.
- Press – Esc key for more BitLocker recovery options.
- When the BitLocker recovery screen appears…
- Choose – Skip this drive.
- Click – Troubleshoot.
- Then, choose – Advanced options on the Troubleshoot window.
- Pick- Command prompt on the Advanced options screen.
- Enter the following command at the WinRE command prompt:
manage-bde -unlock C: -rp recoverypassword, to unlock the drive. - Enter the command:
manage-bde -protectors -disable C:to discard the protectors from the boot drive. - Exit the command prompt and continue to boot into your OS.
Way-5: Deactivate Secure Boot to fix BitLocker screen on startup
Opposite to enabling the Secure boot, disabling the same worked for multiple users to fix frequent BitLocker recovery screen. Therefore, move with the steps below:
- Try to Start the system and when the bitlocker blue screen appears, press Esc.
- Choose – Skip this drive.
- Next, click – Troubleshoot.
- Go to – Advanced options.
- Choose – UEFI Firmware Settings.
- Then, click – Restart.
- Locate the Secure Boot setting and disable it.
Way-6: Update BIOS
BIOS is an important part of the system which when becomes obsolete causes weird problems on Windows 11 or 10. Repeatedly appearing BitLocker password prompt screen might be the result of the outdated program. This is not an integral part of Windows and manufacturer of the device or motherboard handles its versions. So navigate to the manufacturer’s website and try upgrading your bios to the most recent version. You may have to enter model number of your computer to reach the Software and driver’s page. Check your motherboard’s manual for more information when updating your BIOS. See – Windows 10 – 5 Ways To Know BIOS Version of MotherBoard
Way-7: Make Use of Legacy Boot
The new graphical boot menu in Windows 10 might result in a BitLocker password screen infrequently. Therefore, going back to legacy boot can fix this issue.
- Enter – “cmd” in the search box of Windows Taskbar.
- Next, Right-click – Command prompt.
- Select – Run as Administrator.
- After the Command Prompt window appears, type without quotes – “
bcdedit /set {default} bootmenupolicy legacy“. - Press – Enter.

Way-8: Remove Installed Hardware
The BitLocker may trigger problems if you installed new hardware or peripherals. Remove the accessories or hardware one by one and then restart your computer to check if the error goes away.
Way-9: Install Windows update
Whenever Microsoft will officially resolve the BitLocker problem and push the fix through any patch then you will not have to do anything except installing the update.
- Press – Winkey+I.
- Select – Update & Security. On Windows 11, select “Windows update”.
- Click on – Check for updates.
- When you’re asked, click on – Restart now.
Way-10: Format the C: Drive
This method will work if everything failed to solve BitLocker Recovery screen on Startup in Windows 11 or 10. Reformatting the boot drive will easily and rapidly resolve this issue if you don’t care about data loss.
- Press – Esc key for more BitLocker recovery options.
- Click – Skip this drive.
- Next, choose – Troubleshoot.
- Then, pick – Advanced options.
- Choose – Command prompt.
- Type in the command –
list disk. - Hit – Enter from the WinRE command prompt.
- Enter –
select disk X. - Then, hit – Enter.
- Enter –
list volume command. - Press – Enter.
- Enter –
select volume X(Replace X with the volume number of your operating system drive). - Press – Enter.
- Enter –
format fs=ntfs label=volume label quick. - Hit – Enter to run the format.
- Reinstall Windows using an external installer or a USB device.
If you are stuck with the problem then find the BitLocker Recovery key at – https://aka.ms/myrecoverykey
Methods:
Way-1: Uninstall Faulty Update
Way-2: Activate the Secure Boot
Way-3: Turn Off & Then Back on BitLocker Protection
Way-4: Take Off Protectors from the Boot Drive
Way-5: Deactivate Secure Boot
Way-6: Update BIOS
Way-7: Make Use of Legacy Boot
Way-8: Remove Newly Installed Hardware
Way-9: Install Windows update
Way-10: Format the C: Drive
That’s all!!