When you attempt to connect your machine to access data through ethernet or WiFi, some users from you have confronted a message conveying DHCP is not enabled. When you connect your machine to the world of internet, it is the router’s liability to allocate the IP address itself with which they function. But sometimes the process messed up and you get the above message. So, this article shows you the steps for How to Fix DHCP Not Enabled in Windows 10.
The working of the DHCP is straightforward. This is a service that hands over the IP addresses to the machines that demand them. The home network works in an identical way as most of the present day routers support this service to make convenient for the personal machines to connect to the LANs. So, if you also confront the message of DHCP not being enabled, try out the below procedure to see how to fix DHCP not enabled in Windows 10.
How to Fix DHCP Not Enabled in Windows 10
- Bring the core area of all the settings, the Control Panel and choose Network & Sharing Center.
![]()
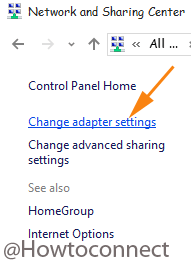
- On the left fringe, click Change adapter settings link.
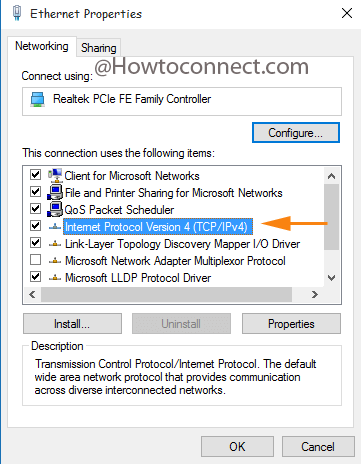
- Right click on the Ethernet connection you are using and choose its Properties.

- Double click on the Internet Protocol Version 4 (TCP/IPv4).
- Now, to turn DHCP on. For this purpose, you need to check the radio boxes against Obtain an IP address automatically on the upper part of the wizard as well as Obtain DNS server address automatically at the lower part.
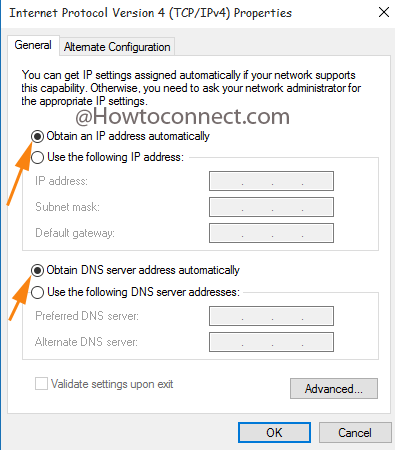
- Windows 10 will retrieve the IP address from the DHCP server.
The Dynamic Host Configuration Protocol controls the allotment of IP addresses and a few other IP parameters to the client machines that do not possess a static IP address. If you don’t have an IP address to provide correctly, take help of the DHCP server and retrieve them automatically.
Omg, finally some detailed information, thanks a lot, great help..!
Working.. Thank you.
Thank you so much for your great instructions. Works great. Kudos
This is just a band aid. The problem returns every time I connect to a different network. I want to know how to fix it so that I don’t have to keep doing this. Thanks for providing a solution for the noobs though.
This is an awesome post……..great……thanks a lot………