Blue screen error is a pretty common issue in Windows 10 and mostly shows up during the bootup then again while starting or closing an application. The problem may also rise up when you plug in USB devices or attempt to access specific files and folders. DRIVER_USED_EXCESSIVE_PTES is one BSOD error that mainly occurs when Windows 10 lacks Page Table Entries (PTE). With bug check code 0x000000D8, this error points out that system page tables are not available because a driver didn’t clear up temporary files properly.
DRIVER USED EXCESSIVE PTES error usually appears due to low disk space, faulty Windows update, outdated drivers, damaged registry, and missing system components. There might be other reasons too such as incompatible BIOS version, software conflicts as well as malware infections. Like any other BSOD, DRIVER_USED_EXCESSIVE_PTES seriously affects Windows functionality and end up causing frequent system crashes with unexpected restarts. In the worst case, the computer won’t boot which makes the resolving process difficult.
DRIVER_USED_EXCESSIVE_PTES
Here is how to fix DRIVER_USED_EXCESSIVE_PTES 0x000000D8 in Windows 10 –
1] Increase the total number of PTE
Page Table entries are used to reserve I/O buffers and other information into the system address space. When the system PTEs run out of memory, the mapping between virtual address space and physical memory gets interrupted. As a result, unexpected error codes rise up which makes the system very slow and unresponsive.
According to Microsoft, DRIVER_USED_EXCESSIVE_PTES can be resolved by maximizing system pages. Therefore, it’s worth trying. You will have to tweak the registry to increase the total number of PTE. Once you do so, the system will create the largest number of page table entries that the physical memory can handle.
- Press – Windows + S.
- Type in – regedit.
- Hit – Enter.
- When a User Account Control appears, click – Yes.
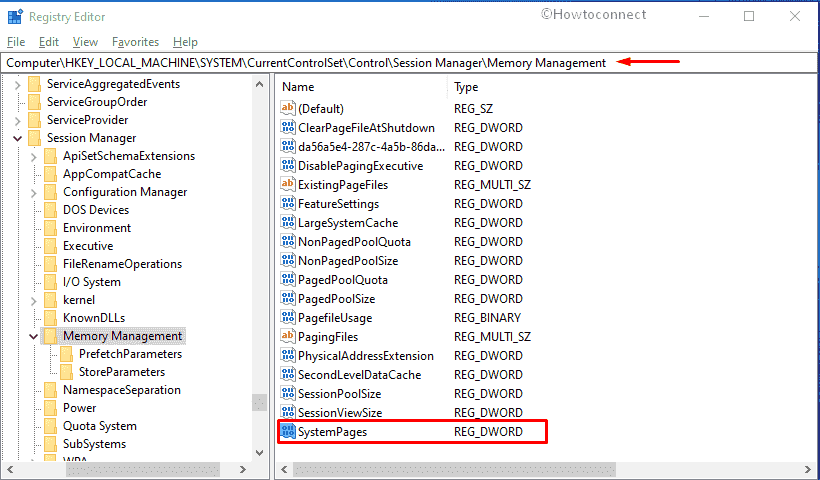
- Navigate to – Computer\HKEY_LOCAL_MACHINE\SYSTEM\CurrentControlSet\Control\Session Manager\Memory Management
- From the right-hand side, double-click – SystemPages.
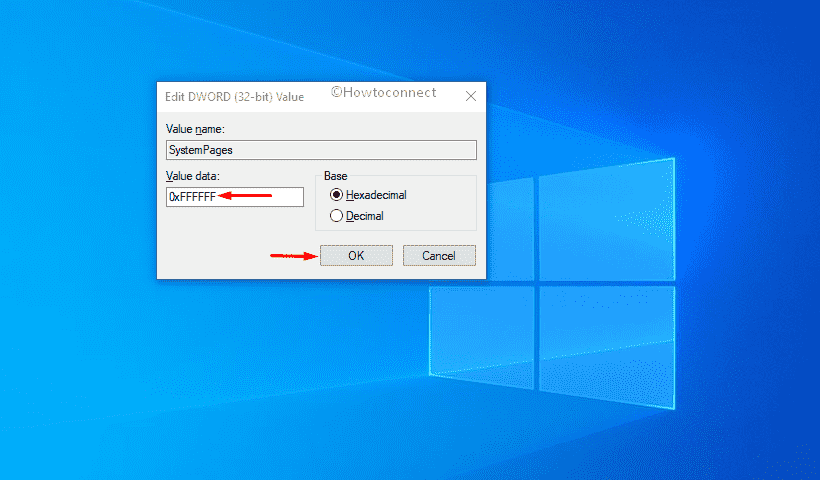
- Put 0xFFFFFFFF in the Value data box.
- Click – OK.
- Close Registry Editor.
- Restart Windows 10.
2] Install latest Windows 10 build
Devices that run with an outdated version of Windows 10 are more likely to cause DRIVER_USED_EXCESSIVE_PTES. Older OS builds not only generate blue screen errors but also make hardware slow, allow malware to affect the system, and create compatibility issues with the latest applications.
Microsoft releases cumulative updates very often and these patches mostly include security features and functionality. Also, they provide fixes for issues people complained about. Keeping Windows 10 up-to-date lessen the risk of vulnerability to a wide range including malware attacks and hardware inefficiencies. Here are the steps to follow –
- Press – Windows + I.
- Click – Update & Security.
- From the right-pane, click – Check for updates.
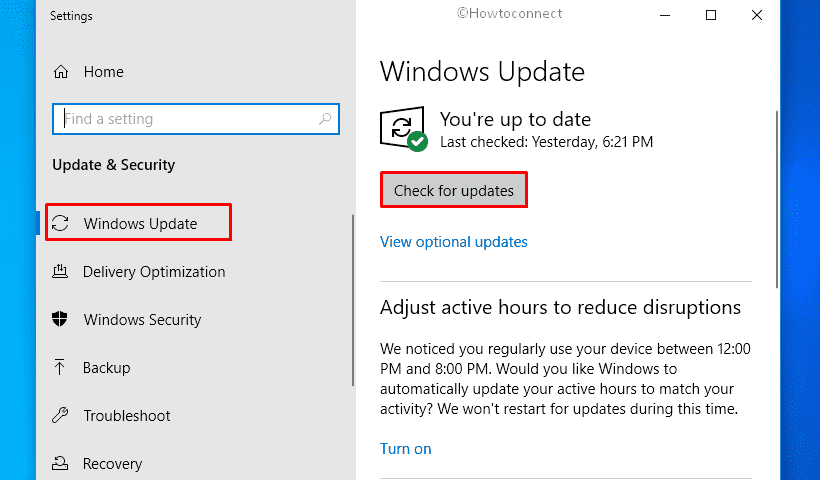
- Hit – Download and install.
- Once the system finishes installing Windows 10 update, click – Restart now.
3] Free up disk space to fix DRIVER_USED_EXCESSIVE_PTES
Every Windows 10 PC comes with fixed hard disk storage which remains separated in partitions like OS (C:), D:, E: and so on. C: drive is known as system driver as it holds all files of Windows installation. It also stores temporary items, shader cache, browsing data, web cache, and restore point data. When you clear off these items, a shadow copy of the same is transferred in the Recycle Bin. The whole thing covers up a large amount of disk space.
Due to low disk space, the system starts running abnormally and oftentimes ends up causing blue screen errors. DRIVER_USED_EXCESSIVE_PTES can be a result of the same issue. If so, wiping out the junks will be effective to resolve the Windows 10 BSOD. To do the same, you don’t need to look for a third-party tool as Microsoft already included a utility for this cleaning purpose. Let’s see how to proceed –
- Press Windows key and type – cleanmgr.
- Hit – Enter.
- For the Driver selection pop-up, click – OK.
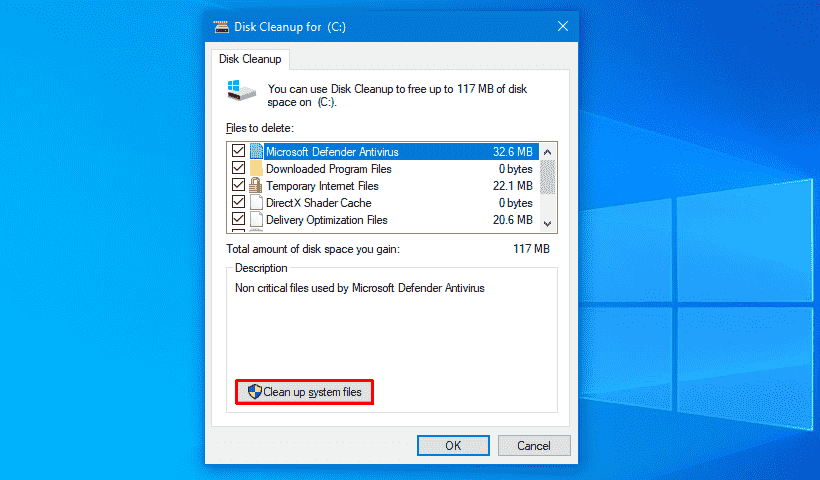
- Hit – Clean up system files.
- Click OK for the next pop-up.
- Select all the checkboxes present beneath Files to delete.
- Leave Downloads deselected if you have important files in it.
- Click – OK.
- When the process ends, reboot the Windows device.
4] Perform virus scan
In recent days, it’s nearly impossible to find a Windows 10 user who doesn’t use internet. Devices connected with the internet are more likely to get affected by malware. Usually, these threats enter into your system from links embedded in the mail or downloaded files. Some files stay in disguise and look like a genuine Windows component when you choose to download them from the web. Once they manage access to your system, start replicating themselves, and affect other usual files. As a result, some important system elements go missing that are very much needed for the smooth functioning of your PC.
Due to missing or misplaced components, DRIVER_USED_EXCESSIVE_PTES blue screen error often appears. If this is the case for you, scan the full system for malware, and eliminate the existing threats. However, malware attack is rare in Windows 10 PC as it includes built-in antimalware program Windows Security. This security suite is not less than any other third-party antivirus moreover ensures your safety online as well as offline.
- Click Start button.
- Type – Virus & threat protection.
- Hit – Enter.
- From the right-pane, click the link – Scan options.
- Hit the radio button set for – Full scan.
- Click – Scan now.
- If the utility traces out any malware, hit – Clean Threat.
- Thereafter, click Remove and then Start actions.
- When the removal process ends, reboot Windows.
5] Enter into Safe mode with networking
When you fail to boot Windows 10 due to critical issues like DRIVER_USED_EXCESSIVE_PTES, Safe mode is the best option to opt for. In this special startup, Windows loads itself with the basic components only. So, it will be easy for you to find out whether third-party software programs are causing the issue or Windows itself is responsible.
Once into Safe Mode, re-create the situation that was giving rise to the blue screen error. After forcing the system, if the computer runs error-free, you can be sure that none of the Windows components are responsible. In case of getting BSOD again, you will have to do deploy resolutions like updating Windows 10, rolling back the recently modified drivers. For that, start Safe mode with networking. Here are the steps –
- Press – Windows + S.
- Type – advanced startup.
- Hit – Enter.
- Click – Restart now.
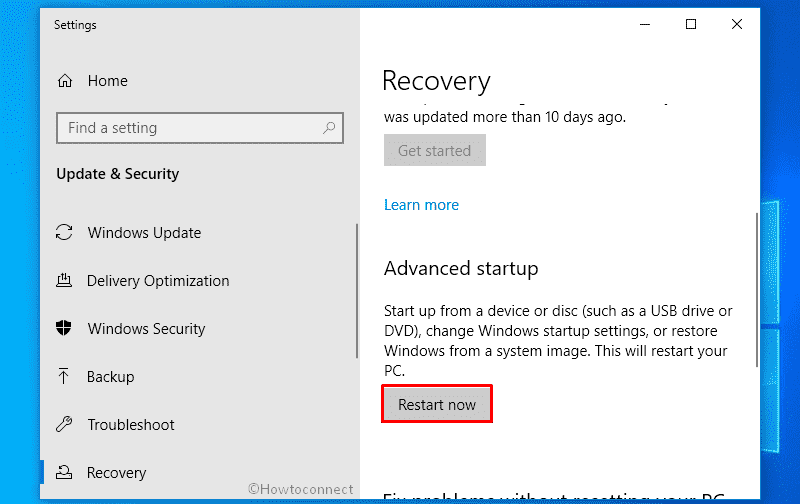
- From the upcoming screen, select Troubleshoot => Advanced options => Startup Settings successively.
- Next, click – Restart.
- When the system starts, press 5 or f5 to enable Safe Mode with Networking.
6] Identify if any particular driver is causing DRIVER_USED_EXCESSIVE_PTES
DRIVER_USED_EXCESSIVE_PTES is often originated from inappropriate or wrongly coded device drivers. Most of the time the issue goes away when you reinstall the faulty driver. That being the case, you must know which driver is actually making Windows 10 crash and bringing forth the blue screen error. Fortunately, Microsoft included Driver Verifier in Windows OS that let you find out the troublesome driver. To use the utility, follow the below steps –
- Press – Start button.
- Type in – verifier.
- Hit – Enter.
- When User Account Control appears, click – Yes.
- Select the radio button set before Create custom settings (for code developers).
- Click – Next.
- Make sure all checkboxes are ticked except DDI compliance checking and Randomized low resources simulation.
- Hit – Next.
- Select the radio button that says – Select driver names from a list.
- Click – Next.
- Select all non-Microsoft drivers.
- Finally, hit – Finish.
- Now, you need to be sure that Driver Verifier is running.
- Click the search icon from the taskbar.
- Type – cmd.exe.
- Press – Ctrl + Shift + Enter.
- Click Yes for appearing User Account Control.
- Insert verifier /querysettings and hit – Enter.
- The command-line will return a list of drivers if the utility is running.
- Or else, you will have to repeat the above steps again.
- After being sure Driver Verifier is working, restart the device.
- When the system powers up, use it normally and wait for the blue screen to appear.
- If any specific action gives rise to DRIVER_USED_EXCESSIVE_PTES, create that situation time and again.
- Once Windows 10 crashes with blue screen, something similar to DRIVER_VERIFIED_DETECTED_VIOLATION (abcdef.sys) will appear. Here, abcdef.sys is the name of the misbehaving driver.
- If you fail to make the system crash, wait at least 36 hours to let the Driver verifier does its job.
- Once you know which driver is creating issue, reinstall the same.
7] Update BIOS
Basic Input/Output System familiar as BIOS is an elementary part of Windows 10 and it is the first thing that starts when you turn on your PC after bringing it home. This firmware is located on the Motherboard and its main work is to manage the data flow between Windows and the attached peripherals.
When BIOS version gets outdated, the system fails to communicate with CPU moreover makes the Windows non-functional. This incident gives rise to severe fatality and sometimes blue screen errors. So, there is a chance to resolve DRIVER_USED_EXCESSIVE_PTES by updating BIOS. Here is the procedure to follow –
- Press – Windows + R.
- In the text field, put – msinfo32.
- Click – OK.
- From System Information window, find – BIOS Version/Date.
- Note down the information if needed.
- Close System Information window.
- Open a web browser.
- Visit the manufacturers’ web page of your BIOS.
- Find the most recent as well as the compatible version of BIOS.
- Download the setup file and install the same.
8] Recover missing system elements to fix DRIVER_USED_EXCESSIVE_PTES
System elements are very crucial for any operating system and if they become unreadable, you may experience unexpected blue screen errors. Usually, these components don’t go missing or become faulty on their own. In most cases, malware infection, software collision, and sudden power surge found to cause the same.
To resolve the corruption at the same time recover the missing ones, you can run the sfc /scannow on elevated Command Prompt. It will scan your full system to find existing corruption furthermore fix them automatically. If the issue is critical and can not be fixed, you will get to know about the same also.
- Press – Windows + Q.
- Type – cmd.
- Right-click on Command Prompt and select – Run as administrator
- When User Account Control turns up, click – Yes.
- Put – Sfc /scannow.
- Hit – Enter.
- Once the scanning process hits 100%, close Command Prompt.
- Restart the Windows device.
9] Unplug external peripherals
Surprisingly, DRIVER_USED_EXCESSIVE_PTES sometimes shows up only after connecting external accessories like printers, scanners, and Bluetooth devices. Though we don’t know the actual reason behind this, most probably the USB adapter is the one causing such drawbacks. If so, the blue screen will go away after disconnecting the peripherals from the Windows 10 device.
Simply, unplug the accessories one by one and keep them in a safe place. Reboot Windows device and thereafter, check if the issue still persists. If the PC is running flawlessly, plug in the peripherals again. But this time, don’t plug in the same port as previous.
10] Check for RAM issues to resolve DRIVER_USED_EXCESSIVE_PTES
Instead of not being permanent data storage, RAM plays a significant role for any device as it holds all temporary files that your system produces. When it becomes faulty or corrupted, Windows 10 starts performing slow furthermore stops responding at some point. Generally, RAM forms bad sectors in it when you use the same for a long time. Besides, overheat, sudden power surges, an accidental restart can cause RAM issues.
Bad RAM often found to cause blue screen errors on Windows 10, therefore, diagnosis is necessary. Before you jump to replace the memory unit with a new RAM stick, run Windows Memory Diagnostic Tool to find what the problem is. After analyzing the diagnosis report, you can take the required steps to fix DRIVER_USED_EXCESSIVE_PTES.
- Press Start button.
- Type – mdsched.exe.
- Hit – Enter key.
- Select – Restart now and check for problems (Recommended).
- Let the utility finish detecting RAM issues.
- Once the system powers up after finishing 100% diagnosis, check the notification bar to find the report.
11] Uninstall faulty Windows update
We always talk about the importance of Windows update but what more significant is an error-free computer. There are many times when the cumulative updates that Microsoft provides come faulty. Or sometimes, the downloading and installing process gets stuck at a certain point due to poor internet connection and update files get cracked partially. As a result, the system fails to coordinate with the build and ends up causing blue screen errors.
If you started getting Windows 10 BSOD DRIVER_USED_EXCESSIVE_PTES after installing the last patch, uninstall the same and check if the issue gets resolved. Once Microsoft provides a fix for the error in their next update, you can get it then. To uninstall the faulty update, here are the steps to follow –
- Press – Windows + S.
- Type – view update history.
- Hit – Enter.
- Click the link that says – Uninstall updates.
- Find the last build you received.
- Select the KB version and click – Uninstall.
- Comply with on-screen instructions to remove the build completely.
- Reboot the device.
12] Rectify Windows Image Files to fix DRIVER_USED_EXCESSIVE_PTES
If any component from local image files become corrupted, DRIVER_USED_EXCESSIVE_PTES may rise up. There are various causes of file corruption but in most cases, an old storage device found to originate the issue. Another probable reason to make the image files faulty is an unexpected power outage. However, these images can be repaired using Deployment Image Servicing and Management (DISM) tool. Steps are as followed –
- Click search icon from the taskbar.
- Type – cmd.
- Press – Ctrl + Shift + Enter.
- To give consent, click – Yes.
- On the black panel, insert –
DISM /Online /Cleanup-Image /RestoreHealth
- Press – Enter.
13] Remove unwanted programs
Software programs ease many functionalities we need but the same can be troublesome oftentimes. If you don’t download software from trusted websites, the setup file may carry bugs that can make the system suffer. Furthermore, if you install too many programs that mostly do the same task, software collision occurs.
Such software conflict leads to a system crash moreover removes necessary elements from the system. As a consequence, DRIVER_USED_EXCESSIVE_PTES BSOD appears. To resolve the issue, uninstall the apps that are more likely to cause a collision and also those programs you hardly use. This way, you will be able to resolve software conflicts moreover system will get some free space.
- Press – Windows + R.
- Type – appwiz.cpl.
- Click – OK.
- From Programs and Features window, find problematic applications.
- Right-click on a program and select – Uninstall.
- For final confirmation, again click – Uninstall.
- Follow the on-screen guidelines to complete this process.
- Restart your Windows device.
14] Fix disk errors
Hard disk is the soul of a system and anything wrong with the same can cause DRIVER_USED_EXCESSIVE_PTES. There are two types of bad sectors that can form in hard disk and call it hard and soft. Hard bad sector refers to physical damage and it usually comes with production faults or from external damage. On the other hand, Soft or logical bad sector is software related issue and usually occur due to accidental power failure, forcibly pulled out cable.
To fix the bad areas in hard disk, the Disk Checking utility is handy. Once run in the elevated Command Prompt, it will scan the whole system to detect the corruption and fix them automatically. To execute the command-line, follow the below steps –
- Open Command Prompt as admin.
- Put
chkdsk /f /r C:after the winking cursor. - Hit – Enter.
15] Disable Fast Boot to get rid of DRIVER_USED_EXCESSIVE_PTES
Fast boot is basically a fusion of the usual shut down and hibernate process. When this remains active, it carries over every single process to the next session so that the system takes less time to boot up. With this startup, every time your system will start from that point where you left before powering off.
If Fast boot is enabled, you might need to struggle a lot to fix DRIVER_USED_EXCESSIVE_PTES BSOD. That’s because your system will carry the blue screen error in every session like other processes. Disabling the startup may stop the BSOD from appearing, therefore, you should give it a try. Here is how to proceed –
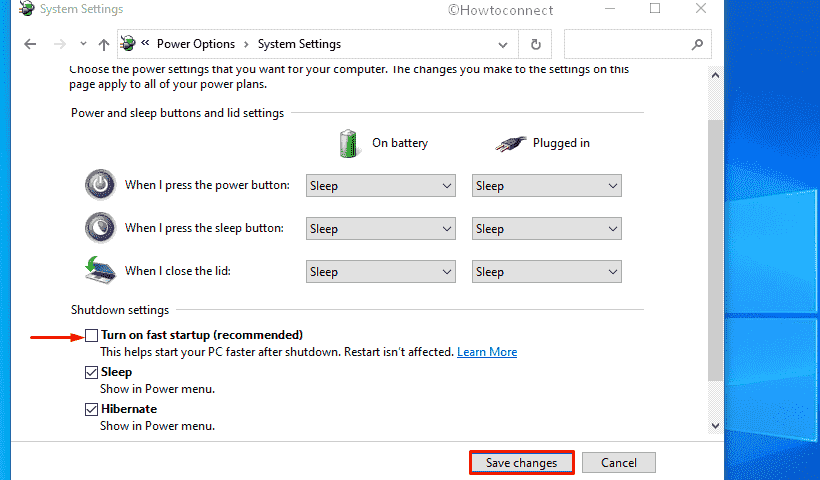
- Right-click the battery icon from System tray.
- Select – Power Options.
- From the left of the newly appeared window, click – What the power buttons do.
- Hit the link that says – Change settings that are currently unavailable.
- Uncheck the box present before Turn on fast startup (recommended).
- Click – Save Changes.
16] Restore to an earlier point
System Restore lets you bring back a previous state of Windows that was working error-less. Oftentimes, after making some changes on Windows by installing a new program or removing another, the registry gets tweaked.
We all know, how sensitive Windows Registry is and any wrong entry will mislead the whole system moreover bring forth issues like DRIVER_USED_EXCESSIVE_PTES. To get rid of the error right away, the best way is to load back the previous state of Windows where there was no blue screen of death. The way to accomplish this task is as following –
- Press – Windows key.
- Type – rstrui.
- Hit – Enter.
- When System Restore wizard prompts, select – Choose a different restore point.
- Hit – Next.
- Click the checkbox – Show more restore points.
- Select the date when you were not getting the blue screen error.
- Click – Next.
- Hit – Finish.
- A pop-up will appear to warn you. Click – Yes.
17] Clean install Windows 10 to resolve DRIVER_USED_EXCESSIVE_PTES
If everything discussed above fails to fix DRIVER_USED_EXCESSIVE_PTES, the last resort to try out is clean install. Doing so is easy if you follow the below steps precisely –
- Visit Official Software Download webpage by Microsoft.
- Click – Download tool now.
- Once the file is downloaded, double-click the setup file.
- For appearing User Account Control, select – Yes.
- When Windows setup wizard shows up, click Accept for the terms and conditions.
- Select – Create installation media (USB flash drive, DVD, or ISO file) for another PC.
- Hit – Next.
- Confirm that the Language, Edition, and Architecture are correct.
- After that, click – Next.
- Click the radio button of ISO file.
- Hit – Next.
- Opt for a location where you want to store the file.
- Click – Save.
- Finally, hit – Finish.
- Visit the directory where you saved the file.
- Double-click the downloaded item to start the installation process.
- Follow on-screen guidelines to complete the procedure.
Methods list
1] Increase the total number of PTE
2] Install latest Windows 10 build
3] Free up disk space
4] Perform virus scan
5] Enter into Safe mode with networking
6] Identify if any particular driver is causing
7] Update BIOS
8] Recover missing system elements
9] Unplug external peripherals
10] Check for RAM issues
11] Uninstall faulty Windows update
12] Rectify Windows Image Files
13] Remove unwanted programs
14] Fix disk errors
15] Disable Fast Boot
16] Restore to an earlier point
17] Clean install Windows 10
That’s all!!