Blue screen errors are quite common for Windows 10 running devices and they mostly rise up during the startup of a program or while ending one. Some BSOD are hard to resolve where some of them get easily fixed with basic workarounds or with just a simple restart. EXRESOURCE_TIMEOUT_LIVEDUMP is one blue screen of death problems that makes the system inoperable moreover inaccessible. This BSOD comes accompanied by a bug check code 0x000001CC and mainly occurs when a kernel ERESOURCE has timed out.
EXRESOURCE TIMEOUT LIVEDUMP points out a deadlock condition or heavy contention which mostly ends up causing performance issues. Blue Screen of Death can be originated from various unexpected and unknown events that take place in the Windows operating system. In most cases, old device drivers, malware infections, outdated Windows, bad RAM, and missing system components found to cause the error. As there is no particular reason to work on, you might need to deploy several workarounds to fix the BSOD.
EXRESOURCE_TIMEOUT_LIVEDUMP
Here is how to fix EXRESOURCE_TIMEOUT_LIVEDUMP Blue Screen Error in Windows 10 –
1] Boot Windows 10 in Safe Mode with Networking
Blue screen error oftentimes doesn’t let you access the desktop, as a result, you remain stuck at the booting screen. In such a case, Safe mode is the only way to manage accessibility. It is also good for troubleshooting as this special startup starts Windows with limited software and services. For that reason, you can easily remove problematic software.
Furthermore, Safe mode establishes an environment where eliminating malware, rolling back or updating drivers, and using utility that troubleshoots issues seem easier. Instead of the usual Safe mode, we suggest you opt for Safe Mode with Networking. This way, you will get full network support that is highly required to troubleshoot the BSOD without any hitch.
- Press – Windows + S.
- Type in – advanced startup.
- Hit – Enter.
- Move to the right of the consequent settings page.
- Click – Restart now.
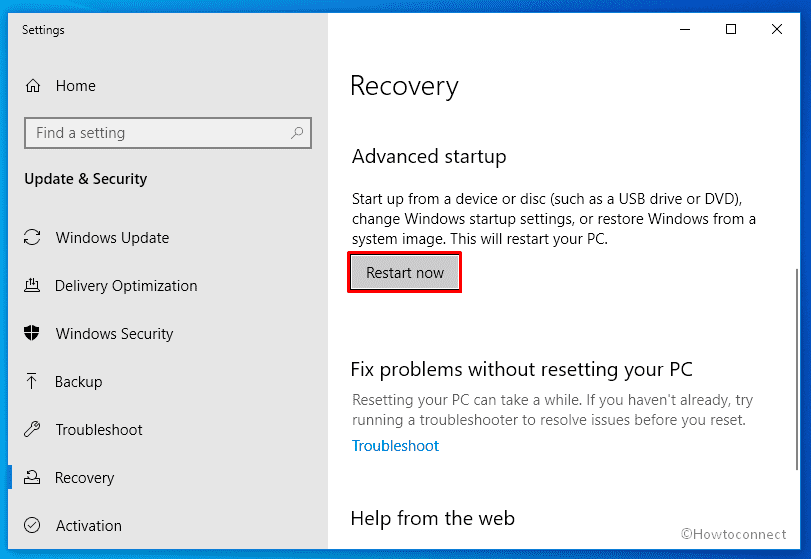
- From the next screen, select Troubleshoot => Advanced options => Startup Settings sequentially.
- After that, click – Restart.
- When the system powers up, either press 5 or f5 key to boot Safe Mode with Networking.
2] Prevent system from unexpected restart
Automatic restart is the most nagging issue that user conflicts due to EXRESOURCE_TIMEOUT_LIVEDUMP BSOD. Whenever the system is about to crash, Windows boot itself unexpectedly without any prior notice. The main intention of such a sudden restart is to lessen the aftereffects that may cause because of the system crash. At the same time, this occurrence makes the system unstable and you hardly can use it properly. Disabling automatic restart will make Windows 10 stable moreover provide an environment where deploying workarounds will be easier.
- Press – Windows key.
- Type – advanced system settings.
- Hit – Enter.
- Doing so will redirect to the Advanced tab of System Properties.
- Click Settings placed beneath Startup and Recovery.
- Uncheck the box present before Automatically restart.
- Click – OK.
3] Install latest Windows update
Outdated OS is more likely to cause blue screen errors and other issues as well. Due to compatibility issues with currently running software, the system starts performing slow too. Therefore, it is necessary to download and install the latest Windows update regularly. Though keeping Windows 10 up-to-date doesn’t make your PC super fast, it definitely helps to eradicate unwanted issues.
- Press – Windows + I.
- Click – Update & Security.
- From the right pane of the appearing settings page, click – Check for updates.
- If any newer patch is available, hit – Download
- When the downloading process ends, click – Install now.
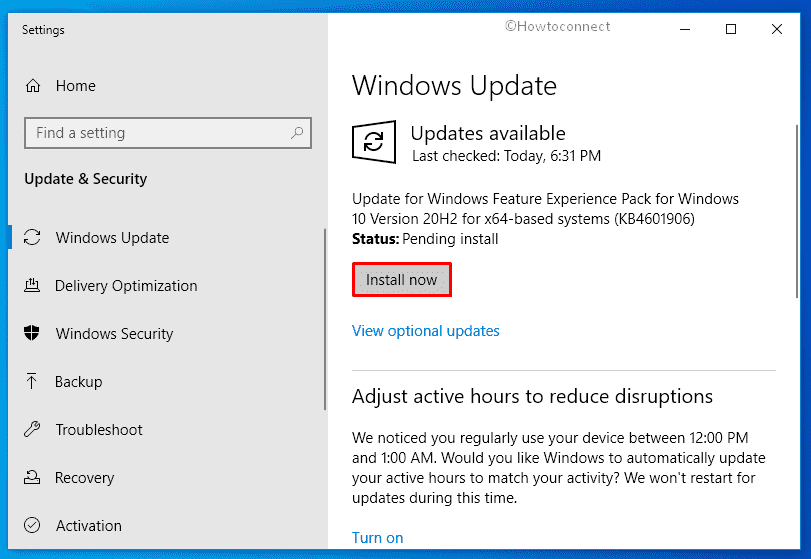
- After being finished, click – Restart now.
4] Scan for viruses
While surfing on the web, viruses can enter into your system from a suspicious site to a malicious link coming in spam email. Malware can also make an entrance through USB devices too. Whenever a malware gets chance to break your security, oftentimes it deletes some necessary system resources and results in EXRESOURCE_TIMEOUT_LIVEDUMP. To find out the existing threats and eliminate them, here are the steps to follow –
- Click the search icon present on the taskbar.
- Insert – Virus & threat protection.
- Hit – Enter.
- From the right column, click – Scan options.
- Select the radio button set before Full scan.
- Click – Scan now.
- If Windows Security traces out any malware, hit – Clean Threat.
- After that, click Remove and then Start actions.
- Reboot Windows device.
5] Unplug USB devices to resolve EXRESOURCE_TIMEOUT_LIVEDUMP
External hardware like keyboard, mouse, printer, scanner, and projectors are pretty much required for a smooth user experience. Unfortunately, some of them often found to cause blue screen errors on Windows 10. Most probably, an incompatible USB adapter is responsible for this. In such a case, disconnecting peripherals from the USB ports usually solves the issue. After that, you can connect them again but while doing so, check if any particular item is giving rise to BSOD. If yes, run hardware troubleshooter before you decide to change the faulty device with a new one.
- Click – Start icon.
- Type – cmd.
- Press – Ctrl + Shift + Enter.
- To approve User Account Control, click – Yes.
- On Command Prompt, insert the following and hit Enter –
msdt.exe -id DeviceDiagnostic
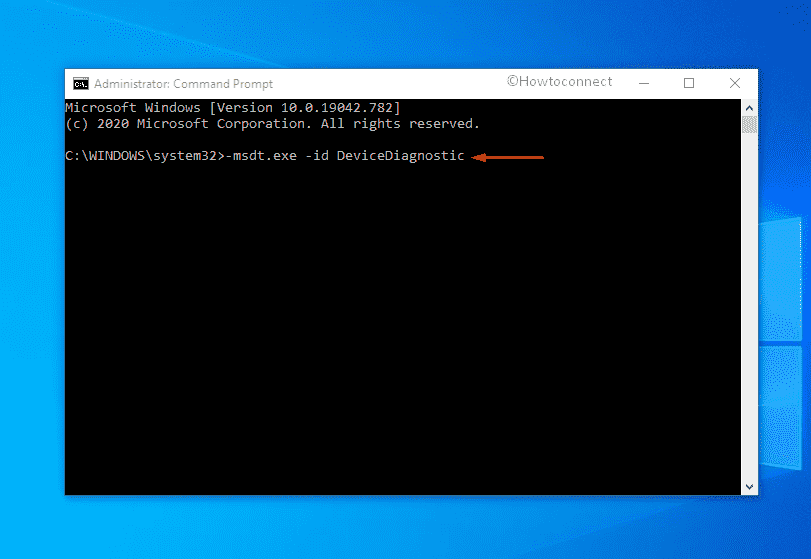
- When Hardware and Devices Troubleshooter shows up, click – Next.
- After detecting issues, the utility may display devices that have problems.
- Select the device you want to troubleshoot and click – Next.
- When the tool offers an automatic repair, hit – Apply this fix.
- Lastly, click Next to allow the system to restart.
6] Make sure all Device Drivers are updated
Drivers are the sole component of any operating system and when they become outdated, EXRESOURCE_TIMEOUT_LIVEDUMP may evolve. Keeping them updated not only prevents unexpected error codes from appearing but also helps in maintaining a healthy PC. Device drivers usually get updated when the system installs updates for the OS. If you excluded drivers from updates, look for the available update manually and install as well.
- Press – Windows + X.
- Select – Device Manager.
- Double-click the device that has an exclamation sign by its side.
- Right-click the driver with a yellow indication and choose – Update driver.
- Opt for – Search automatically for drivers.
- If any recent version is available online, the system will download and install it as well.
- In the end, reboot the device so that the changes can take place.
Note – If Device Manager indicates that you have the best-suited version already, visit the makers’ website and check for the wanted driver manually. When you get the suitable one, download as well as install the same.
7] Detect hard disk problem
Due to prolonged use and poor maintenance, bad sectors may form in the hard disk. Other reasons that make the disk corrupted are software and hardware failure, physical damage, furthermore undetermined power outage. If the problem is software related, the corruption can be fixed with the Disk check utility. In case of external damage, you might need to change the hard drive.
- Click the taskbar search icon.
- Type – cmd.exe.
- Right-click on Command Prompt and choose – Run as administrator.
- Copy
chkdsk C: /f /r /xand paste it at the base of the winking cursor. - Hit – Enter.
- Don’t interrupt the process in between and wait patiently.
- Review the diagnosis report.
- If the issue is fixed, reboot the device. Or else, do what the report suggests.
8] Rollback driver update to fix EXRESOURCE_TIMEOUT_LIVEDUMP
With Windows update, the latest device drivers get installed too. Not always but sometimes Microsoft provides faulty drivers that are either incompatible with your system or buggy itself. As a result, the system starts behaving unusually and ends up causing issues like EXRESOURCE_TIMEOUT_LIVEDUMP. We can’t deny the fact that an updated driver is important but if the version you got doesn’t go with your systems configuration, various problems will rise up.
- Open Device Manager.
- Expand the device that has received an update lately.
- Right-click the driver you want to restore and choose – Properties.
- Shift to Driver tab.
- Click – Roll back Driver.
- If asked, give a reason for the rollback and hit – Yes.
- After rolling back successfully, close Device Manager.
- Reboot Windows when the system asks for it.
9] Uninstall unwanted applications
Unnecessary apps not only occupy disk space but also create unwanted problems on Windows 10 machines. This actually happens when two or more program tries to do the same task but results in a collision. During the conflict, both software loses their own components along with some essential system elements. To avoid such an occurrence, uninstall the apps that have similar congruence also the ones you hardly use.
- Right-click the Start icon.
- Choose – Apps and Features.
- From the right-pane, find the application that is prone to cause conflict.
- Select the same and click – Uninstall.
- For confirmation pop-up, again hit – Uninstall.
- Comply with further instructions if any.
- Following the same way, uninstall all unnecessary applications.
- Once you are done, restart the device.
10] Fix corrupted system elements to resolve EXRESOURCE_TIMEOUT_LIVEDUMP
Missing and fault system components are highly responsible to cause EXRESOURCE_TIMEOUT_LIVEDUMP BSOD on Windows 10. Corruption in system files usually takes place as a result of an accidental power cut, defective Windows update, and malware infection. System elements also go missing due to the same reasons. To resolve and recover the corruption, follow the way –
- Open Command Prompt as administrator.
- In the black pane, insert –
Sfc /scannow. - Hit – Enter.
- When the scanning process ends, review the report.
- If the utility fixed the existing issue, close Command Prompt and restart the device.
- Or else, execute
DISM /Online /Cleanup-Image /RestoreHealthin the same pane. - Lastly, reboot Windows.
11] Free up disk space
With each execution of a task, Windows 10 creates temporary files that become useless after a certain time. Also, the system stores browser cache, old Windows files, and more such things. These items keep piling on and a good amount of disk space gets occupied. As a consequence, the system runs out of memory and gives rise to unwanted error codes. To free up the disk space –
- Press – Windows + Q.
- Type – cleanmgr.
- Hit – Enter.
- When Driver selection pop-up arises, click – OK.
- From the next wizard, hit – Clean up system files.
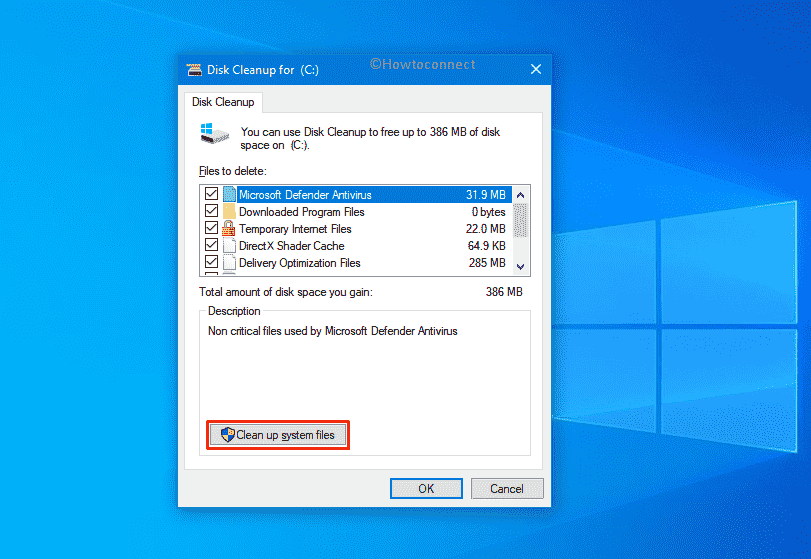
- Click – OK.
- Check all the boxes lying under Files to delete section.
- Keep Downloads and Recycle Bin deselected if important files exist there.
- Click – OK.
- When the process ends, reboot the device.
12] Uninstall faulty Windows update to fix EXRESOURCE_TIMEOUT_LIVEDUMP
Sometimes, Microsoft provides faulty updates that give rise to dreadful conditions and end up with EXRESOURCE_TIMEOUT_LIVEDUMP. Your system may get broken update files because of a poor internet connection too. If Microsoft is responsible, they will provide a fix for this blue screen error in their next patch. Meantime, uninstall the recently installed update to get rid of the BSOD.
- Press – Windows key.
- Type in – view update history.
- Hit – Enter.
- Click – Uninstall updates.
- Scroll down to reach the Microsoft Windows section.
- Select the most recent KB you received.
- Click Uninstall from the top ribbon.
- Comply with on-screen instructions to complete the removal process.
- Restart the device.
13] Check if your RAM is bad
Though RAM is not permanent data storage of Windows 10, it is one of the sole components. When it goes bad, the system shows unpredictable behavior and oftentimes ends up with blue screen errors. Besides, if your system runs out of RAM memory, EXRESOURCE_TIMEOUT_LIVEDUMP can arise. If this is the case, uninstall or disable the software and services you hardly use. After that, if the issue still exists, run a memory test to find out if the memory module is corrupted.
- Click – Windows + R.
- In the Run dialog box, put – mdsched.exe.
- Click – Enter.
- Select the option – Restart now and check for problems (Recommended).
- Let the utility check for RAM issues.
- When the system powers up after completion, check the diagnosis report present in the notification area.
14] Use Driver Verifier to fix EXRESOURCE_TIMEOUT_LIVEDUMP
Neither a backdated driver nor an updated one, what actually causes EXRESOURCE TIMEOUT LIVEDUMP is a bad driver. If Windows 10 BSOD still persists after rolling back and updating the outdated driver, there is a chance that the faulty driver is not listed or acting as a false positive. Therefore, it’s necessary to find out the real culprit. For that, Driver Verifier is pretty handy as it verifies each driver exists on the system and tracks down which one exactly brought the issue.
- Click – Start icon.
- Write down – verifier.
- Hit – Enter.
- Allow User Account Control by clicking – Yes.
- Hit the radio button present before Create custom settings (for code developers).
- Click – Next.
- Put tickmark on all the boxes except DDI compliance checking and Randomized low resources simulation.
- Press – Next.
- Select the radio button set for Select driver names from a list.
- Hit – Next.
- Select the drivers whose provider is not Microsoft Corporation.
- Click – Finish.
- Now, check whether Driver Verifier is running.
- Insert cmd on Windows search.
- Press – Ctrl + Shift + Enter.
- Click Yes to give User Account Control consent.
- Copy verifier /querysettings and paste it on Command Prompt.
- Hit – Enter.
- If the system doesn’t return a list of drivers, perform the below steps once again.
- In case it does, imitate the below steps.
- Restart Windows device.
- After signing back in, use the device like always.
- Wait for the system to bring forth EXRESOURCE_TIMEOUT_LIVEDUMP. It may take a maximum of 36 hours.
- When the error shows up, the utility will reveal troublesome driver’s name on the screen.
- Reinstall the driver.
15] Perform Clean Boot to troubleshoot EXRESOURCE_TIMEOUT_LIVEDUMP
Oftentimes, installed software programs, services, or device drivers obstruct the usual functioning of a system furthermore cause EXRESOURCE_TIMEOUT_LIVEDUMP. Clean boot is a special startup that lets you try out troubleshooting processes without any interruption. This mode allows Windows to start with a minimal set of drivers and applications moreover isolate performance problems.
- Press – Windows + R.
- Insert – msconfig.
- Click – OK.
- When System Configuration wizard shows up, select – Selective startup.
- Uncheck the box set before – Load startup items.
- Shift to Services tab.
- Make sure the checkbox of Hide all Microsoft services is ticked.
- Click – Disable all.
- Move to Startup tab.
- Click the link – Open Task Manager.
- Right-click on a program listed here and select – Disable.
- Disable all startup applications in the same way.
- Close Task Manager.
- When back in the System Configuration, click Apply and then OK.
- Reboot Windows to start clean boot state.
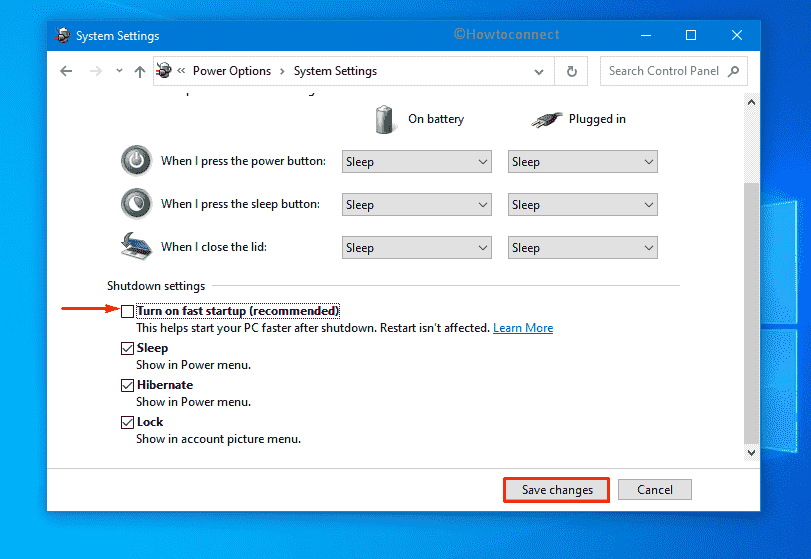
16] Disable Fast boot to get rid of BSOD loop
When Fast boot is enabled on your Windows 10 PC, the system carries over every single process for the next session. This special feature is used to boot the system faster on every session. Like every other progress, there is a chance that the system is carrying forward the info of EXRESOURCE_TIMEOUT_LIVEDUMP. As a result, you keep getting the BSOD error constantly. Disabling Fast boot may help in such issues.
- Right-click the battery icon from the taskbar.
- Choose – Power Options.
- From the left column, click – What the power buttons do.
- Hit the link – Change settings that are currently unavailable.
- When the inaccessible options become active, uncheck – Turn on fast startup (recommended).
- Click – Save Changes.
17] Update BIOS to fix EXRESOURCE_TIMEOUT_LIVEDUMP
BIOS works to maintain the data flow between Windows OS and the attached peripherals. This firmware is a primary part of a device as this is the first thing that starts when you switch on your computer for the first time. When it becomes outdated, Windows become non-functional and lead to blue screen error like EXRESOURCE_TIMEOUT_LIVEDUMP.
- Press – Windows + S.
- Write down – msinfo32.
- Hit – Enter.
- Check the info present before BIOS Version/Date.
- Either keep in mind or note down the same.
- Close System Information window.
- Open a web browser you prefer.
- Visit the manufacturers’ website of your BIOS.
- Look for the current and compatible version of BIOS using the previous info got.
- Download the setup file.
- Go to the directory where the system stores downloaded items.
- Double-click the exe file you got.
- Comply with on-screen instructions to complete the installation process.
- Lastly, reboot the device.
18] Prepare Windows for automatic repair
Automatic repair is a built-in feature of Windows that usually helps you to get rid of startup errors like EXRESOURCE TIMEOUT LIVEDUMP. When this feature is enabled, it gets launched automatically at the third boot. The utility runs multiple diagnostic tools to find out what caused the BSOD and fix them accordingly. To start the repair tool –
- Open Windows Settings app.
- Click on – Update & Security.
- From the left sidebar, select – Recovery.
- Click Restart now placed beneath Advanced startup.
- From next screen, select Troubleshoot =>Advanced options => Startup Repair each in turn.
- When Automatic Repair page shows up, provide credentials of your account.
- Click Continue to initiate the repairing process.
19] Load last known good configuration to get rid of EXRESOURCE_TIMEOUT_LIVEDUMP
If any recent changes, software conflict, lately installed application tweak the registry wrongly, EXRESOURCE_TIMEOUT_LIVEDUMP BSOD may emerge. The best way to revert back the situation is performing system restore. This tool will be only useful if your PC had system protection option turned on.
- Press – Windows + Q.
- Type – rstrui.
- Press – Enter.
- When System Restore wizard becomes visible, click – Next.
- Choose a restore point available there.
- Click – Scan for affected programs.
- Select the app you want to remove.
- Close the currently running wizard.
- Once back in System Restore, click – Next.
- To initiate restoring process, hit – Finish.
20] Start fresh with clean installation
If nothing worked to fix EXRESOURCE_TIMEOUT_LIVEDUMP blue screen error, try clean install as last resort. Doing so will overwrite the local disk furthermore remove all content related to user files.
- Navigate – Software Download webpage.
- Click – Download tool now.
- Double-click the exe file you got.
- To allow User Account Control, click – Yes.
- For setup terms and conditions, hit – Accept.
- Select – Create installation media (USB flash drive, DVD, or ISO file) for another PC.
- Hit – Next.
- Make sure that the Language, Edition, and Architecture are correct.
- Click – Next.
- Select – ISO file.
- Hit – Next.
- Choose a location where you want to save the setup file.
- Click – Save.
- Finally, hit – Finish.
- Go to the directory where you saved the file.
- Double-click the setup file.
- Follow on-screen guidelines to complete the installation process.
Methods list
1] Boot Windows 10 in Safe Mode with Networking
2] Prevent system from unexpected restart
3] Install latest Windows update
4] Scan for viruses
5] Unplug USB devices
6] Make sure all Device Drivers are updated
7] Detect hard disk problem
8] Rollback driver update
9] Uninstall unwanted applications
10] Fix corrupted system elements
11] Free up disk space
12] Uninstall faulty Windows update
13] Check if your RAM is bad
14] Use Driver Verifier
15] Perform Clean Boot
16] Disable Fast boot to get rid of BSOD loop
17] Update BIOS
18] Prepare Windows for automatic repair
19] Load last known good configuration
20] Start fresh with clean installation
That’s all!!