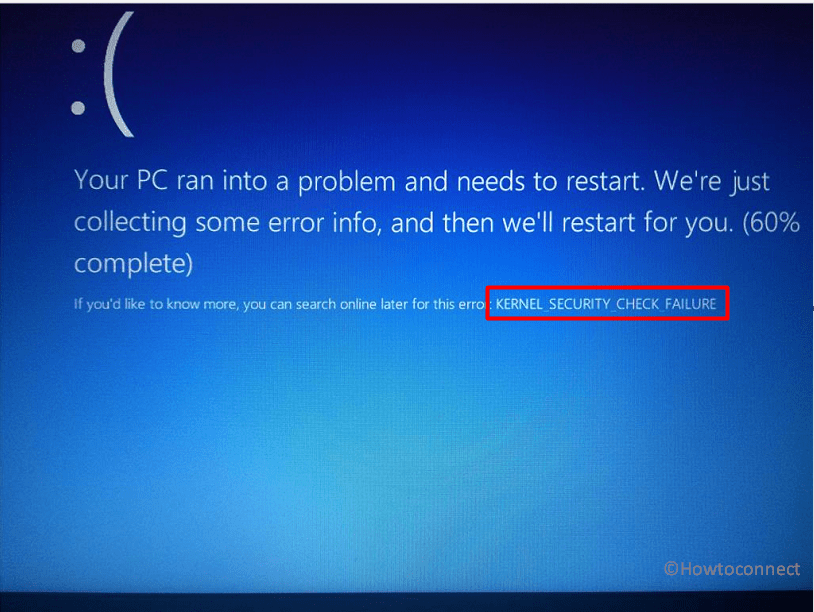
Are you getting puzzled by Kernel Security Check Failure Blue Screen in Windows 11 or 10? Cause of this error is mostly virus infection, memory, or obsolete driver issues. Your system unexpectedly shows BSOD with certain suggestions when the problem appears.
You may see the solutions for Blue screen issues here – Whea Uncorrectable Error and Memory Management Error. Kernel Security Check Failure in Windows 11 or 10 may come in 4 scenarios –
1. After waking up PC from sleep – Some users report that after waking their PC from sleep, they face Kernel Security Check Failure with a “blue screen of death”.
2. After upgrading the RAM – The error may also appear when users upgrade a new RAM and start the computer after installing.
3. While playing games – If you are a gamer then you might have already faced interruption while playing your favorite games. Users are getting BSOD that apprises Kernel Security Check Failure in Windows 11 during playing games such as Fortnite.
4. While using specific apps – It is reported that some specific apps and programs trigger Kernel Security Check Failure in Windows 11 more frequently than others.
Table of Contents
Stop code Kernel Security Check Failure fix
Here is how to fix Kernel Security Check Failure in Windows 11 or 10 –
There are two likely problems that you could face when this error. Either you will be unable to login to the OS while this error will show up every time you power it up or you will face Kernel Security Check failure BSOD time to time. We will cover solutions for both situations one by one. You can check the root cause of this error using BlueScreenView or WhoCrashed.
When the BSOD prevents you from logging in to your system:
If Kernel Security Check Failure won’t boot occurs then follow the solutions –
Way-1: Enable legacy advanced boot menu
Turn on your Windows 11/10 in Boot mode. If you don’t know the procedure, check out our article How to Boot Windows 10 From USB Flash Drive.
- When the Windows Setup box appears, click on Next.
- After that, click on Repair your computer from the following screen.
- Now a page will ask you to Choose an option. From there, select Troubleshoot and thereafter select Advanced options.
- Once the new options appear, click Command Prompt.
- Write down C: and hit Enter on your keyboard.
- This time type in the below-given command and press Enter.
BCDEDIT /SET {DEFAULT} BOOTMENUPOLICY LEGACY
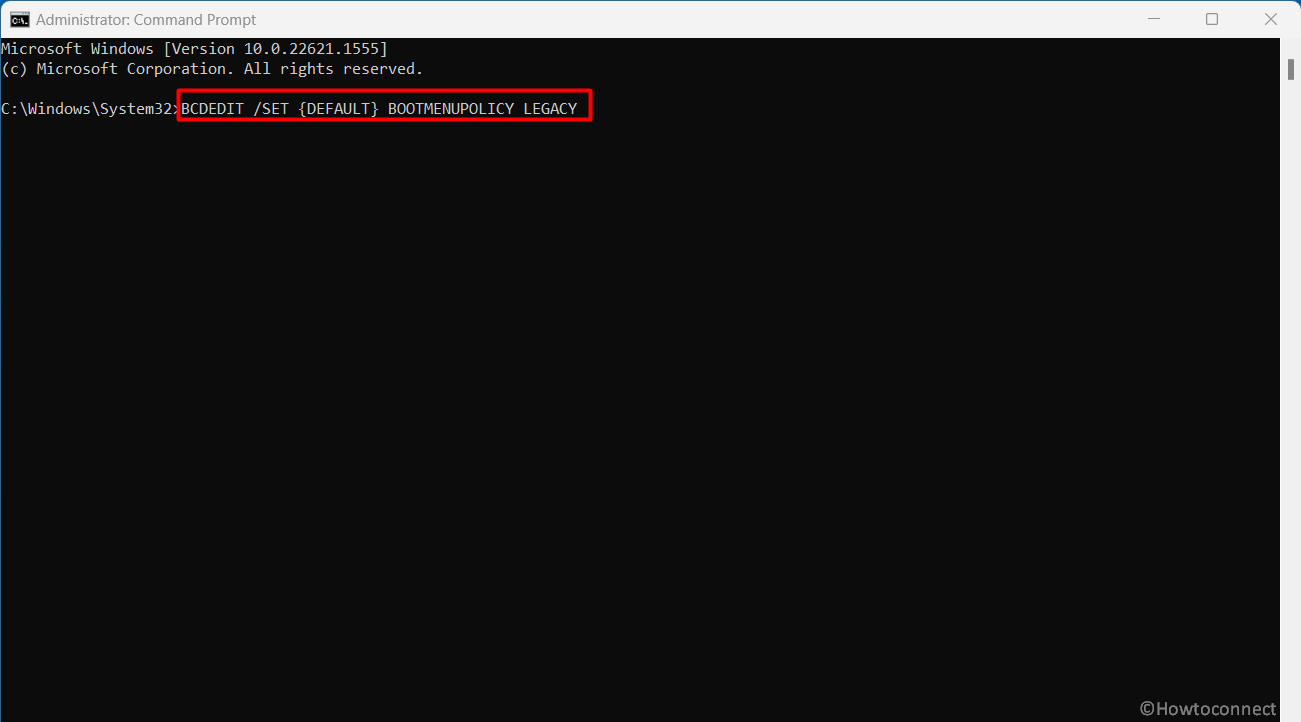
- It will “Enable legacy advanced boot menu”.
- When the command is successfully executed, type EXIT in order to close the Command Prompt.
- In the end, go back to Choose an option screen and click on Continue.
- Finally, Start your PC normally and check if the issue is resolved.
Way-2: Use System File Checker and DISM
- If your Windows 11 or 10 doesn’t start successfully, press Windows and S.
- Type Advanced Startup and hit the Enter key.
- Click on – Restart now.
- When the new window shows up, select Troubleshoot.
- Thereafter, select Advanced Options and then click Startup Settings.
- Now click on Restart located in the bottom right corner of the screen. Windows should boot with minimum system requirements info.
- After restarting, click on Search and type cmd.
- Select – Run as administrator.
- Now type in or copy/paste the command
sfc /scannowand press Enter.
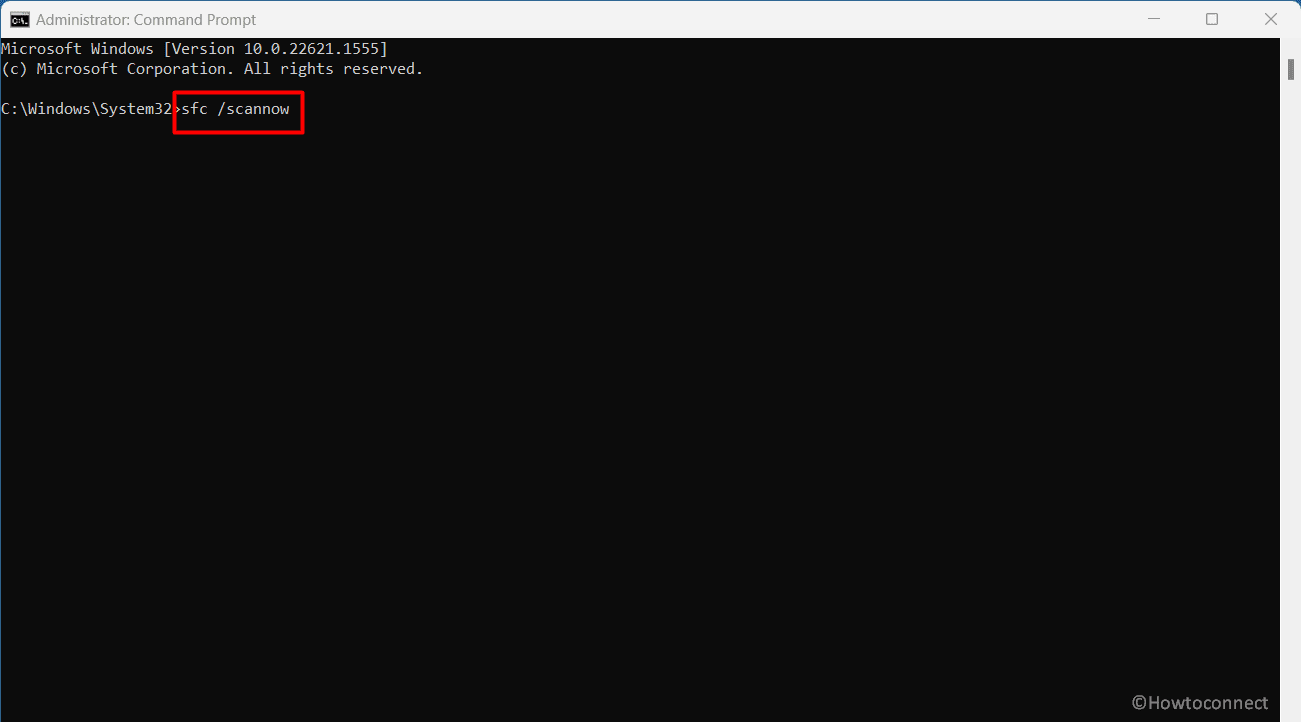
- It will immediately start detecting the corrupted files on your system. When everything finishes, type in Exit and hit Enter to close the command prompt.
- Then check if BSOD Kernel Security Check Failure error is fixed.
- Suppose this problem is still annoying then you need to run the DISM tool. For this, Start the Administrator: Command Prompt again and run the following commands by turn:
dism /online /cleanup-image /checkhealth
dism /online /cleanup-image /scanhealth
dism /online /cleanup-image /restorehealth- In the end, reboot your PC.
You may like to read SFC /Scannow, DISM.Exe, CHKDSK Windows 10.
Way-3: Run Windows Memory Diagnostic
When Kernel Security Check failure RAM then:
- Click on Start and write MdSched.exe.
- Right-click on Windows Memory Diagnostic and select “Run as administrator“.
- A pop-up will appear; click the option Restart now and check for problems.
- After rebooting, the system will check the “memory of your RAM” and show up the possible reason for getting BSOD.
See Windows 10 – How to Detect RAM Issues with Windows Memory Diagnostic Tool.
Way-4: Check the memory slot
Several times “memory slot” may trigger Windows Kernel Security Check Failure if it’s not positioned in the right way. Therefore, it’s important to place the memory slot into the socket correctly.
Experts suggest that it is always safe to replace or change the memory slot.
Once you are done, reboot the computer and check if the Blue screen bug check error still persists to occur.
Way-5: Check your hard drive
If above workaround didn’t work, it may be possible that the ‘hard drive’ is not functioning properly. To check the functionality of your hard drive, make sure that it is plugged in correctly into your device. If you use an extra hard drive then try to change it and see if starts accurately. Again you are finding the blue screen then:
- Press Windows and R keys.
- Type cmd.exe.
- Then press Ctrl + Shift + Enter.
- When User account control popup appears, click on Yes.
- Type
CHKDSK C: /F /R /X - Press Enter and wait until the process is completed.
- Restart your computer and see if the BSOD no longer occurs.
When Kernel Security Check Failure occurs occasionally:
Now, if you are able to run your system normally and the problem occurs occasionally then you should make an attempt at the below-given workarounds.
Way-6: Update your Windows
To resolve Kernel Security Check Failure in Windows 11 or 10 you should use the latest version on your PC. Microsoft frequently and regularly rolls out updates in order to improve users’ experience. These include the system’s stability and fix for various issues. To do so, head to the following steps-
- Press Win+I hotkeys to access Windows Settings.
- Then, click on Update & Security category once highlighted. In the case of Windows 11, click on Windows Update.
- Go to the right side and click on Check for updates.

- It will check if an update is available and downloaded and installed all by itself.
Way-7: Perform a full scan
“Virus infection” may also be the reason for Kernel Security Check Failure issue. In that situation, you need to scan your PC with Windows built-in antivirus Windows Defender. Here’s how to do it –
- Click on Search.
- When the result displays, select Windows Security.
- Click on Virus & threat protection.
- Then click on Scan options.
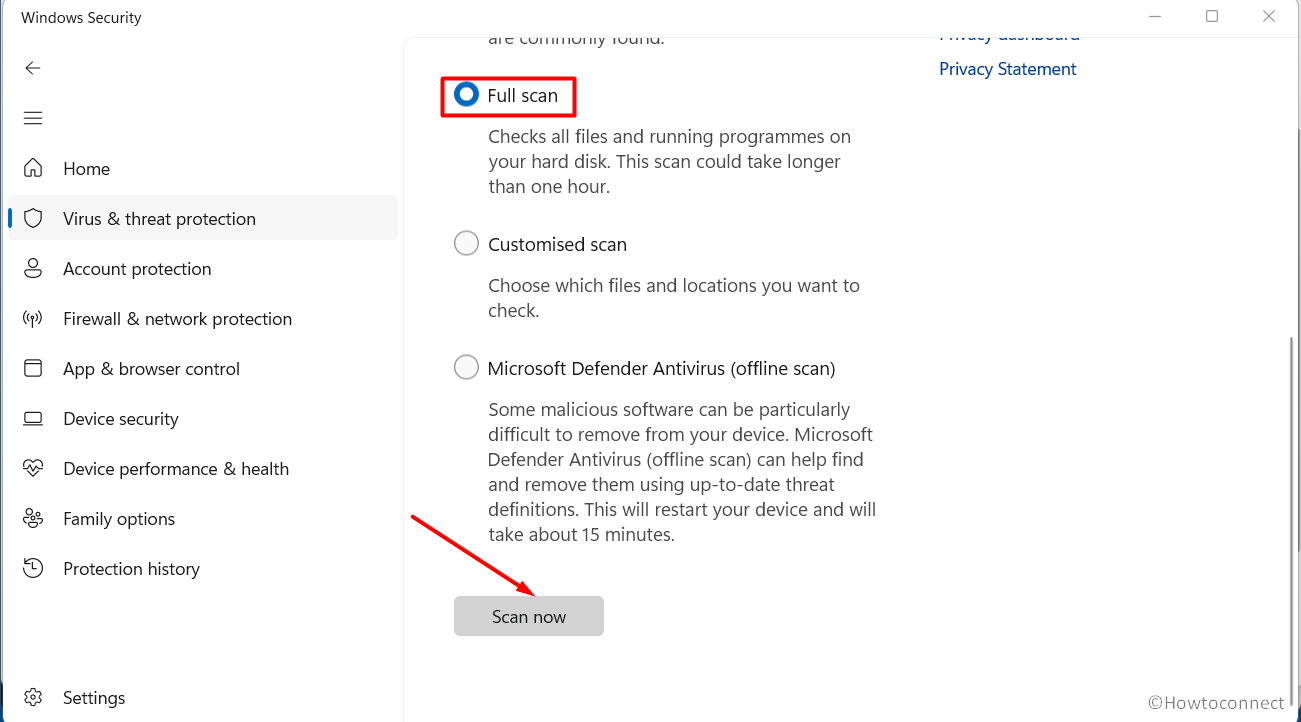
- When a new page appears, select the radio button beside Full scan.
- Thereafter, click on Scan now in order to launch a full system malware scan.
Way-8: Run System Restore
If this error is generated just after installing any software, then you may try the “system restore” to fix it. This feature helps you to remove the apps and programs that you added recently. It also allows you to restore the previous configuration without losing files, except for a few.
- Press Winkey.
- Type rstrui.
- Hit the Enter key.
- On the System Restore wizard, click on Next.
- Check the box for Show more restore points.
- Select a date and time when the bug check was not started.
- Again click on – Next.
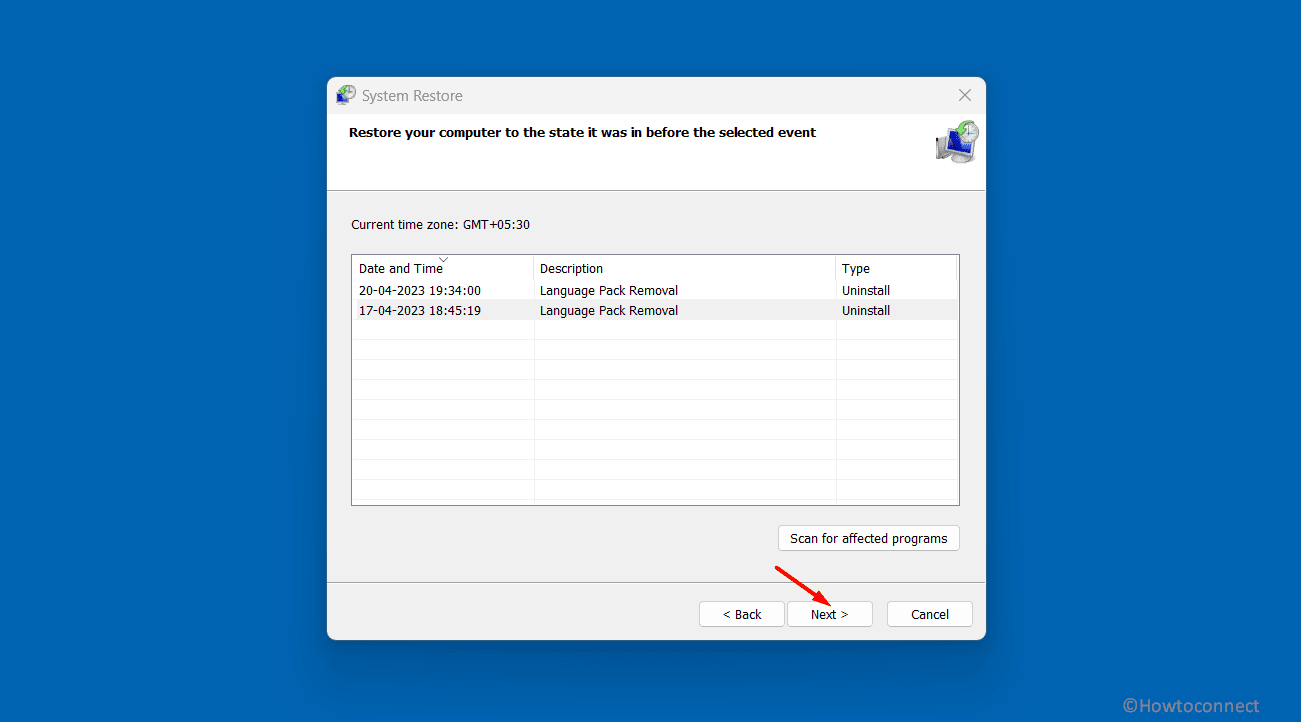
- Review your selections and click on Finish.
- You will see a prompt asking “Once started, System Restore can not be interrupted. Do you want to continue?”. Click on Yes.
- This will take a long so sit back and take a coffee until the process is completed.
Furthermore, you can use “Reset this PC” options that allow you to clean install the operating system.
Way-9: Remove Overclock
Overclock may bring this error to your PC. Therefore, revert your computer to its default settings and uninstall “overclocking software” if you have any. Thereafter Reboot your device to see if the error persists.
The above workarounds should solve your problem but if the hardware or Ram of your device is faulty then you have to replace it with a new one.
Methods:
Way-1: Enable legacy advanced boot menu
Way-2: Use System File Checker
Way-3: Run Windows Memory Diagnostic
Way-4: Check the memory slot
Way-5: Check your hard drive
Way-6: Update your Windows
Way-7: Perform a full scan
Way-8: Run System Restore
Way-9: Remove Overclock
That’s all!!.
