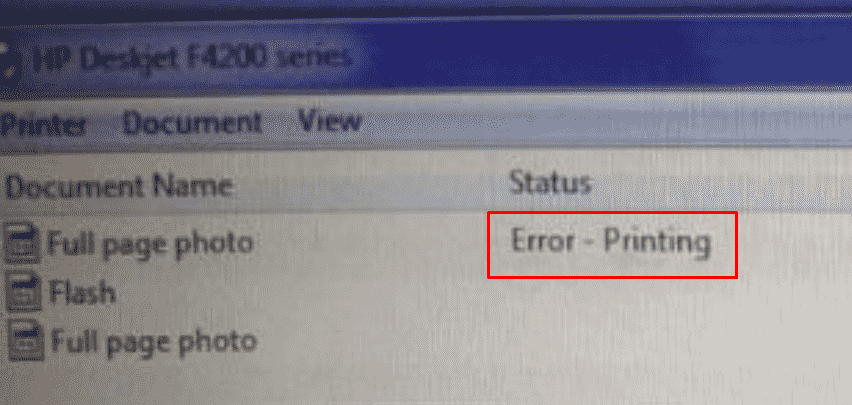
Windows 10 issues after upgrading or updating the OS is a common occurrence. Status error – printing is one of such issues that appears when you run a print job even though there is no problem with the device or materials. As the error message appears without any description, it’s tough to decide what is the reason causing the issue.
Generally, the connection issue between the printer and your device causes status error – printing. Furthermore, corruption in Printer Spool service, incompatible USB drivers, invalid data in the spool printing tray could be equally responsible. Whatever the reason is, once the document you are trying to print out gets stuck in a queue things become difficult to handle especially when you are in a hurry. To fix it up, go through the plausible solutions we have listed below.
Table of Contents
Status error – printing
Here is how to fix status error – printing in Windows 10 –
1] Uninstall recent Windows update
Most of the time, a new update causes status error – printing moreover graphics, network devices, disk drives. Therefore, if you have recently installed a patch and getting the printer’s problem then uninstall without having any doubt. Here’s how –
- Press Win+I hotkey at once.
- When Windows Settings page appears, click on Update & Security.
- Move to the right pane on the consequent page.
- Click the option View update history.
- From the subsequent page, select the link Uninstall updates.
- When the Program & features window floats up, scroll down to reach Microsoft Windows section.
- Locate the most recent KB version you installed and right-click the same.
- Choose Uninstall option.
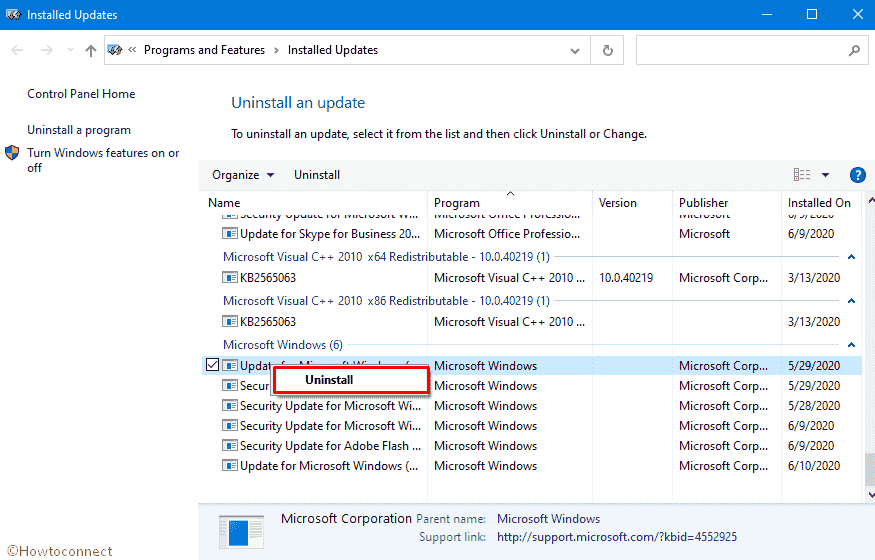
- Comply with on-screen instruction to remove the patch completely.
2] Make your USB driver up-to-date to fix status error – printing
“Status error – printing” appears even after the Printer machine is absolutely fine, then there is a possibility that the USB driver is either incompatible or outdated. USB driver is a small program like any other drivers that allows you to establish a connection between the computer and connected components, for example, keyboards, mouse, and printers. Steps are as follows –
- Right-click on Start button and choose Run.
- Type devmgmt.msc in the command box and then click the OK button.
- Once Device Manager shapes up, reach the bottom and expand Universal Serial Bus Controllers by double-clicking.
- Locate your USB port driver which usually comes with the name chipset and/or controller.
- Right-click and click on Update driver.
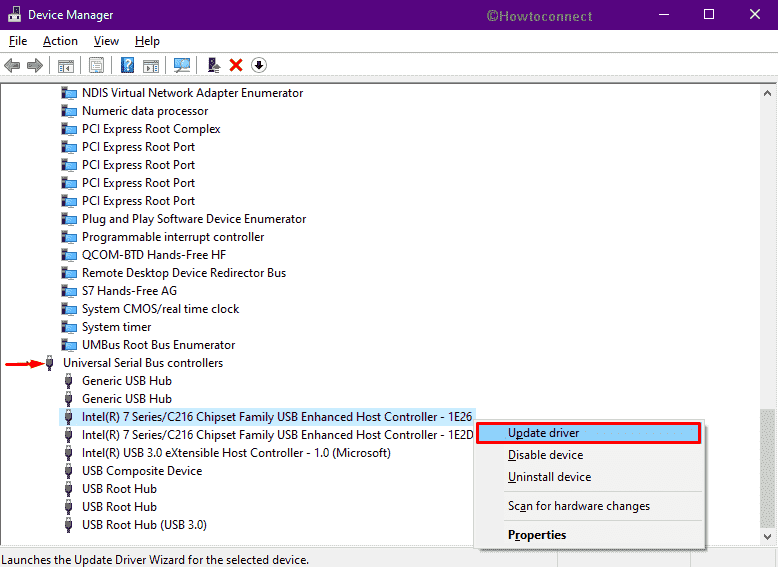
- From the next pop-up, choose Search automatically for updated driver software.
- If the system gets any newer version online, it will be downloaded and installed automatically.
Important – To explore if any updated version available, visit the manufacture of your USB driver and look for the most recent version and compatible one. Thereafter, download the setup file and then install the same.
3] Restart Printer Spooler service
Printer Spooler service may be also a root cause of error printing. When it gets corrupted, not running, or hung, the message may show up in Windows 10. Reason is the service means you can fix the issue by only a restart after removing pending print jobs. To do so –
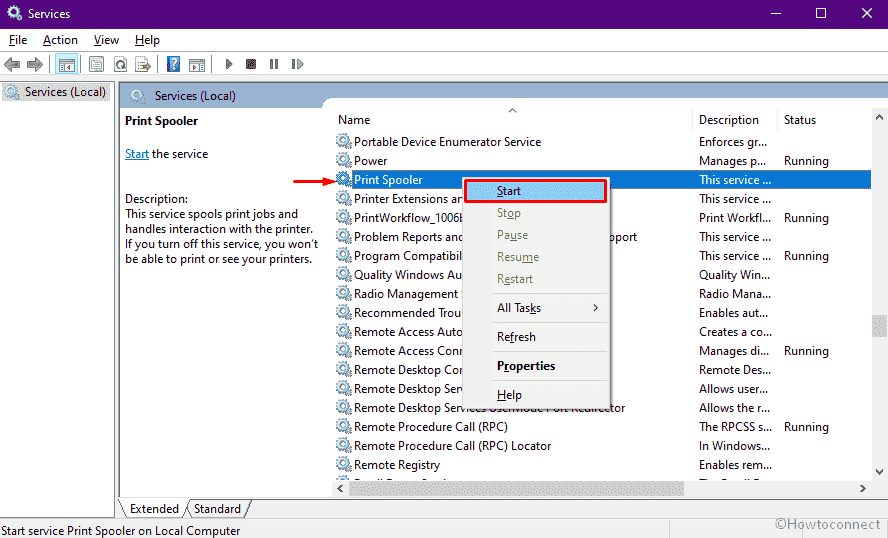
- Click on taskbar search and type in services.msc.
- Hit Enter key when Services console appears up at top of search result.
- Approach alphabetically to find out Print Spooler.
- Once found, right-click on the same and choose Stop.
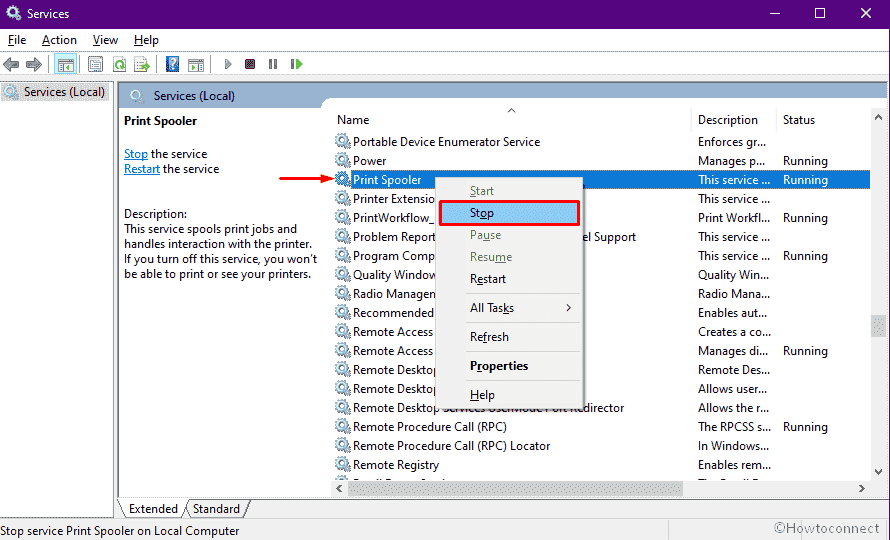
- Minimize Services window and then open File Explorer by pressing WIn+E hotkey.
- Access “C:\WINDOWS\system32\spool\PRINTERS” (note – path might not be exactly same depending on your PC).
- You get a warning dialog then select View files anyway.
- Once you are into the folder, press Ctrl+A to select all the items once at a time and then hit the delete key.
- Go back to Services window.
- Again, right-click on Print Spooler and this time opt for Start option.
4] Reinstall the Printer driver to fix status error – printing
Corrupt Printer driver is another big reason leading to status error – printing. So uninstall a driver and reinstall the same will back you everything on track. Let’s see the procedure –
- Press Win+R and type control in the command box.
- Click OK button to bring forth Control Panel.
- Set the View by option to Large icons.
- Click on Devices and Printers.
- Right-click on your printer and then choose Remove device.
- If a UAC prompts for confirmation, give consent.
- Restart Windows 10 as usual.
- When the PC powers up, the system should automatically detect and install your printer driver. If it doesn’t, unplug the USB port of the printer and plug it back again.
5] Look into Printer’s port settings
Printer port settings might be another culprit behind the status error you encountered. To fix it up, follow the steps given below –
- Press Win+S keyboard shortcut to invoke Windows search.
- Put devmgmt.msc in the search bar and hit Enter key.
- Once Device Manager shows up, scroll down a bit and expand Printers and Scanners.
- From the driver list, right-click on your printer and choose Properties.
- Move to Ports tab and check if the plug your printer use is selected there.
- If not, uncheck the box located beside selected port and then check the box for the one you usually use.
- Finally, click Apply followed by OK to save the changes.
6] Tweak Device Manager to ensure the Printer is being detected
If the system fails to detect the printer while processing a task, related error codes may arrive that obstruct the device from working properly. To make sure the detection process, here are the steps you need to follow –
- Open Device Manager.
- When it appears, click on View from the menu bar and then choose Show hidden devices.
- Locate Ports (COM & LPT) and double-click the same.
- Once the driver lists expand, right-click on the Printer port followed by choosing Properties.
- Shift to Port Settings tab of newly appeared wizard.
- Click the radio button of Use any interrupt assigned to the port and then check the box located alongside Enable legacy Plug and Play detection.
- Click Apply and then OK.
- In the end, reboot the device and if check if status error – printing is gone.
7] Check the USB cable and Wi-Fi connection properly
After deploying above workarounds, you’re still struggling with status error – printing issue then USB cord or Wi-Fi connection could be the reason behind it. Therefore, you need to make sure the cables and connections of the printer are perfectly okay moreover there is no loophole in it. Give an attempt to attach the devices with a different USB cable and the state printing – error will be automatically solved.
After establishing all connections properly, switch off the printer, and then switch back on. Meanwhile, restart the Windows 10 and try printing out anything; hopefully, everything will work correctly.
Methods:
1] Uninstall recent Windows update
2] Make your USB driver up-to-date
3] Restart Printer Spool service
4] Reinstall the Printer driver
5] Look into Printer’s port settings
6] Tweak Device Manager to ensure the Printer is being detected
7] Check the USB cable and Wi-Fi connection properly
That’s all!!
