Windows 11 and 10 are always considered the most amazing operating system as it continues to unveil magnificent features from time to time. Sadly, there are certain circumstances where users experience abrupt bugs and issues. One such problem that users are concerned about is that their Wifi keeps dropping repeatedly even after having the latest version of System.
The Wifi connection of the computer becomes unstable and drops out every few minutes without any warning. The wireless icon on the taskbar either displays a Limited network yellow mark or completely cuts out altogether. Moreover, to get back the Wifi again, users have to disconnect the wireless connection and then reconnect it which is really annoying as it happens every five minutes. Thankfully, there are certain solutions that could bring stability to the Wifi connection. Let’s start –
Wifi keeps Dropping
Here is How to Fix Wifi keeps Dropping in Windows 11 or 10 –
1] Restart Router, Modem, and Computer
Before trying out any solutions, it is best to restart all the devices that make wireless connectivity possible. In simple terms, reboot the router, modem, and your computer as well to clear out the temporary glitches that might be causing the trouble.
Once you reboot these devices, check for the WiFi stability and if the issue continues to persist, try out the given workarounds.
2] Troubleshoot Network Adapter
This automated built-in tool is designed by Microsoft to detect and resolve troubles with wireless or other network adapters. To carry out this simple workaround, follow these steps –
- Press Winlogo + I hotkey to open Windows Settings.
- Select Update & Security.
- Choose Troubleshoot subsection on the left pane. Switch to the right side and select Network Adapter.
- Click Run the troubleshooter button.
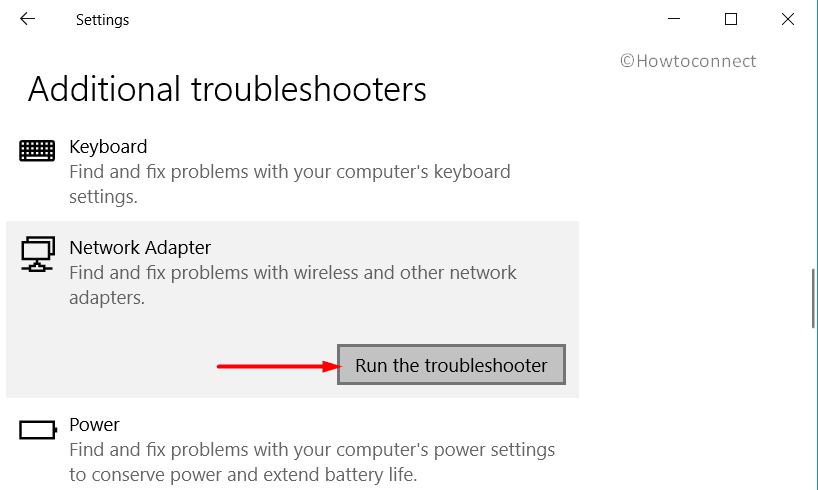
- The tool will immediately start diagnosing the network-related complications. Once the process gets over, reboot the device and check if Wifi keeps dropping or not.
See How to Run Network Adapter Troubleshooter in Windows 10
3] Disable WiFi Sense to Fix Wifi keeps Dropping
By default, Windows 11 or 10 enable WiFi Sense feature with a view to have trouble-free experiences for the users. However, this becomes a security concern as the passkey is shared with your contacts. Hence, it is best to disable this feature and to do so, go through these series of steps –
- Fire up Start Menu and click the tiny cog icon.
- Once into Settings app, select Network & Internet.
- Go to WiFi subcategory on the left pane.
- Now in the right window, ensure to toggle OFF all the options that are listed under WiFi Sense.
- Moving on, also make sure that you turn off Hotspot 2.0 networks and Paid Wi-Fi services as well.
- Disconnect the WiFi connection you are using and connect it again. Use it for some time and see if this solution is able to fix WiFi keeps dropping issue in Windows 10 or 11.
Note – WiFi Sense no longer exists after version 1803. So if you are using an earlier version, this solution will be applicable.
4] Tweak Power Management Settings
As Windows 11 or 10 continuously drops the wireless connection without prior warning, then the possible cause of the problem could be the misconfiguration of power management settings. You need to manually abolish the permission which will eventually let Windows turn off the adapter to save power. As a result of this small tweak, many users were able to resolve this annoying Wifi keeps dropping Windows 10 or 11 problem. So to accomplish this solution, walk-through the below guidelines –
- Press “Win logo + R” combination of keys to open Run dialog box.
- Type in ncpa.cpl and click OK.
- Do a right-click on the Wifi adapter that is creating the problem and select Properties.
- Click Configure button.
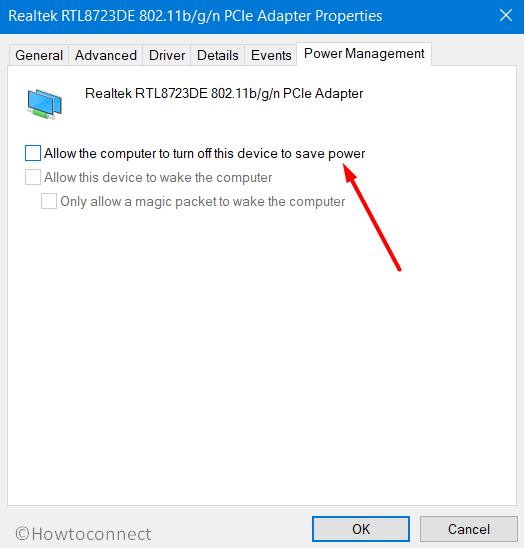
- Highlight the Power Management tab. Here, ensure to uncheck the box that reads as “Allow the computer to turn off this device to save power“.
- Click OK to save the changes.
5] Set Wifi AutoConfig Service to Automatic
Several affected users have pointed out that changing the status of WLAN AutoConfig service from Manual to Automatic has resolved this issue of Wifi keeps dropping. So simply change the status of service and see if this makes the wireless connectivity work normal again. To perform the task, observe these given steps –
- Right-click on the Start icon and choose Run.
- Insert the command services.msc and click OK.
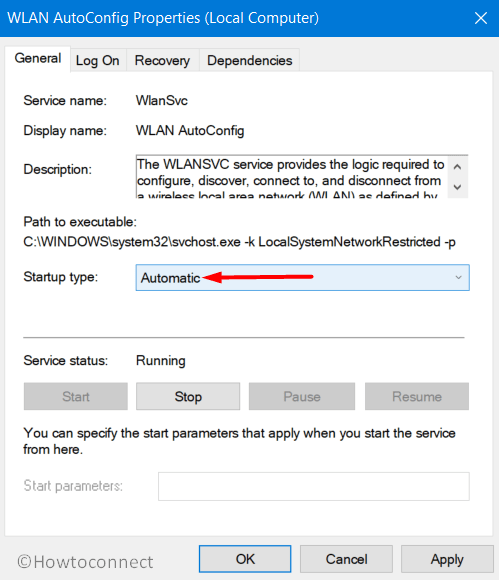
- Once Services console comes into view, locate and right-click on WLAN AutoConfig. Select Properties.
- Click the drop-down next to the Startup type and opt for Automatic.
- Hit Apply, OK buttons and restart Windows 10 PC for the changes to take place.
6] Fix Wifi keeps Dropping by Updating Wireless Drivers
The incompatibility of the Wireless driver is also one of the main causes behind the Wifi keeps dropping issue. Hence updating its driver can install the latest version which might eventually make things work again. To update the drivers, see the below sequence of steps –
- On the taskbar search box, type in devmgmt.msc. Hit Enter to open Device Manager.
- Once into it, expand Network Adapters.
- Perform a right-click on the Wifi device you are using and select Update Driver.
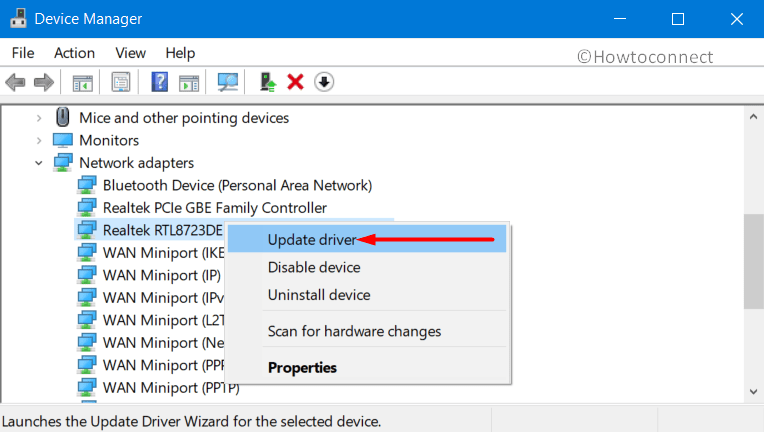
- On the following wizard, select the first option “Search automatically for the updated driver software“.
- Wait for the system to detect, download, and install the latest drivers. Do the same process for other devices listed under Network Adapter as well.
- After updating the drivers, restart the device and then check for the Wifi stability.
7] Temporarily Disable Third-party Antivirus
Wifi keeps Dropping repeatedly can be caused due to the interference of 3rd party antivirus. There are several free antivirus tools from outside sources that often block the wireless connection. Therefore to fix this problem, it is advisable to disable that security software. To do so –
- Locate the antivirus software icon on the taskbar notification area.
- Do a right-click on the icon and choose Disable.
If disabling the security software fails to resolve the issue, then you should remove it. However, simply uninstalling might not be the solution as they leave their files or registry entries even after uninstallation. Most of these antiviruses provide a removal tool as well that will eradicate all the elements of the program from the system. If the application you are using has any removal tool, use it to clear its settings from the device. Once the PC is clear and does not have any trace of 3rd party security tool, try to check the duration of your wireless connectivity.
8] Try Google DNS to solve Wifi keeps Dropping
DNS servers can sometimes create issues in the network connectivity and Wifi Keeps dropping in Windows 11 or 10 is one such example. So there are possible chances that if the device is obtaining the DNS server automatically, the connective might disrupt. Therefore, try out to use Google DNS servers in Windows 10 and see if this makes things in better way. Go through these steps to switch to Google’s DNS server –
- Hit “Win+R” hotkey to access Run.
- Type in ncpa.cpl and click OK.
- Execute a right-click the active wireless connection and choose Properties.
- Select Internet Protocol Version 4 (TCP/IPv4) followed by a hit on Properties button.
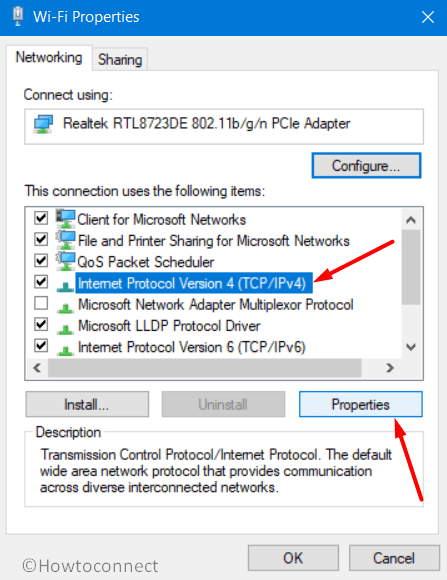
- On the subsequent window, select the radio button that states “Use the following DNS server addresses“.
- Now, on the Preferred DNS server field, insert 8.8.8.8 and type 8.8.4.4 in the box next to the Alternate DNS server (see screenshot).
- Click OK and hopefully, this will not drop the connection.

9] Set Network Profile as Private
WiFi keeps dropping is pretty much evident among the users who have set their connection to Public. These networks have a different piece of settings and as a result of them, users may experience this drop in their connection. So follow the given steps to change the network connection to Private –
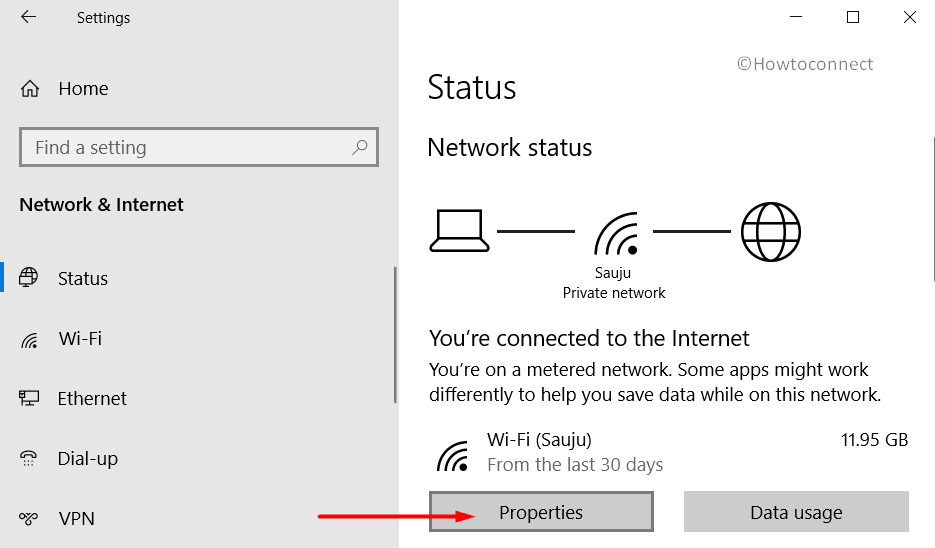
- Do a right-click on Start and choose Network Connections from Win+X menu.
- Click Properties button under your Wifi connection name (see picture).
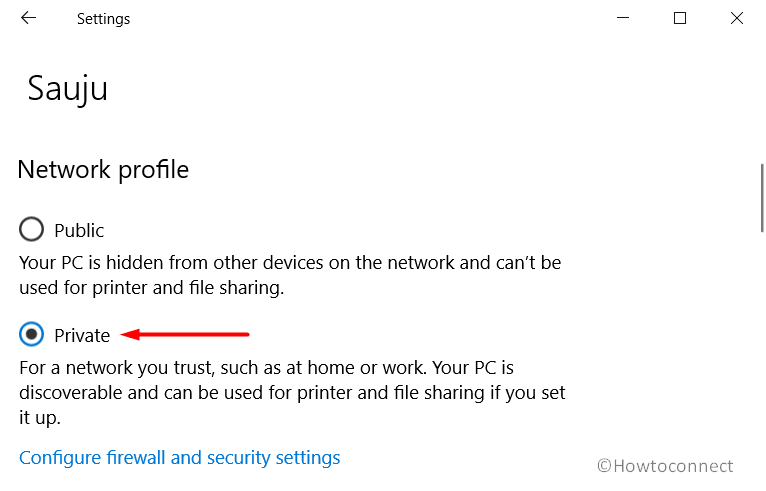
- Under Network Profile section, choose the radio button against Private.
10] Reinstall Wireless Adapter Driver
If the above solutions fail to resolve the problem, make an attempt to re-install the wireless adapter driver. To do so, go through these series of steps –
- Press Win logo+X keys and select Device Manager.
- Expand Network adapter category to view all the listed devices.
- Make a right-click on the installed device and choose Uninstall device. Again hit Uninstall button in the popup to confirm the removal process.
- Restart the device to finish the process and on startup, Windows will automatically install the driver.
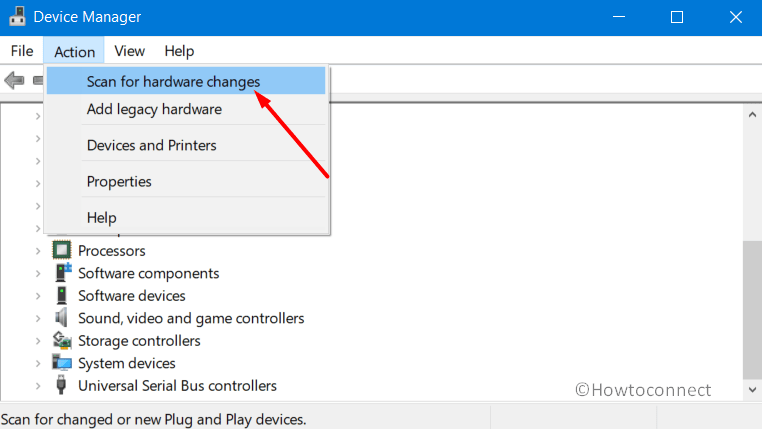
- If not, then again launch Device Manager, click Action on the menu bar.
- From the list of options, select Scan for hardware changes.
As an alternative, visit the manufacturer’s site to grab the latest version of the driver.
11] Reset TCP/IP Settings to Resolve Wifi keeps Dropping
Sometimes resetting your computer’s TCP/IP settings makes the network connection stronger and will prevent the situation where Wifi keeps dropping. Simply run a series of commands in the Command Prompt and you are good to go –
- Type cmd in the taskbar search box. Select Run as administrator from the extended pane when Command Prompt is displayed in the result.
- Click Yes to grant permission to the UAC prompt.
- Once you access elevated Command Prompt, insert these given syntaxes, and ensure to hit Enter after each.
ipconfig /release
ipconfig /renew
netsh winsock reset
netsh int ip reset
ipconfig /flushdns
ipconfig /registerdns
- After resetting the connection, use the Wifi and check for the signal strength.
12] Disable 802.11n Mode
802.11n Mode is the latest wireless standard that gives the ability to experience a better range along with high transfer speed. But the drawback arrives when some of the old routers fail to support this standard. You encounter Wifi keeps dropping repeatedly in this condition. So if you are also using an old router that might not support this standard, then disable it and see the network performance. Go through these steps to accomplish this task –
- Type control panel in the taskbar search and hit Enter.
- Once you open Control Panel, make the applets into small or large icons view.
- Select Network and Sharing Center.
- Right-click Wifi connection and click Properties.
- Hit Configure button.
- Focus the Advanced tab, select 802.11n Mode, and set it to Disable.
13] Reset Network Connection
Another easiest solution to make the wireless connection work again without losing its signal is to revert back its settings to the default state. Simply reset Network Settings to default which will eventually remove and then reinstall all your network adapters. Moreover, it will also rollback other network components to their original settings. Subsequently, if you have other networking software, you need to re-install them manually, like VPN client or virtual switches. Go through these sequence of steps to carry out the workaround –
- Launch Settings using Win+I keys.
- Select Network & Internet category.
- Switch to the right pane of the Status section and scroll down. Click the link Network reset.
- Click Reset now button again on the following page.
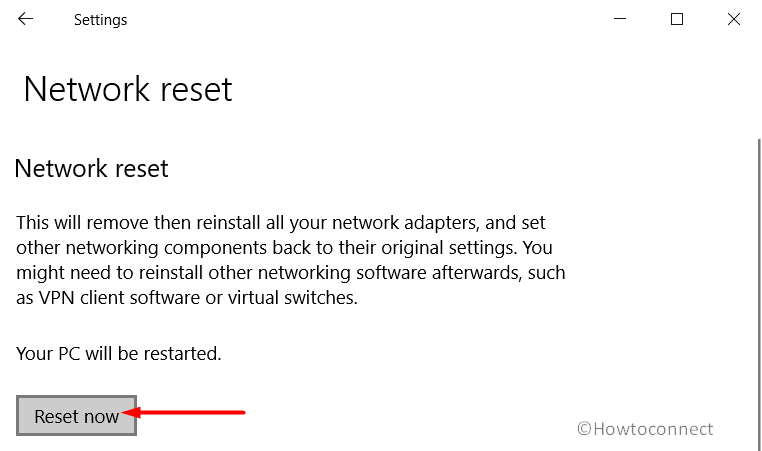
- After successfully resetting the network adapter, the system will restart.
14] Modify WiFi Channel Width
As per some specialists, Wifi channel width is another factor that results in the instability of the wireless connection. Try to change this area and hopefully, the router might perform in a better way. Follow these steps to do the task –
- Perform a right-click on Start and select Run to launch the wizard. Write ncpa.cpl and hit Enter.
- Conduct a right-click on your Wifi connection and choose Properties.
- Click Configure.
- Head to Advanced tab and select the entry 802.11n Channel width. Click the drop-down against it and select Auto.
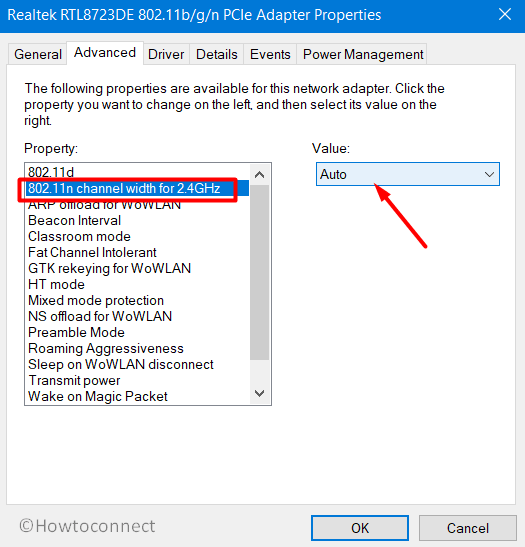
- Click OK and for the modifications to take place, reboot the device.
Methods:
1] Restart Router, Modem, and Computer
2] Troubleshoot Network Adapter
3] Disable WiFi Sense
4] Tweak Power Management Settings
5] Set Wifi AutoConfig Service to Automatic
6] Update Wireless Drivers
7] Temporarily Disable Third-party Antivirus
8] Try Google DNS
9] Set Network Profile as Private
10] Reinstall Wireless Adapter Driver
11] Reset TCP/IP Settings
12] Disable 802.11n Mode
13] Reset Network Connection
14] Modify WiFi Channel Width
That’s all!!