With the launch of Windows 10, Microsoft introduced many great features with an intention to maximize the facilitation to users. Unfortunately, few went adversely hence end up causing some vulnerabilities like wifitask.exe. Though it seems malicious at first look, in reality, it’s not. Without being a virus itself, often it acts like one because it works as a carrier to malware and spyware.
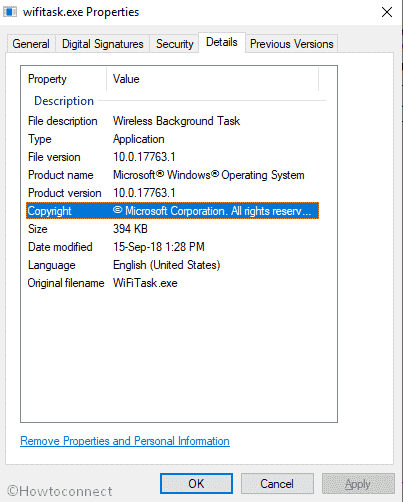
The legit wifitask.exe is a Wi-Fi Background Task of Windows and authorized program of Microsoft company. It is security related process associated with the Windows 10 Operating system. Mostly, it behaves unusual due to a malfunction in Windows Security, an anti-malware program. But, there is a lot of confusion going around with wifitask.exe in Windows 10. Some people report that the process uses almost 100% of the CPU. On the other hand, few users get wifitask.exe in the virus list while scanning the PC with any anti-malware software. Therefore, people get confused about its identity and what they should do to eradicate it. Let’s unfold all of them one by one.
wifitask.exe in Windows 10 Solutions
Here is how to fix wifitask.exe in Windows 10 –
Before describing the solutions, let’s discuss some basic info about wifitask.exe.
What is wifitask.exe in Windows 10?
Wifitask.exe in Windows 10 is an executable file linked with the Windows 10 OS from Microsoft. 10.0.17763.1 is the latest version number of this process. If you are thinking that it is an eminent part of Windows 10 Operating System and is safe, think again because the chances of it being a malware can’t be avoided.
Wifitask.exe comes installed in your Windows 10 computer and is the wireless background task. You might have noticed that it occasionally appears in the task list and then again disappears by itself. It won’t always be in the list of processes but whenever it is there, your system’s CPU usage will be high.
What causes wifitask.exe in Windows 10 error?
If wifitask.exe is not a virus or malware, then the error can be because of malfunctioning of Windows Security or any other antivirus program present in your system. At that time, the CPU usage of your PC always remains 100% or around this percentage.
A temporary solution to get rid of this problem is ending the process wifitask.exe from Task Manager. Here’s how –
Step-1: Right-click on Taskbar and choose Task Manager from the visible list.
Step-2: Once it comes into the view, click on More details if the wizard is not expanded already.
Step-3: Shift to Details tab.
Step-4: Locate wifitask.exe from the list, right-click on it and select End task.
Note – This is not a permanent solution as the process will again start and reduce your computer’s performance.
How to find if wifitask.exe in Windows 10 is safe?
There are many virus creators who place malicious codes in a process and give it the name of some important system file of Windows 10. Their intention to send malware to your computer is quite clear, they want to either harm the valuable data or steal your information. So, whenever you see anything unusual with wifitask.exe in Windows 10, follow these steps to check whether it is a virus or not –
Press Ctrl+shift+esc at once to open Task Manager.
When the Task Manager opens, click on More details.
In the Processes tab, scroll downwards and find wifitask.exe in the list.
Once found, Right-click on it and then select Open file location.
If the file location is C:\Windows\System32\wifitask.exe, don’t worry because it is safe. Otherwise, you need to worry because it can be a harmful malware named as wifitask.exe.
See – How to Clean Windows 10 PC on Malware or Virus attack.
How to fix wifitask.exe in Windows 10?
Fixing wifitask.exe in Windows 10 is quite easy. Here are most probable solutions, you should follow them in order to get quick results.
Scan for Virus
If you found wifitask.exe as a virus, scan your full system to eradicate the issue. Here is the process –
- Press Win+I at the same time to open Windows Settings app.
- When it shows up in the screen, click on Update & Security.
- On the running page, select Windows Security from the left column.
- Hover the cursor to the right pane and click on Virus & threat protection.
- Window Security page will appear, click on Scan options.
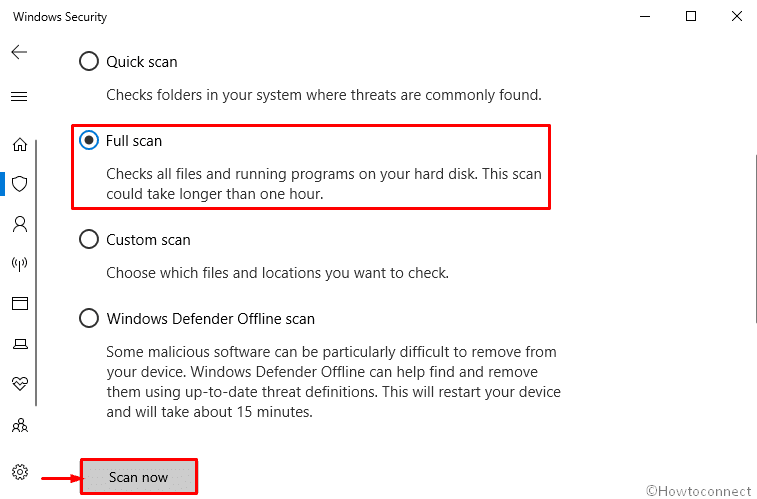
- On the following page, select the radio button of Full scan and then click on Scan now to initiate the process.
When you are done, Restart your PC and check if wifitask.exe in Windows 10 still exists.
Verify the Windows Account
Sometimes it happens that when you make any significant improvements in the OS, your account is placed in the unverified state by Windows 10. Because of this some security processes such as wifitask.exe start using high CPU. To fix it, you just need to verify your account and for that, do the following –
- Right-click on the Start button and select Settings from the list.
- On the following window, click on Accounts.
- Beneath your Account name, a Verify button is present. Click on it.
- Wait for a few seconds until the system brings up the new wizard. Once it turns up, click on the desired account you want to verify with.
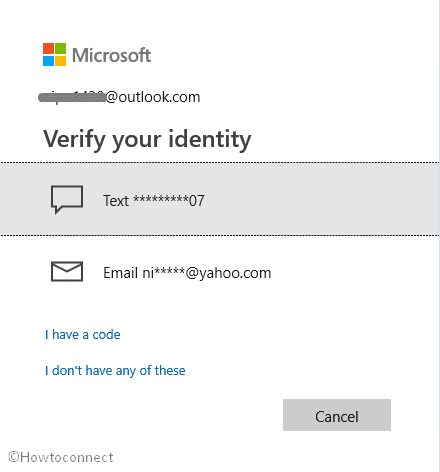
Enter the email id or phone number that it asks for and click on Send code.

Note – The verification process might differ and you can be asked to either enter the last 4 digits of your phone number or the alternative email address linked with your email.
A security code will be transmitted to your submitted account.
Put the verification code in the running wizard and then click on Verify.

Hopefully, it will fix wifitask.exe in Windows 10.
Run System File Checker (SFC)
If wifitask.exe in Windows 10 is corrupt, running SFC (System File Checker) will help you. The tool will not only scan but also and restore the original files from the cache. You should follow these steps –
- Press Windows + S keys and let the Search menu appear.
- Write cmd in the search box and when the result is brought up, click on Run as administrator.
- A permission dialog box will appear, click on Yes.
- A blinking cursor on a black window will emerge. Write
sfc /scannownext to it and press Enter.
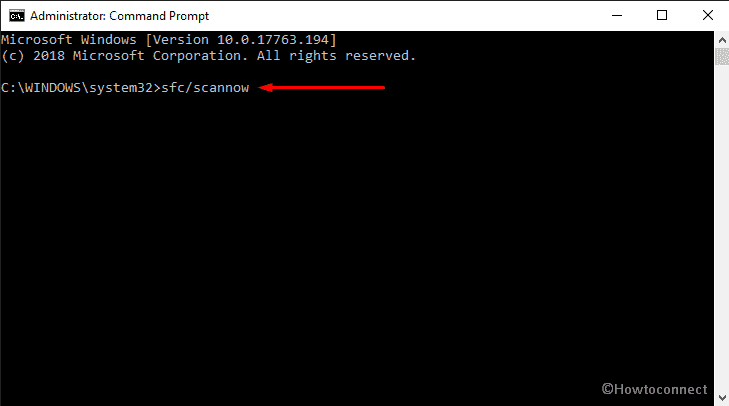
- All the system files along with wifitask.exe get scanned for any errors.
- Note that this is a time-consuming process. so, be patient and restart Windows 10 to end the process.
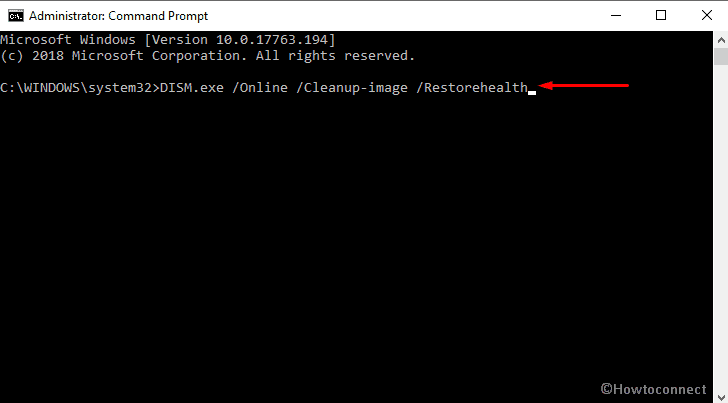
Run DISM command
- Open Command Prompt as admin.
- When it turns up on the screen, Type DISM.exe /Online /Cleanup-image /Restorehealth and press the Enter button to proceed with the resolution.
Check for updates
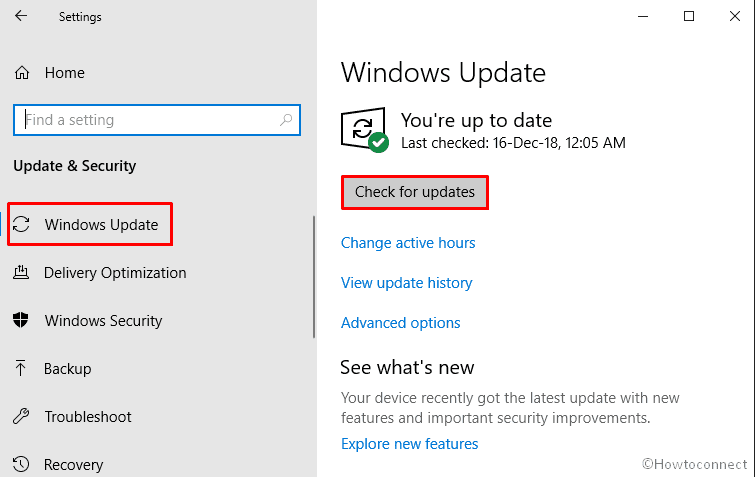
In some cases, the wifitask.exe in Windows 10 error occurs when the operating system is outdated. So, the best solution is to update it.
- Press Windows logo key and I simultaneously and select Update & Security after the settings app comes into the view.
- On the following page click on Check for Updates.
Windows Restore
The success rate of this fix is the highest in comparison to all the above solutions. You can restore the computer to some point prior to the error by going through these sequence of steps.
- On the Cortana search box, type System Restore and hit Enter. This will access the System Properties dialog box.
- Here, click System Restore button in the System Protection tab.
- Once System Restore appears, follow the on-screen guidelines and select an appropriate restore point.
- Find the relevant backup image and restore the system to that point.
- Finally, restart the system and check for the wifitask.exe errors
Reinstall Windows 10
When all the above, simple and advanced, solutions fail to fix the wifitask.exe in Windows 10 error, you are left with only one solution – reinstall Windows 10. Before doing so, take the backup of all your important files.
That’s all!!!
