If you want to disable sync settings in Windows 8 then you have to follow the below given steps.
Disable Sync Settings in Windows 8
- At first, you should computer login through default administrator account.
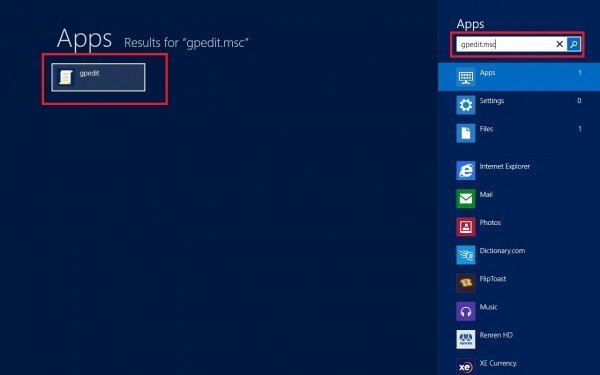
- Open charm bar by pressing Windows + C shortcut and choose Apps search box in the top side.
- Type – gpedit.msc in apps search box and press Enter button.
- Now Local Group Policy Editor window is coming. Browse following options in left panel one by one.
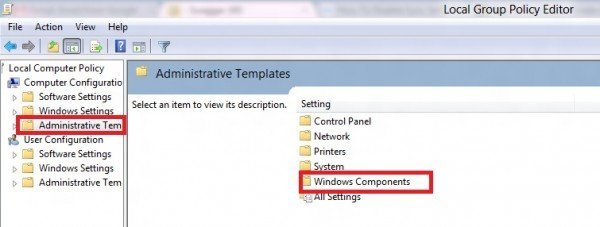
- Click on Computer Configuration, and select Administrative Templates.
- In administrative templates tab, click on Windows components.
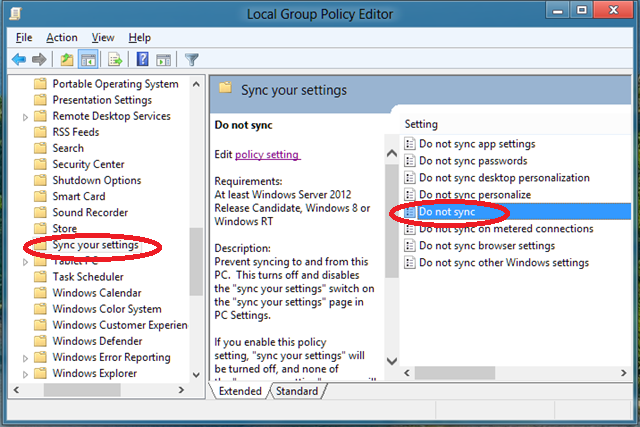
- Now you find Setting sync option in left panel.
- Double click on Do not synchronize user application Settings in the right panel and open new window.
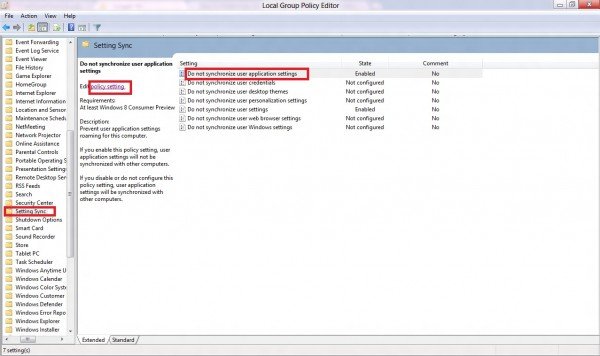
- Here check the box – Enabled and choose Apply and OK button at the bottom.
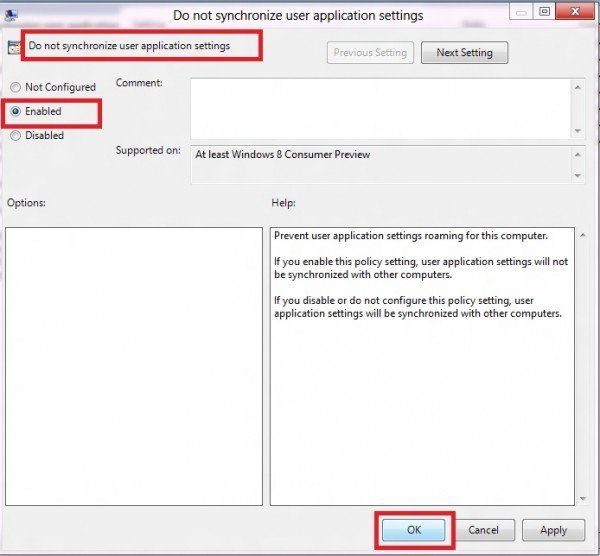
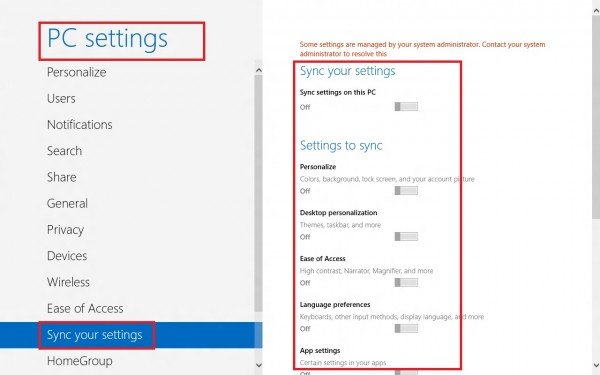
- If you have applied sync settings will be disabled.
Remarks
If you want to enable PC sync setting tools in the computer the open local user policy editor window and check the box – Not Configured Option in the same tab.