This article includes step-by-step instructions to enable or disable Windows Defender Firewall on your Windows 10 system with 4 ways. The methods involve clicking Shield icon on the taskbar, Cortana, Settings app and list view on the Start menu.
Let’s be clear that Windows Defender Firewall is the new name of Firewall and came into existence after the inclusion of Windows Defender Security Center in Windows 10. All you could do to block or allow various applications from the classic Control Panel is now available on the current interface.
List of ways to Enable / Disable Windows Defender Firewall in Windows 10 –
1. From Shield icon in Taskbar
2.Using Cortana search
3. From Start menu list view
4. Via Windows Settings app
5. With Help of Control Panel
6. By means of Windows Defender Firewall with Advanced Security
6 Ways to Enable and Disable Windows Defender Firewall in Windows 10
Here is Enable and Disable Windows Defender Firewall in Windows 10:
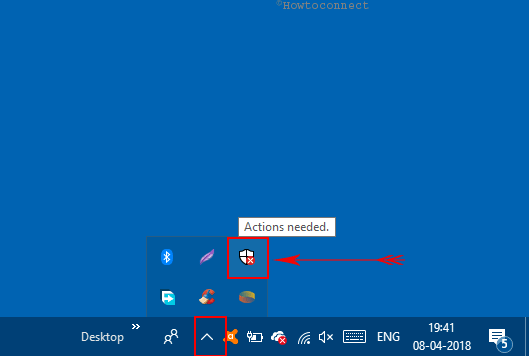
Way-1: Easiest way: Through Shield icon on Taskbar
Step-1: Hover the cursor to the taskbar and do a click on Shield icon in System tray.
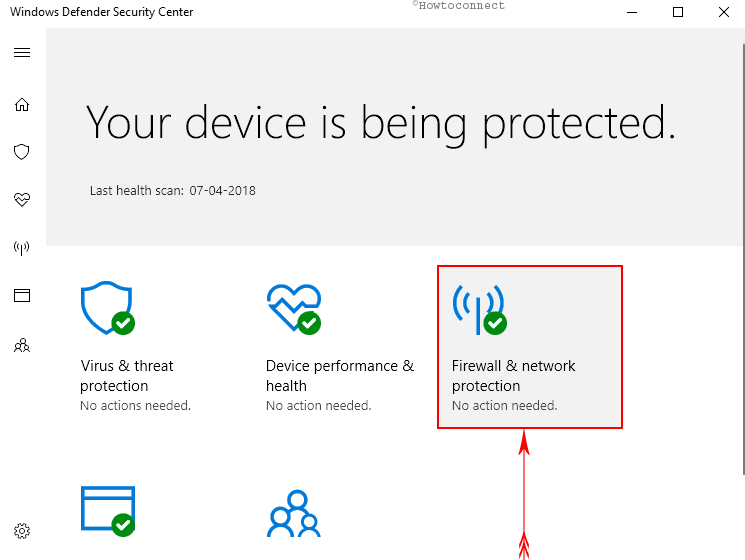
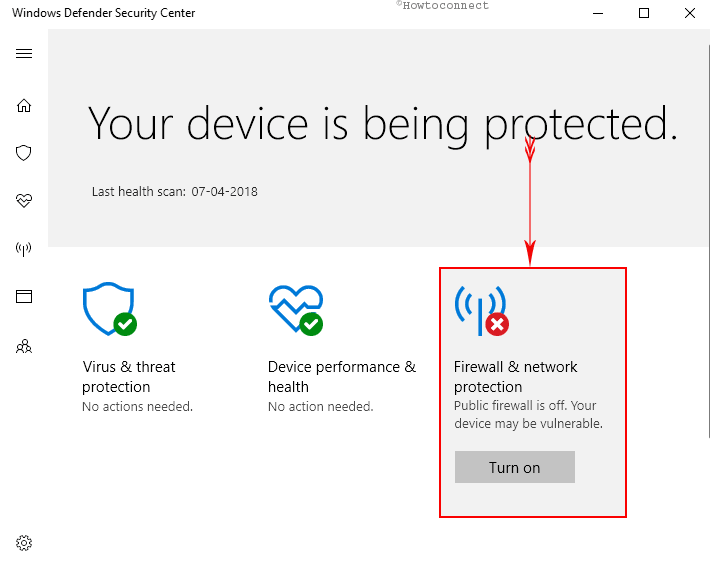
Step-2: The “Windows Defender Security Center” will come into view on the display. Click on Firewall & network protection to expand the options.
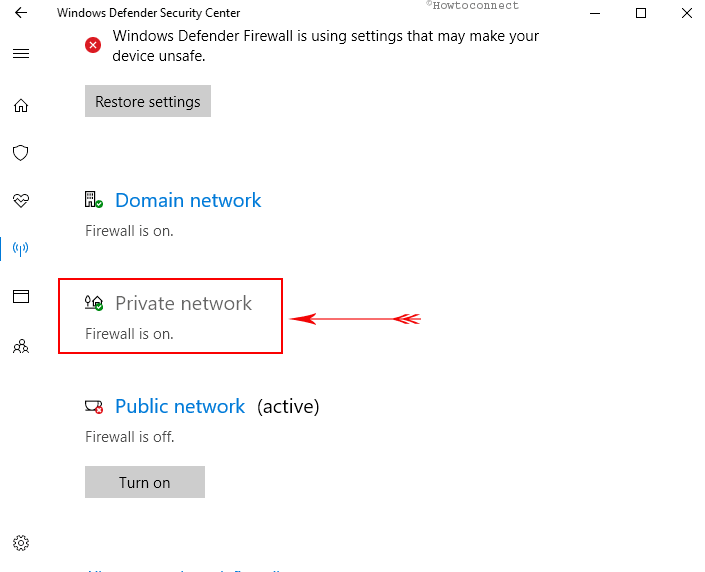
Step-3: Select Private network.
Step-4: To disable toggle the button under Windows Defender Firewall to Off.
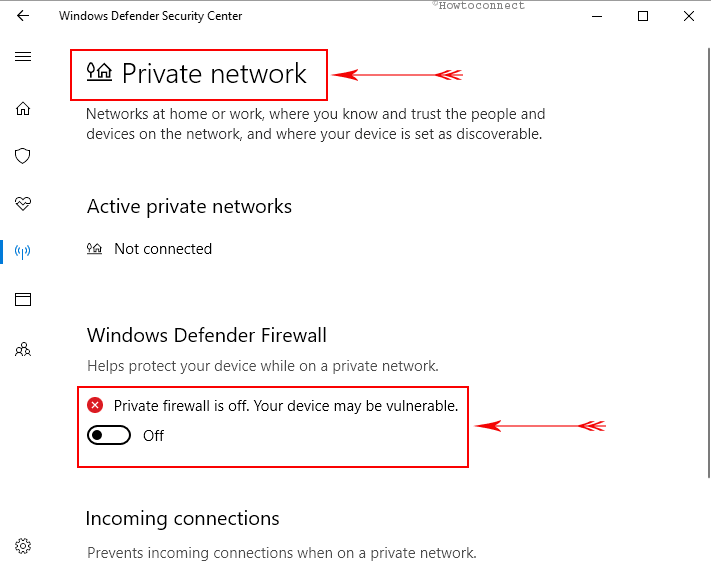
Step-5: When you will view a UAC dialog prompt, click on Yes.
Step-6: Now go back to the previous page using back icon on the window.
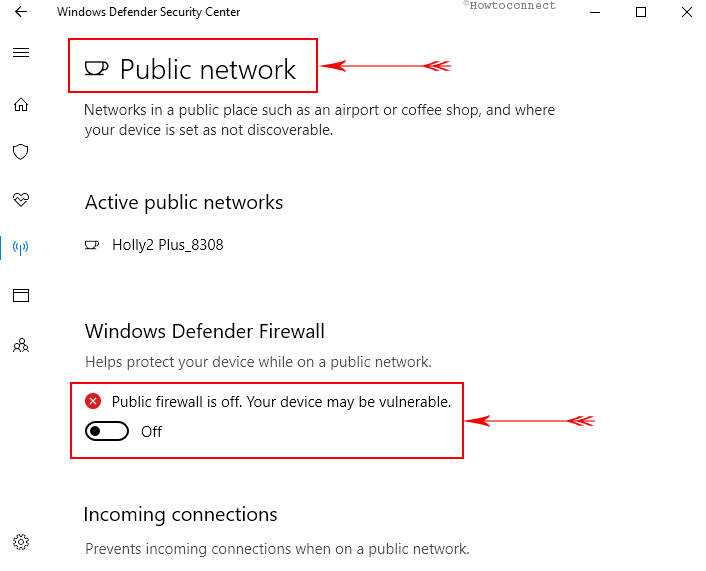
Step-7: Choose Public Network.
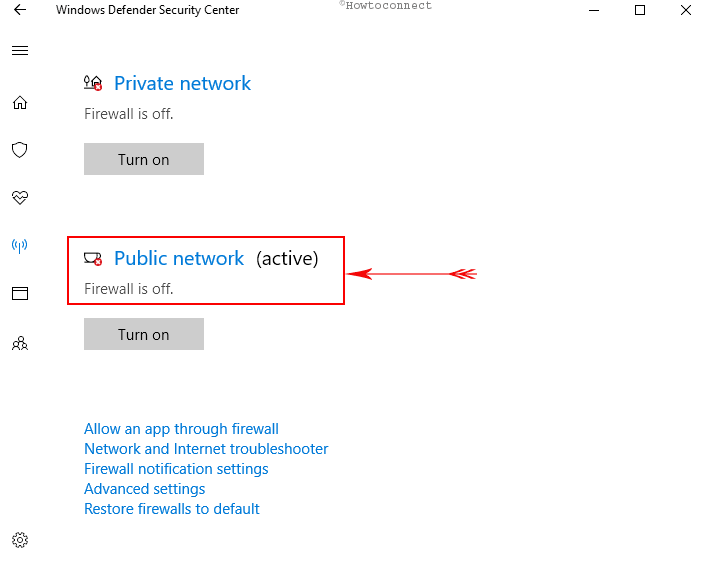
Step-8: When a new page appears toggle the switch of Windows Defender Firewall towards Off.
Step-9: This time you will also get a user account control locking your display. Select Yes.
Moreover, to enable the same press the Turn on underneath Firewall & network protection on the homepage of “Windows Defender Security Center”.
Way-2: Using Cortana Search
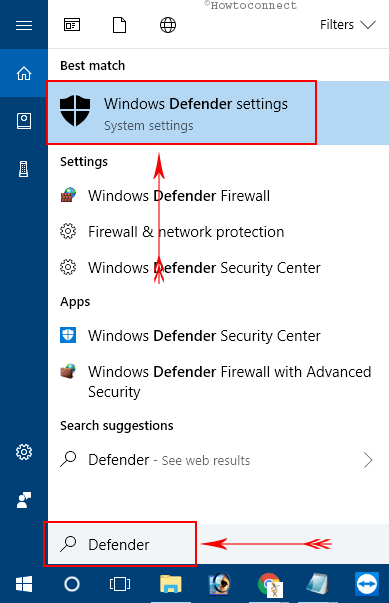
Write “Defender” in Cortana search box and select Windows Defender Security Center from results.
Once a new Windows is visible, repeat the same procedure from step 2-7 as advised in Way-1.
Way-3: From Start menu list view
Open the start menu and scroll down to W alphabet from the list view.
Make a click on Windows Defender Security Center once highlighted.
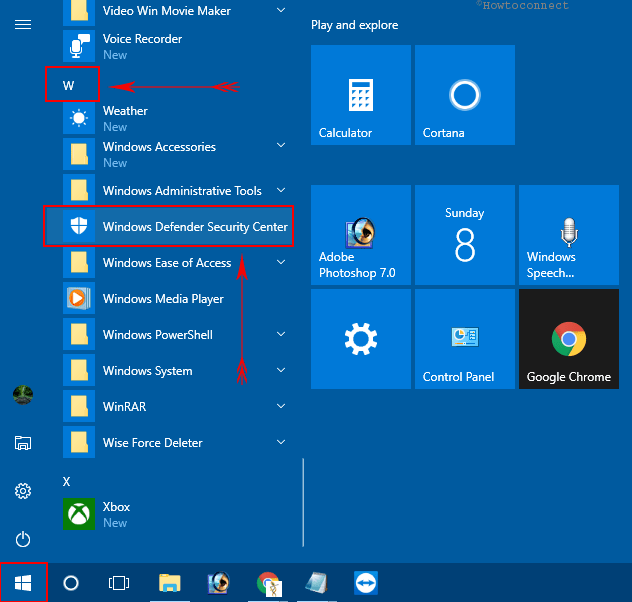
Now, follow the same instructions as discussed in Step 2-7 from Way-1.
Way-4: Via Windows Settings app
Jointly press “Win+I” hotkeys to launch Windows Settings app.
Move the pointer over the slate and perform a click on Update & Security.

After the new page flashes into view, Select Windows Security from the left pane. Move aside to corresponding right and do a click on Open Windows Defender Security Center.
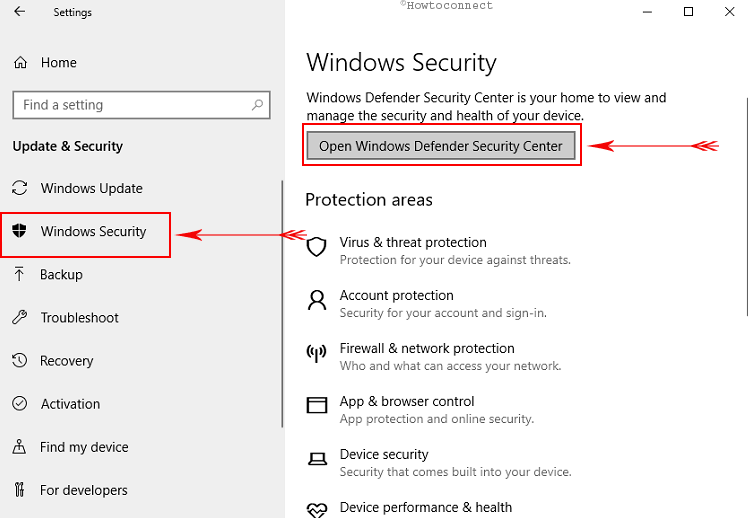
When the new window hangs on, follow the exact same actions from Step 2-7 in Way-1.
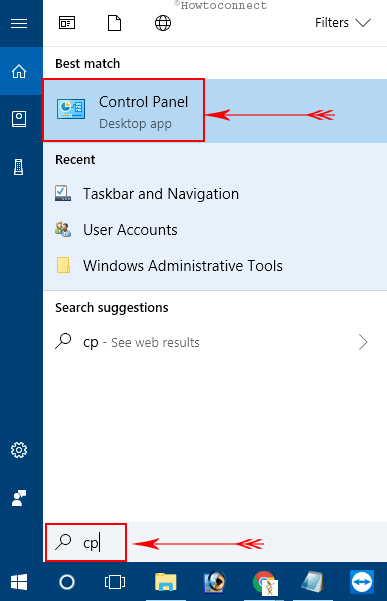
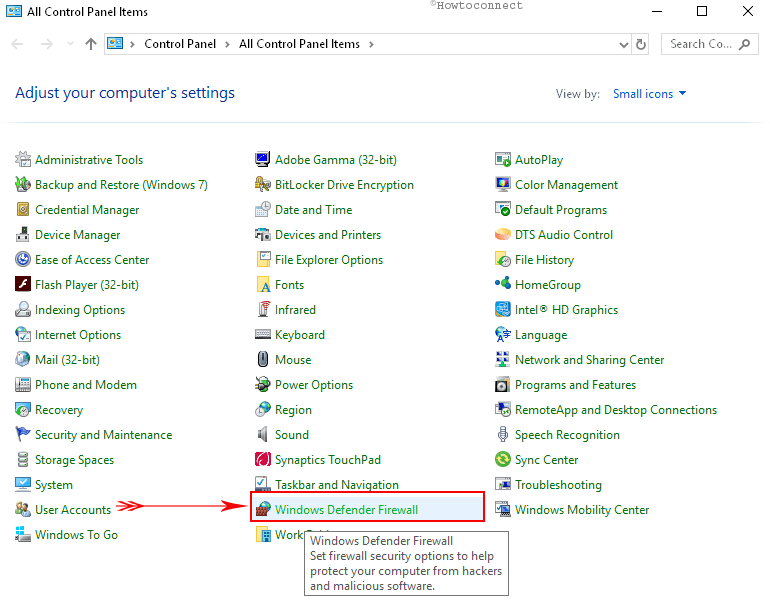
Way-5: With Help of Control Panel
The classic Control Panel still includes the Windows Defender Firewall so you can enable and disable the same from here easily. See the way
Press on the taskbar search icon, type cp and then hit Enter.
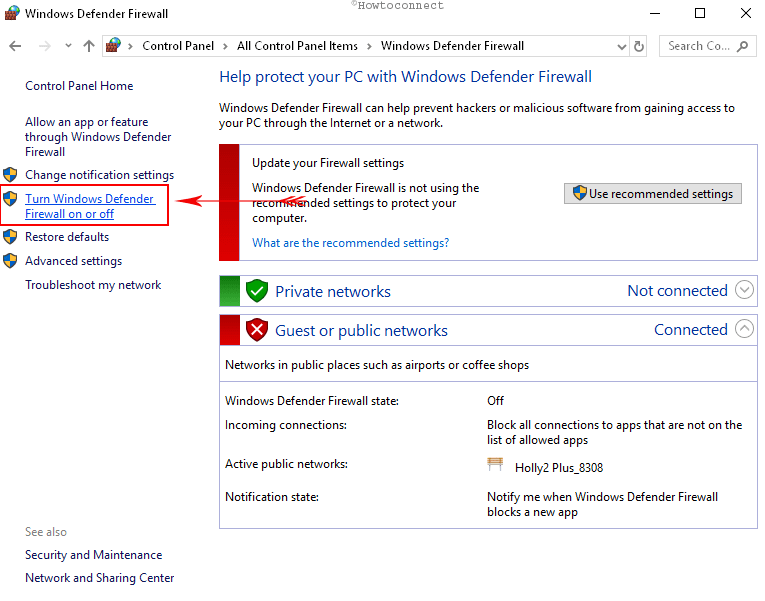
Click on the Windows Defender Firewall from the All Control Panel Items.
Choose Turn Windows Defender Firewall on or off from option from the left sidebar.
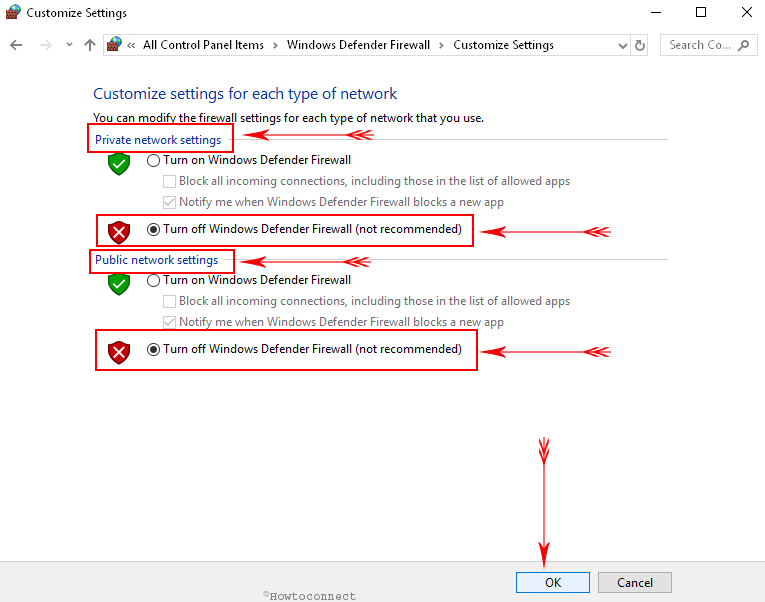
Under Private network settings, check the small round button before “Turn off Windows Defender Firewall (not recommended)”.
Similarly, click on Turn off Windows Defender Firewall (not recommended) in the Public network settings section.
Lastly, select OK to Disable Windows Defender Firewall in Windows 10.
To Enable it again, come back to the previous window and click on Use recommended settings.
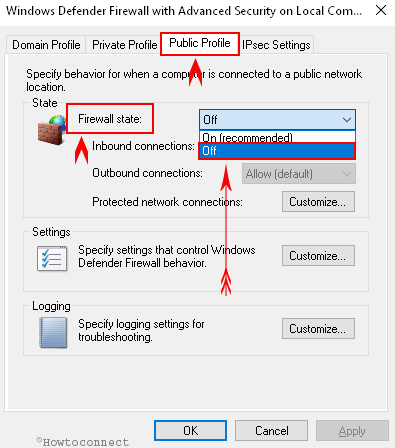
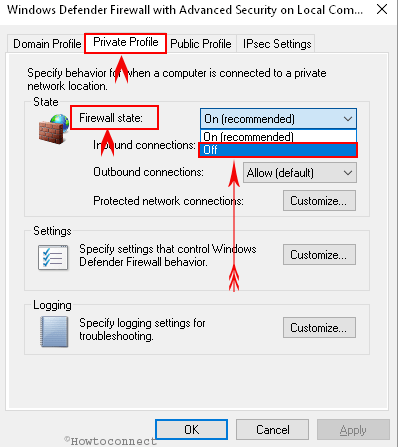
Way-6: By means of Windows Defender Firewall with Advanced Security
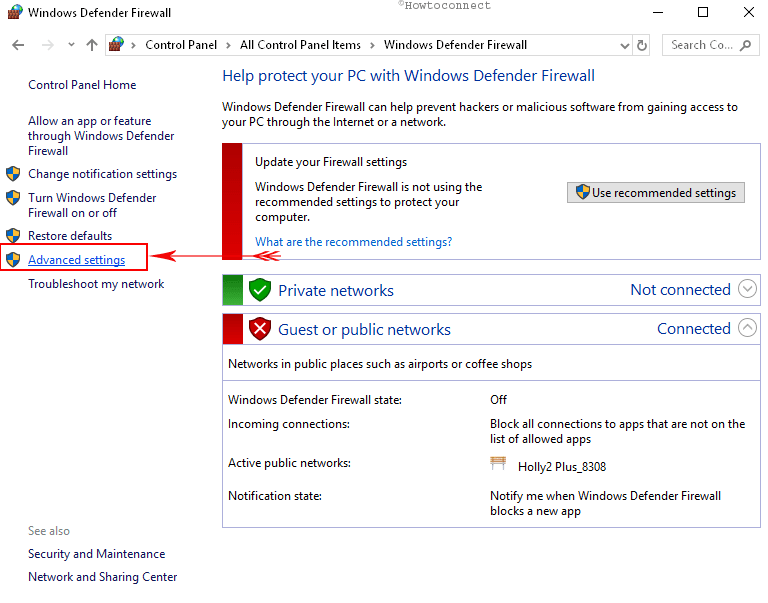
Once you reach “Windows Defender Firewall” using “Control Panel” with the help of Way-5. click on Advanced settings from the left pane.
Select Windows Defender Firewall Properties, from the middle pane of the current window.
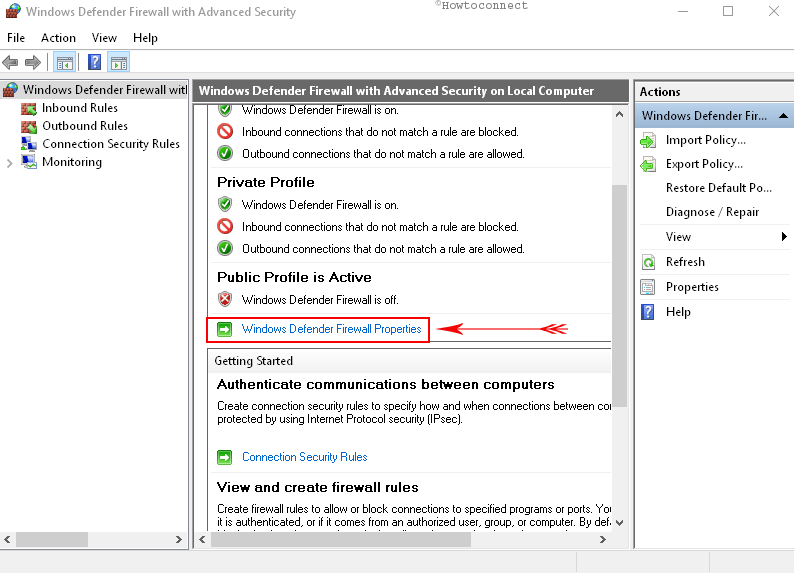
On Windows Defender Firewall with Advanced Security on Local Computer wizard, switch to the tab Public profile. Click on the drop-down, adjacent to Firewall State and choose Off. Select OK.
In the same method, choose “Private profile” tab, click on the dropdown facing “Firewall State” and press Off. Choose OK.
That’s all about the ways to Open Windows Defender Firewall in Windows 10. So simple and easy to execute! But means a lot while protecting your Windo