Microsoft has finally made Windows 10 November 2019 Update Version 1909 live for all users after long testing. Generally, with each major update, the company provides additional features moreover fixes for reported issues. But, this time the main focus was more on augmenting the stability of Windows 10 operating system rather than adding something new. Though some features have been included such as better managing notifications, expanded navigation pane, key-rotation option, ability to create an event from the Calendar flyout and so on.
Under normal conditions, Microsoft provides newly released updates automatically but sometimes it takes time. So, if you are overmuch excited to try out Windows 10 November 2019 Update Version 1909 right away, there are three different ways to get it manually. Choose any convenient one from the below-listed methods –
Install Windows 10 November 2019 Update Version 1909
Here is how to Install Windows 10 November 2019 Update Version 1909 –
1] Update directly through Windows Settings
You can grab the latest version of Windows 10 i.e November 2019 Update instantaneously from the Settings app. Here’s how –
- Press Windows key and I in one go to open the Settings interface.
- Once it becomes visible, click on Update & Security.
- On the subsequent page, move to the right-hand side and hit the button named Check for updates.
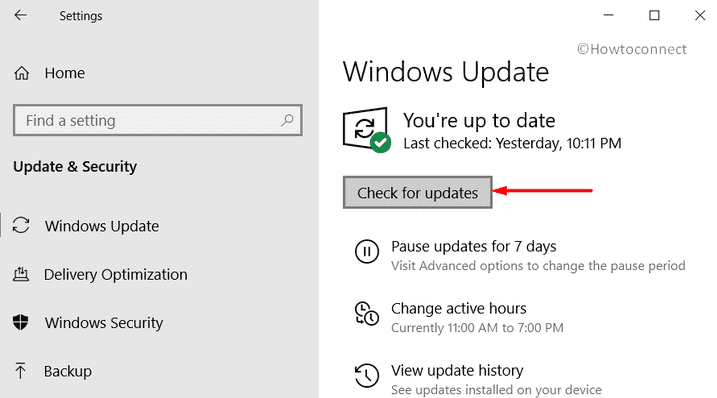
- When the system gets version 1909 available to download, get it and install the same as well. Make sure you are present in front of the PC as the procedure might ask you to restart Windows 10 several times.
You can also pursue – 4 Ways to Update Windows 10.
2] Install Version 1909 from USB
Media Creation Tool lets you create a USB flash drive in order to install Windows 10 November 2019 Update Version 1909. For that, arrange a drive with a minimum of 8 GB space and then proceed with the below steps –
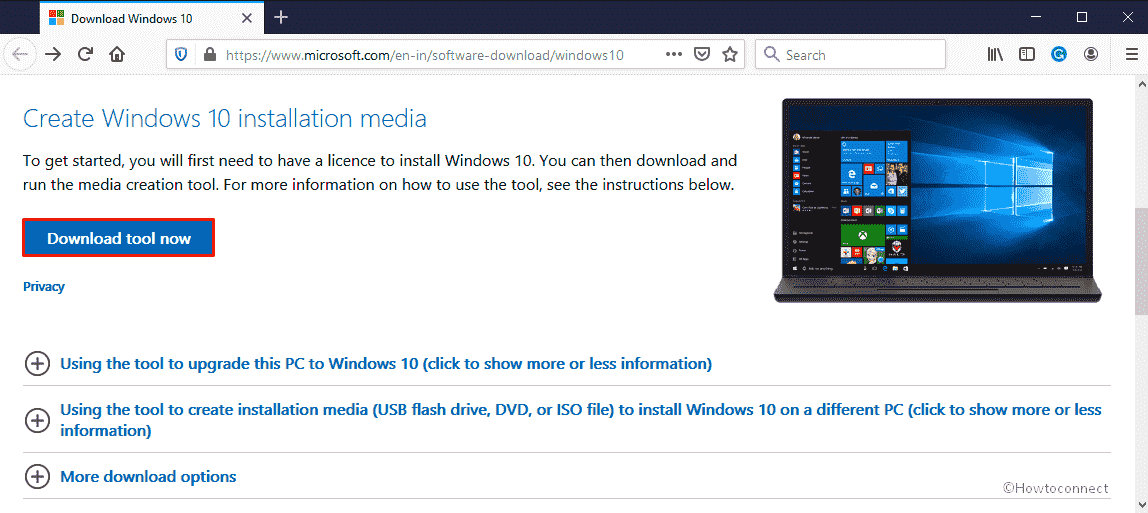
- Launch any web browser to navigate the official download page of Microsoft.
- After getting into the page, click on Download tool now button that you see under Create Windows 10 installation media segment.
- Once the downloading process ends, go to the folder where your system saves the downloaded files and double-click on MediaCreationTool.exe.
- A UAC will prompt up straight away, click its Yes button to carry on.
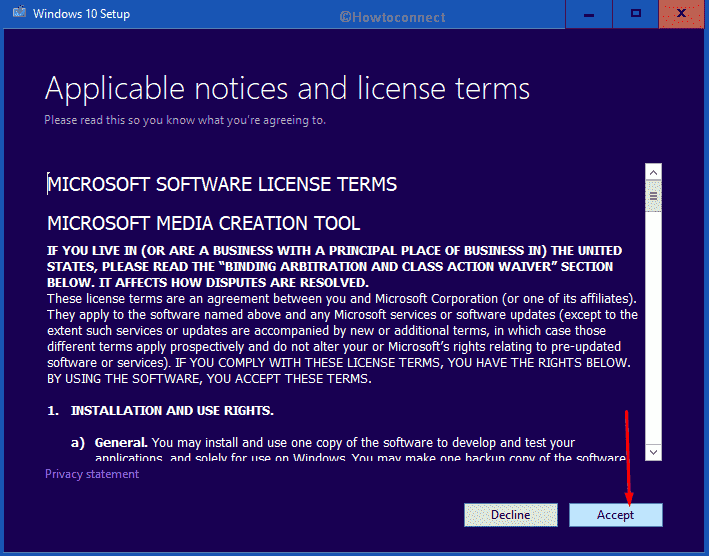
- Now, wait for a few seconds and let Windows 10 setup wizard becomes ready. Once the license terms show up, hit the Accept button.
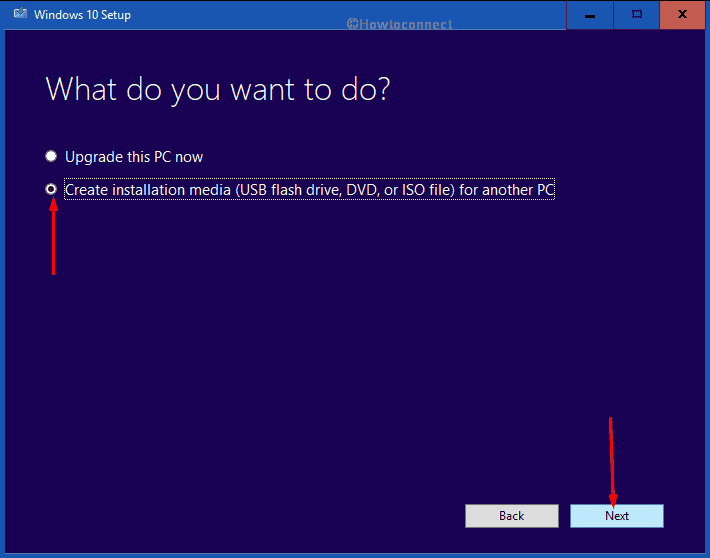
- On the concurrent page, click on the radio button assigned to Create installation media (USB flash drive, DVD, or ISO file) for another PC followed by hitting Next.
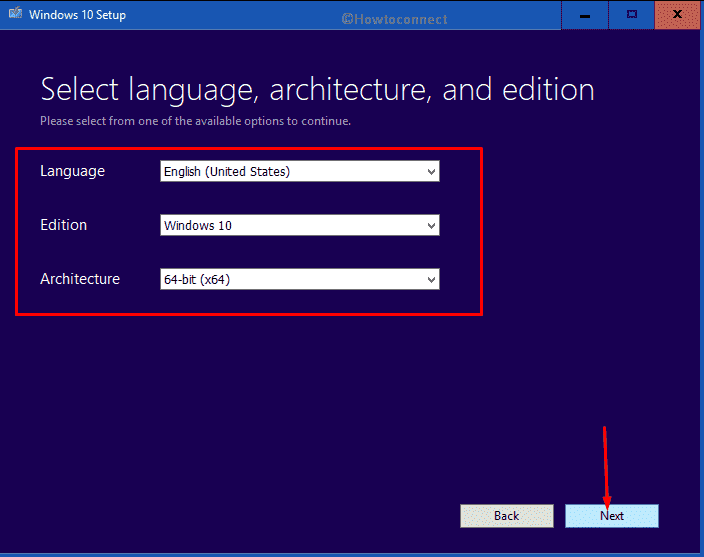
- Now, you will be demanded to choose the preferred Language, Edition and Architecture. Though the tool picks up the right edition for each by default, in case of changing the same you can use the drop-down menu located beside the options. Click on Next.
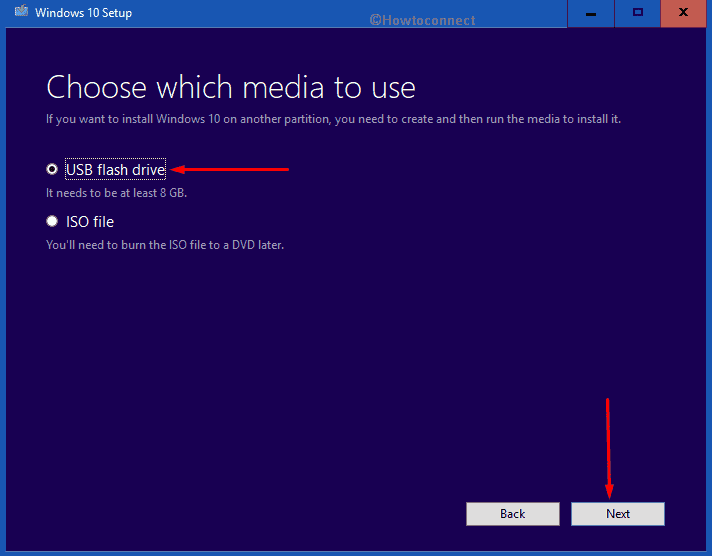
- Consequently, when the tool put forward options to choose which media to use, click the radio button of USB flash drive and then select Next.
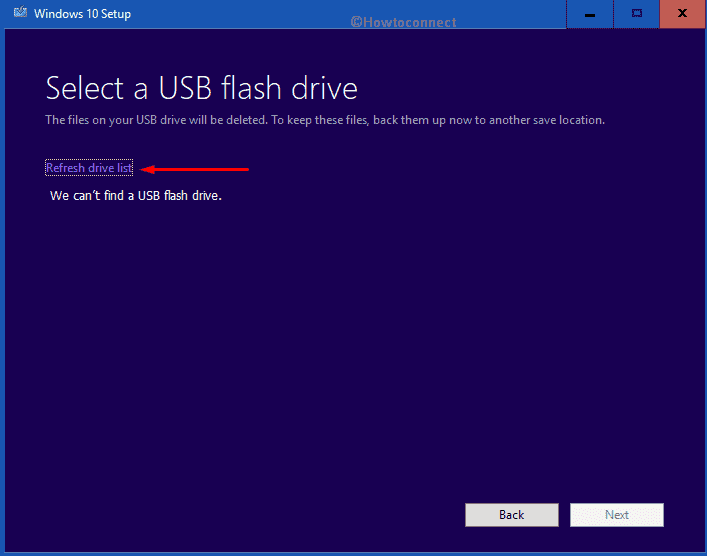
- Thereafter, choose the USB drive where you want to write the files. Make sure to select the right one as the procedure will completely wipe out the drive. If you don’t get it in the first instance, click the link entitled Refresh drive list and then opt for the correct one.
- In the end, click Next for the last time to download the associate setup file of Windows 10 November 2019 Update Version 1909.
- Now, you are ready to install the same through USB.
3] Clean Install Windows 10 November 2019
Clean installation is mostly used to make Windows 10 performance better moreover lessen the startup time. Furthermore, it prevents the update error messages that come up unaccountably while attempting to getting the same. So, without further ado lets jump into the process of clean install Windows 10 November 2019 Update Version 1909 –
- Open a browser you prefer to surf the web and head over the official page of Microsoft.
- Hover the cursor to Create Windows 10 installation media area and then click on Download tool now.
- A prompt will be stretched out from the bottom, click on Run from there.
- A UAC dialog will roll out for your consent. Click the Yes button to give compliance.
- When Windows 10 Setup wizard becomes prepared, click on Accept to agree with its terms and conditions.
- Following that, select the radio button of Create installation media (USB flash drive, DVD or ISO file) for another PC option and click the Next button.
- On the subsequent page, set your preferred Language, Edition and Architecture manually if you are not okay with the already selected ones and then hit Next to move further.
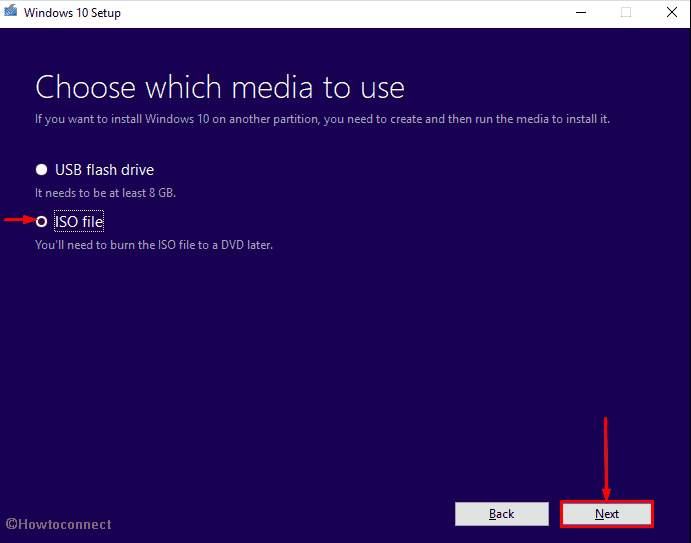
- After that, click the radio button allocated for ISO file option henceforth hit the Next button.
- When a pop-up appears asking you to select a path, choose the desired location where you want to store the file and then click on Save.
- Now, all you need to do is wait until the procedure hits 100% completion. Once done, click on Finish to exit from the Media creation tool.
- As of now, you need to and after doing so, insert it into one of the ports.
- Once the system commands you to press either of ESC, Del, F2 or F12 to proceed Boot options Setup screen, hit the required key.
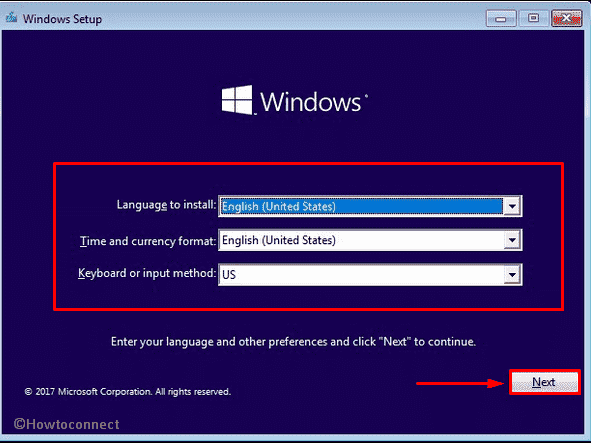
- From the forthcoming wizard, choose the suitable options from the dropdowns of Language to install, Time and Currency Format, and Keyboard or input method gradually followed by clicking Next.
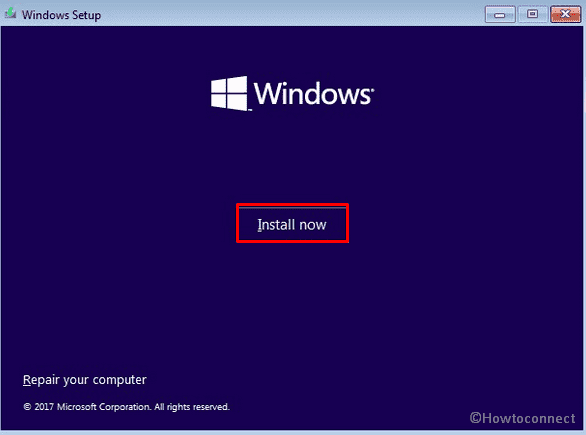
- On the imminent wizard, click on Install now button.
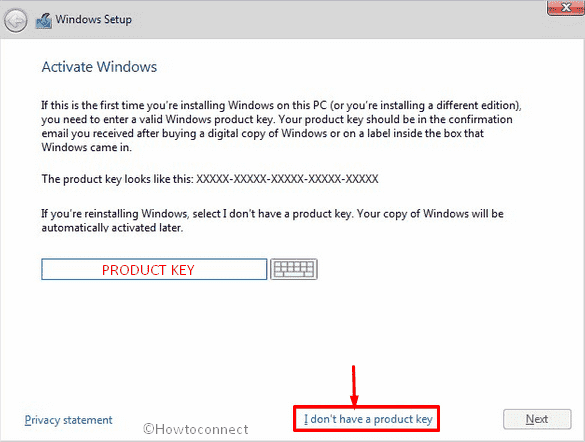
- Once you asked to provide the product key, write down the genuine one in the specific bar. In case of not having it, click on I don’t have a product key.
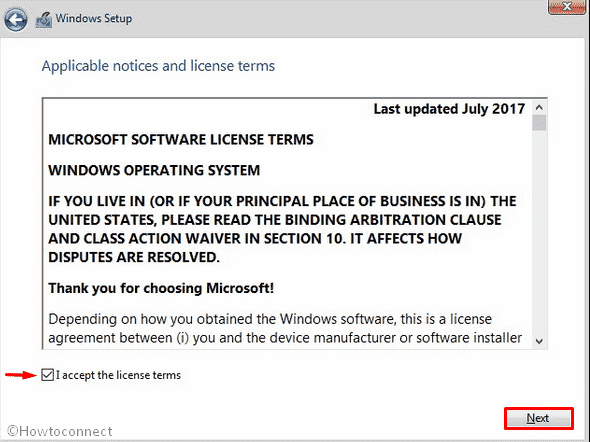
- Now, the setup wizard will present applicable notices, hit the checkbox of I accept the license terms and then click on Next.
Note – The steps we are are going to describe afterward are flexible. Therefore, pick out the option that is preferable for you to install Windows 10 November 2019 Update Version 1909.
- On the currently running wizard, click on Custom: Install Windows only (advanced).
- Doing so will show you the new drive connected to your PC. Select the right one and tap the Next button.
- A warning box will come into the view that says about the deletion of existing content. Here, you need to click on OK.
- Though the ulterior process is automatic, be present opposite your device and if the setup tool asks to choose an option, select the correct one.
- The whole process will take a good amount of time and in-between, the PC will restart itself several times as a part of the installation.
- Once the procedure is done, either put your Microsoft email account, phone and Skype identification in the respective fields when prompted or proceed with Set up a PIN option.
- Next, click the Yes button if you are eager for turning on Cortana.
- Finally, choose the Privacy settings as you like and then click on Accept to finish the process.
Update –
Now you are able to Install Windows 10 November 2019 Update Version 1909 using the built-in Update assistant offered by Microsoft. Simply navigate to this link and follow the instruction showing on the tool window up to last.
Methods:
1] Update directly through Windows Settings
2] Install Version 1909 from USB
3] Clean Install Windows 10 November 2019
That’s all!!