Firefox contains several built-in options that can help you to speed up the web browsing. This browser has designed its cache system in a way so that you can store the files locally rather than having to fetch them every time. It also manages the size of the cache on various factors. In this regard, one such awesome cache dealing option is to Override Automatic Cache Management in Firefox.
When you visit any website in Firefox, the browser automatically accumulates data such as JavaScript files, images, text and so on. After collecting the data, it locally stores them on your hard disk in the form of cache. So, whenever you visit any page, Firefox retrieves data from the disk instead of the internet which helps the browser to load pages quickly. But if the cache stored is too big, you can face issues. Therefore, with Override Automatic Cache Management in Firefox, you can always organize the maximum cache size on your disk.
When you select this option, Firefox lets you configure the cache size limit (in MB). Depending on the type and size of your hard drive, you can set the value accordingly. Since the cache is accessed through the disk, so there are chances to experience a sluggish performance if you have a small hard disk. And if you have lots of drive space available, increasing the cache limit will eventually benefit you. So, let us move towards the sequence of steps that can help you to manage the cache in this specific browser.
How to Override Automatic Cache Management in Firefox
You are just a few steps away from enabling the option Override Automatic Cache Management in Firefox. Follow the below steps properly to accomplish the task.
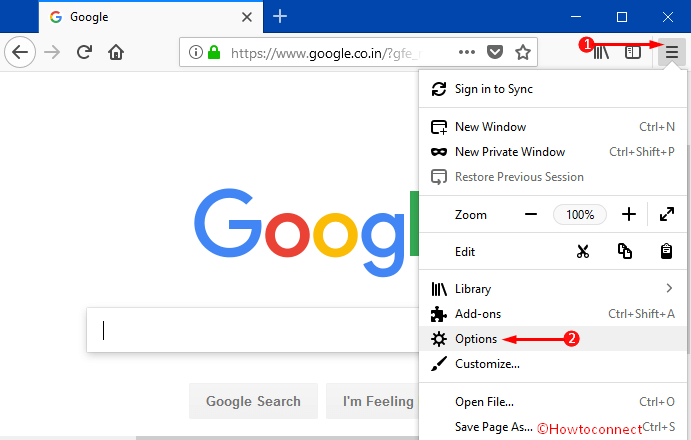
Step-1: Open Firefox browser on your computer and click the Menu button on the extreme top right. When a menu comes into view, locate and click Options.
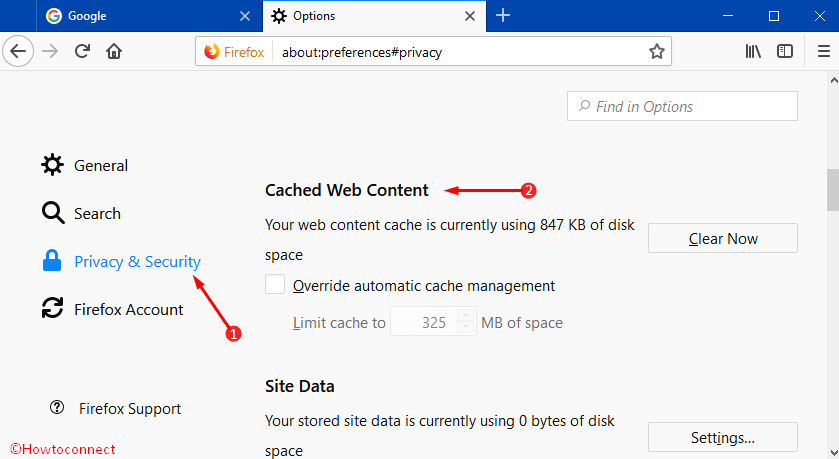
Step-2: On the Options page, click Privacy & Security on the left sidebar. On its corresponding right pane, scroll to the section Cached Web Content.
Note – Alternatively, you can directly go to this page by typing about:preferences#privacy on Firefox’s address bar and press Enter.
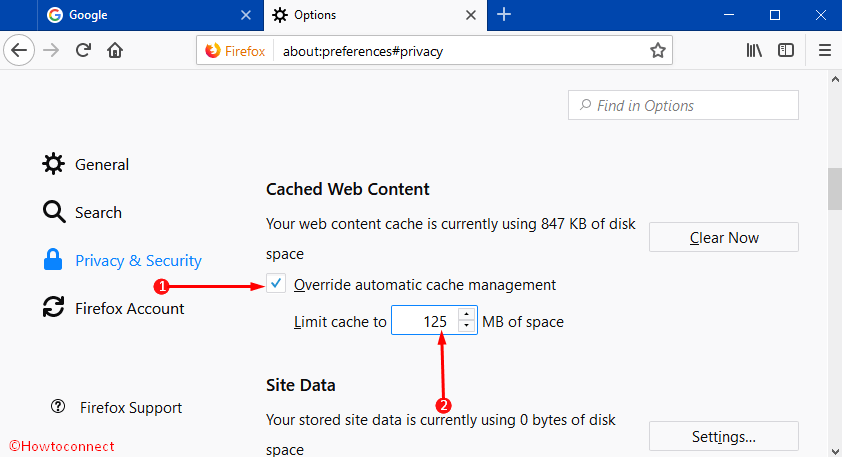
Step-3: Here, under Cached Web Content section, you can notice the option namely Override automatic cache management. So, checkmark this option and it highlights Limit cache to box. Now, assign your preferred number in the box in MB.
Conclusion
We know cache is the element that provides in-memory storage. Additionally, it also manages the data on your PC. Override automatic cache management in Firefox is a built-in setting which is kept unchecked so that you can enable this option according to your choice. The instruction above will help you to manage this setting in a smooth way. Read the steps carefully and apply them properly.