Installing Microsoft Office 2010 brings an extra option on right-click context menu. This is ‘Shared folder synchronization’ that might annoy you with its appearance on Windows 10. To clarify, this Desktop context menu option refers to its Microsoft SharePoint Workspace known as Groove. However, you can easily remove Shared folder synchronization using registry tweak and cmd.
You might think to delete the context menu option without uninstalling Office 2010. Both the methods here will allow you to remove groove folder synchronization, furthermore, keep MS office as it is.
Remove Shared folder synchronization from right click menu in Windows 10
Here is how to remove Shared folder synchronization from right click menu Windows 10 –
1] Using Regedit registry tweak
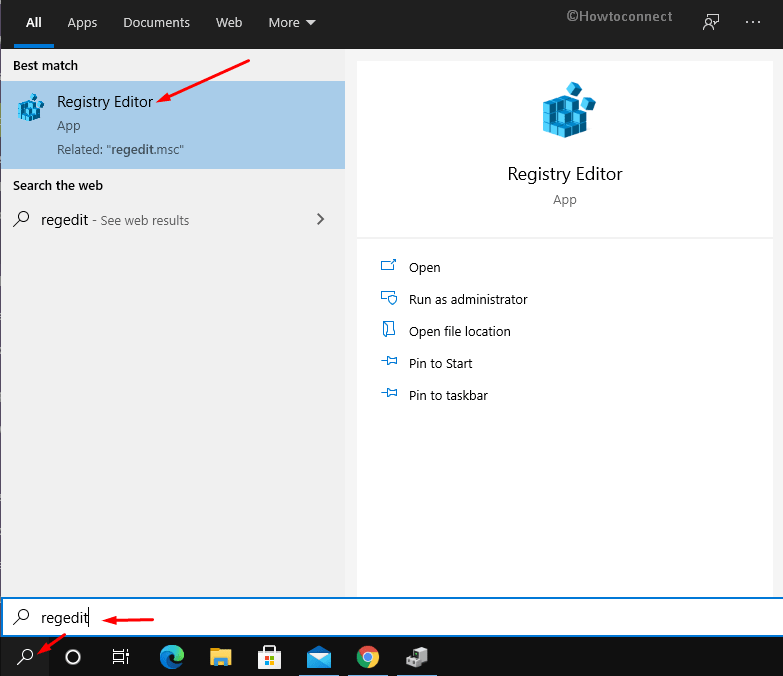
- Click the – Search icon located on the taskbar.
- Type – regedit.
- Press – Enter.
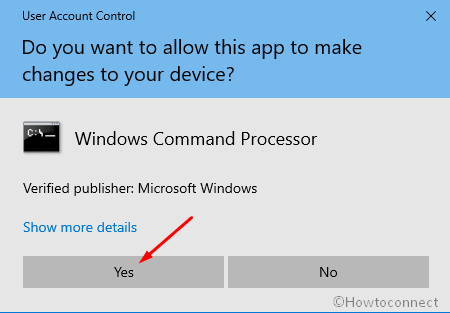
- On user account control prompt, click – Yes.
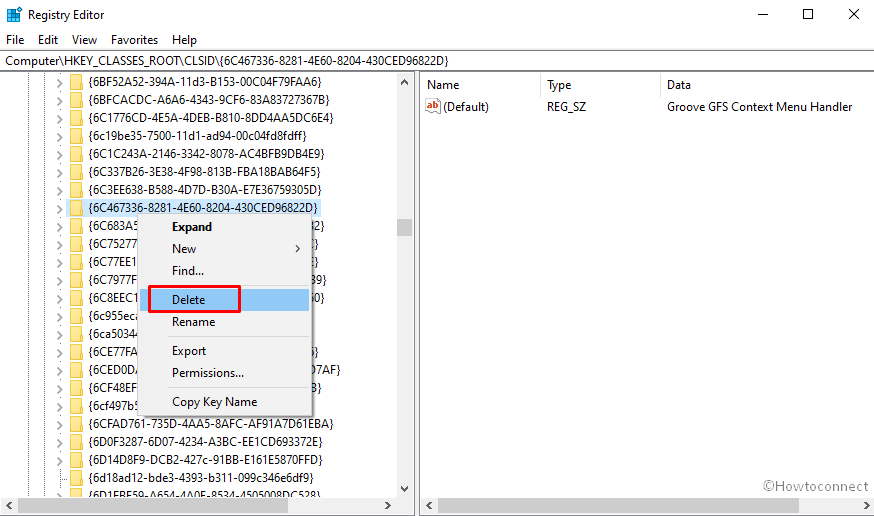
- Reach – HKEY_CLASSES_ROOT\CLSID\{6C467336-8281-4E60-8204-430CED96822D}
- Right click on the sub key {6C467336-8281-4E60-8204-430CED96822D}
- Select – Delete.
- Reboot your computer or restart Windows Explorer and experience the removal.
2] Via CMD Command
In addition, you are able to delete Groove folder synchronization from context menu using a cmd command –
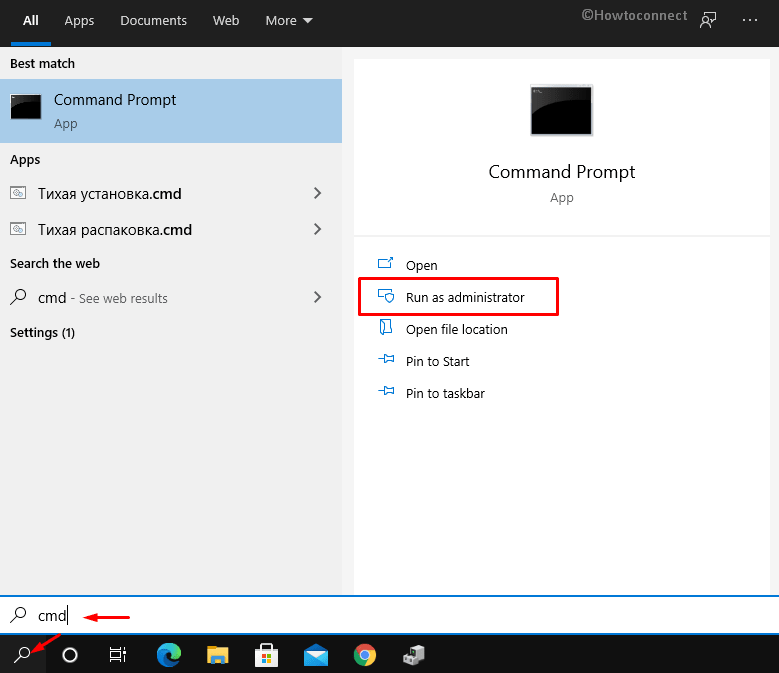
- Press – Winkey.
- Type – cmd.
- Right click the result and select – Run as administrator.
- Click Yes on UAC prompt.
- Copy the following cmd command (for 64-bit Office) –
regsvr32 /u C:\Program Files\Microsoft Office\Office14\GROOVEEX.DLL
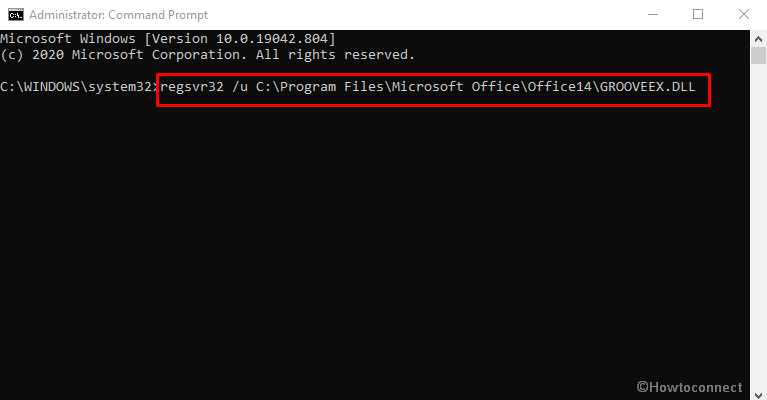
- Paste into the command prompt and hit – Enter.
- Finally, you will come across a confirmation pop up about the successful execution of the command.
Methods list
1] Using Regedit registry tweak
2] Via CMD Command
That’s all!!