How to Fix Resource Protection Couldn’t Start Repair Service in Windows 10 – When you encounter a glitch on you machine the best support for you is SFC Checker, but what will happen when this SFC checker finds itself helpless. This type of situation may arise after getting a fresh update on Windows 10 machine.
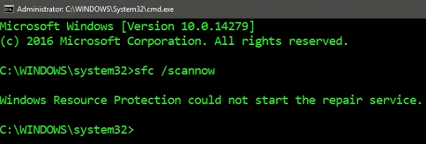
When you face the circumstances like this running sfc /scannow addresses the message – Resource Protection Couldn’t Start Repair Service – instead of this patching up the flaw. Many of the users are confronted with this issue on receiving update 14279 on his Windows 10 machine. So, focusing on this issue, we are here demonstrating few fixes to resolve it.
How to Fix Resource Protection Couldn’t Start Repair Service in Windows 10
Fix 1
One important reason behind this trouble stated by experts is the wrpint.dll that went missing from the directory of the respective PCs of x64 and x86. So, your piece of effort is to copy the wrpint.dll back to its original location and guess what, it works like magic!
Note – The below workout is applicable for Windows 10 build 14295 and any new builds in near future and this works for both x64 and x86 machines.
- Hit the folder symbol that is distinctly noticeable on the taskbar and thus, permit the “File Explorer” to be observable on your screen.
![]()
- Closely observe the menu bar, and thereafter click or hit “View” tab, and henceforth tick mark the cell that reads as “File name extensions”.

- Now, come to your desktop, do a “right click” on an empty slot and from the appeared list of options, click or hit the choice “New” and then “Text document”.
- Now, name it as “scanfix.cmd” and make sure that you erase off “.txt” from its end and hence, the name has to be “scanfix.cmd” (without quotes).
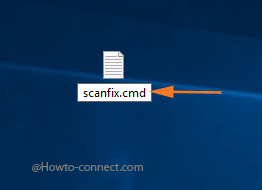
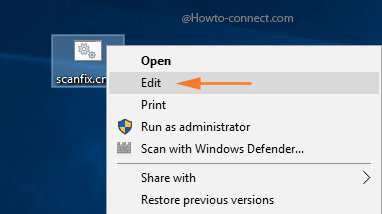
- You will notice one icon with a name “scanfix.cmd” is placed on your desktop, do a right click on it and appoint a click or hit on “Edit”.
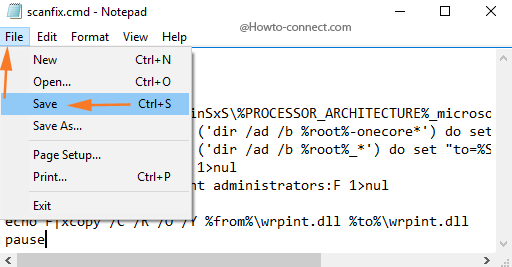
- Now, copy this entire code as it is and paste it in the “Notepad” and once done, hit “File” from the menu bar and thereafter hit “Save” option.
@echo off
cls
setlocal
set root=%SystemRoot%\WinSxS\%PROCESSOR_ARCHITECTURE%_microsoft-windows-servicingstack
for /f "delims=" %%A in ('dir /ad /b %root%-onecore*') do set "from=%SystemRoot%\WinSxS\%%A"
for /f "delims=" %%A in ('dir /ad /b %root%_*') do set "to=%SystemRoot%\WinSxS\%%A"
takeown /F %to%\* /R /A 1>nul
icacls %to%\*.* /T /grant administrators:F 1>nul
echo on
echo F|xcopy /C /R /O /Y %from%\wrpint.dll %to%\wrpint.dll
pause
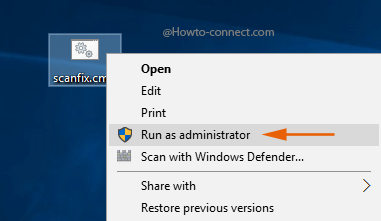
- Now, again perform a right-click on “scanfix.cmd” and from the emerged list of choices, click or hit “Run as administrator”.
- Some executions will be done, exit from the “elevated Command Prompt”.
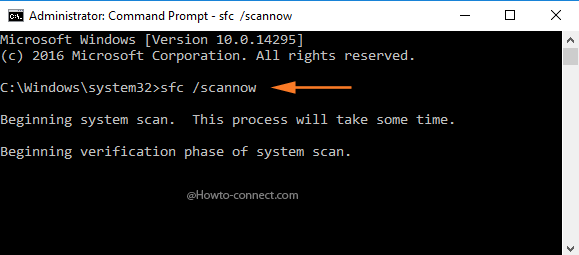
- Now, right-click “Start” symbol and click or hit the choice “Command Prompt (Admin)” and therein write “sfc /scannow” and you will witness the scanning.
Fix 2
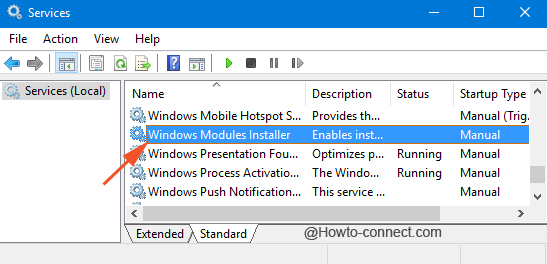
Set the Startup type of Windows Modules Installer service to Manual.
- Go to the Cortana search field and thereon type “services.msc” and the same name will be highlighted at the top, click on it.

- In the opened window, scroll down and find out the service named as “Windows Modules Installer”.
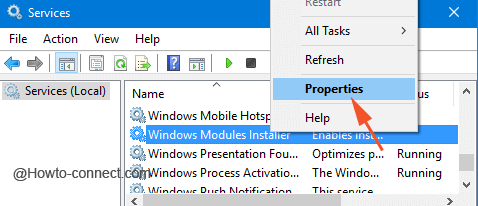
- Right-click on that specific service and click “Properties” from the resultant menu.
- In the next seen tiny Properties box, see the “Startup Type” section and pull down its options and thereon opt for “Manual”.
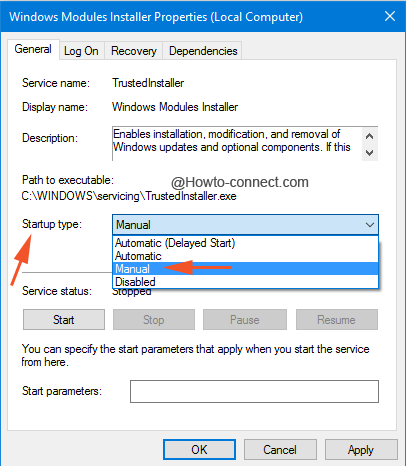
- Implement the change by hitting “Apply” and successively “Ok” buttons.
Fix 3
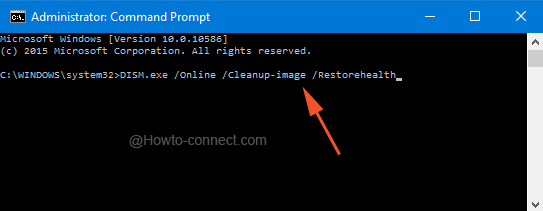
At first, you need to get the help of DISM tool.
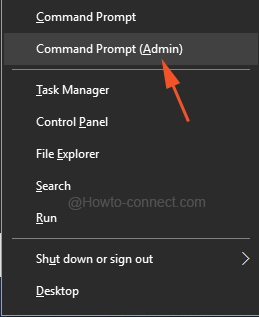
- Jointly hit the keys of “Win and X” and from the arrived list of options, click or tap “Command Prompt (admin)“.
- In the command line, type this and henceforth hit Enter – DISM.exe /Online /Cleanup-image /Restorehealth
You can review what was the culprit creating the mess up.
When this build is installed, because of some bugs, the SFC /scannow is broken and thus showcases the error note after the scan is completed.