How to Fix 0x80240031 Error in Windows 10 – This build is pushed not a long ago and plenty of the Surface as well as PC users, are continuously stating about a severe mess up. They confront the flaw having Error number 0x80240031 while the update files are being installed. Anyway, you will read further the steps to fix How to Fix 0x80240031 Error in Windows 10.
To come out of 0x80240031 is a tricky task and all will set.
How to Fix 0x80240031 Error in Windows 10
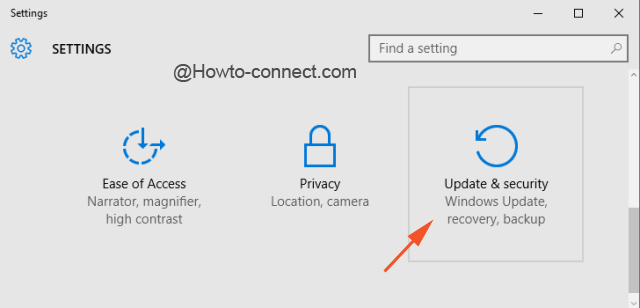
- Hit “Win+I” in order to launch settings application.
- Move to the last one “Update & Security” and click it.
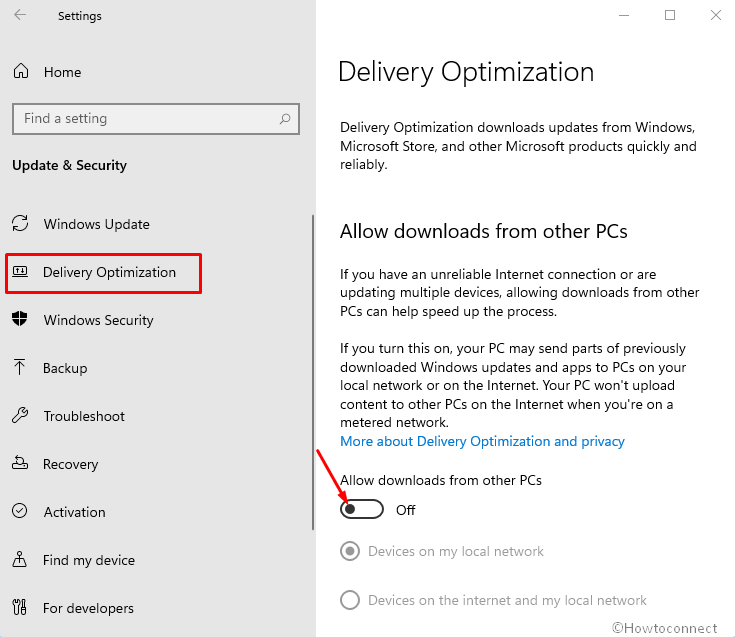
- On the right “Update & Security” Settings page, click the link which says “Delivery Optimization”.
- Go to the right pane, and turn off the – Allow downloads from other PCs.
- Now you need to once more download the updates after clearing the cache.
- Download this script (residing at Technet website) and hit on it to run.
- You witness “Reset Windows update tool” is before you on the screen
- Click on “any key” on your Keyboard.
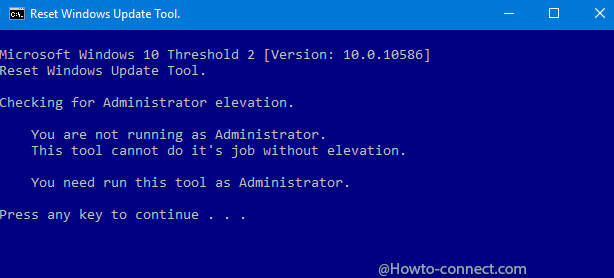
- The tool will run in the background and after a while, it will clean the required files and folder and prepare your machine once more download the files.
- Again go to “Update and & Security” and hit “Check for updates”.
- The files will be downloaded and installed successfully without any approach on behalf of you ahead.
If you manually purge update cache you need to run several commands time and again and an average user may commit mistakes in the middle of the process. The given script is from the official website of TechNet so there is no need to be concerned about it.