Methods to Restore Classic Windows Defender in Windows 10 After Creators Update. – In the Windows 10 Creators Update, the users have encountered with a new experience, Windows Defender Security Center. This user-friendly hub makes easier to view and control the security perspectives on your Windows 10 device.
Many users are accustomed to the classic Windows Defender and like to get it back. Security threats are one of the leading concerns of the day and that’s why Microsoft tried to build Windows 10 to be the most secure version of Windows ever. So follow a guide for How to Restore Classic Windows Defender in Windows 10 After Creators Update to get it back simply. When you want to use the old version of this built-in security tool then this is a quite easy way.
Restore Classic Windows Defender in Windows 10 After Creators Update
When you use this old version you can run both the security tools at the same time.
Step 1 – Click on the File Explorer which is commonly pinned to the taskbar of the device.
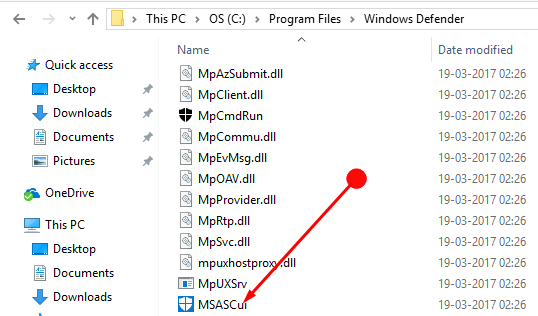
Step 2 – Copy the path from the following line and paste into the address bar of file explorer and then press Enter.
c:\Program Files\Windows Defender\
You can find the address here also – Default Files, Folder Location and Path Windows 10 List.
Step 2 – Now, locate MSASCui.exe from the list that appears in the folder. Make a Double-click on this file MSASCui.exe and allow to run on the screen.
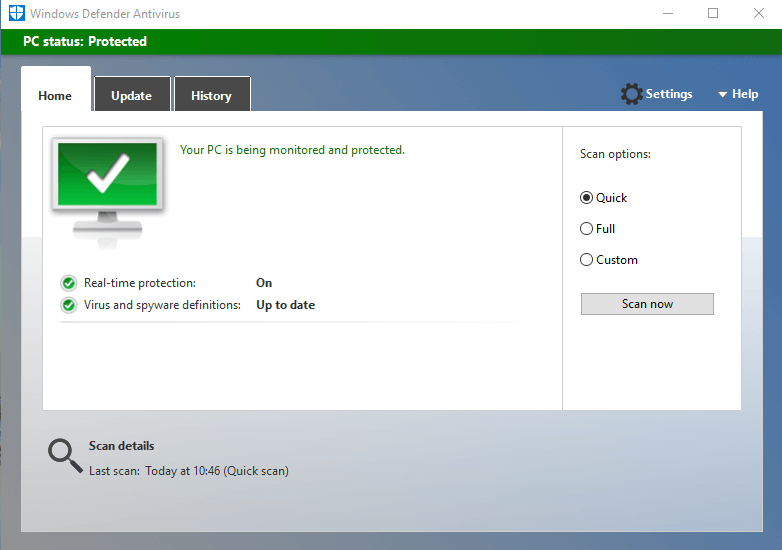
This will help you bring back the classic and familiar Windows Defender user interface.
Create a Shortcut to Classic Windows Defender
If you want to use the classic Windows defender then making a Desktop shortcut to the same may help open it frequently.
Step 1 – On the desktop, find an empty space and then make a right click. Next, hover on New and click on the Shortcut option.
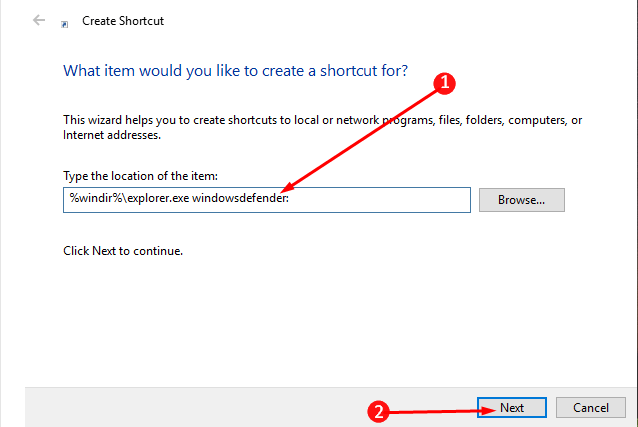
Step 2 – Then on the next screen copy-paste the command and tap the Next button. You can look for the Next button at the bottom of the wizard.
%windir%\explorer.exe windowsdefender:
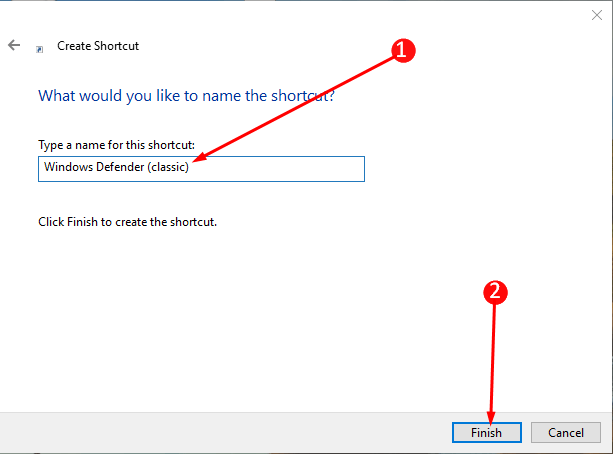
Step 3 – Now type whatever name you wish to give to the currently made shortcut in the next window. We suggest you name it as Windows Defender (Classic) as it will help you to find the shortcut easily.
Step 4 – Finally, tap on the Finish button and complete the entire process of creating a shortcut.
Changing the icon of the created shortcut
Once the Classic Windows Defender Desktop shortcut becomes available, you can change the icon.
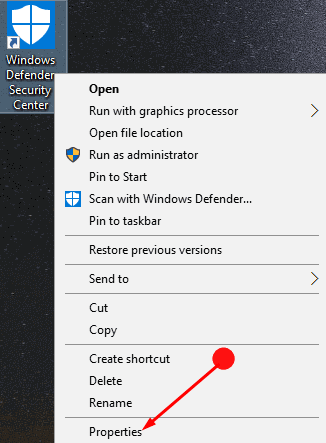
Step 1 – Right-click on the shortcut of the Windows Defender and click the option Properties.
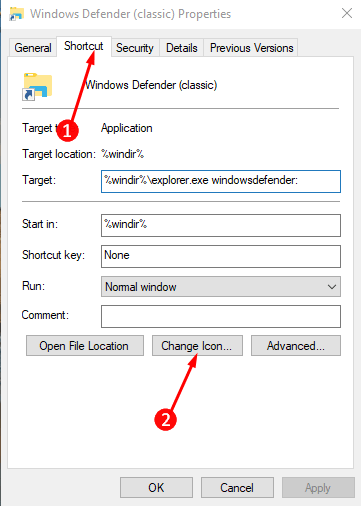
Step 2 – Press the Shortcut tab which is at the top of the box on the next screen. Now under Shortcut tab click Change icon option.
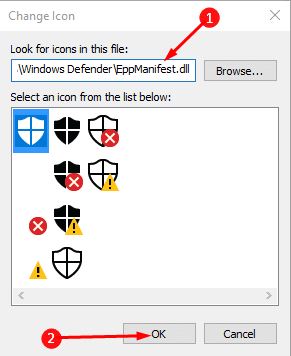
Step 3 – Here beside Browse, copy and paste the location given below and then click OK to execute.
%ProgramFiles%\Windows Defender\EppManifest.dll
Step 4 – Now, choose the symbol that you want as the icon of the shortcut. Then click Apply and OK buttons to implement the new icon to the shortcut.
Conclusion
So here you can see how to Restore Classic Windows Defender in Windows 10 After Creators Update. Not only can you bring it back but also can create a shortcut and change the shortcut icon of Windows Defender.