Earlier you have used the amazing app Skype on Windows 8/8.1. Skype allows you to perform video chat with your own colleague. However, some Windows users are facing problems with the built-in Skype app on Windows 10. Skype does not start as well as run properly in Windows 10. As you know, It is simple to remove this issue instead of fixed by RTM.
In fact, the main cause for getting this issue is Windows developers forget to adjoin webcam permissions for the Metro version of Skype which has come with Windows 10 build 9860. That is why the Skype behaves awfully on some devices having a webcam.
How to Run Skype Trouble Free On Windows 10
We are elaborating on this post to fix the webcam issue on Skype. You have to only follow a few steps given below so that Skype starts to run properly.
1. Click to open Settings app from Start menu. Before this, hit the Windows button on the taskbar and prompt the start menu.

2. Click Privacy under Settings.

3. Click Camera tab on the left sidebar.
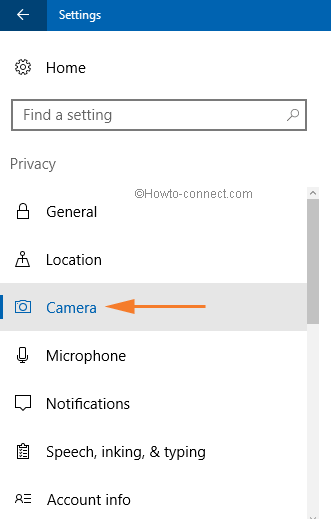
4. Now, on the right panel, locate Skype Preview and turn it to ON position.

After that, you would not later face this issue on your Windows 10 OS. Launch Skype and it will run quite smoothly with no problem.