Methods to Switch Default Language on Windows 10 with steps. – Are you using a Windows 10 computer with the OS running only one language across the system? So, do you want to use another language such as Hindi, Chinese, Italian, German, Thai, and so on for your PC? If it’s true then Microsoft offers various languages for you to download and install in this latest operating system. An article of the same settings section How to Set a Language as Default in Windows 10 can help you.
This guide to Switch Default Language in Windows 10 is specifically useful when multiple users access the same computer and each user prefers a different language.
See the procedures to Add Local User, Administrator Without having a Microsoft Account Windows 10.
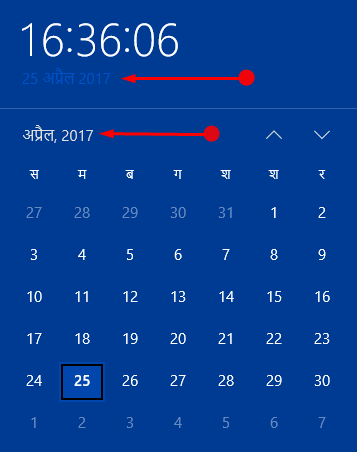
Let us now begin the steps and see how to grab and display a new language in Windows 10.
Switch Default Language in Windows 10
Add a Language
Step 1 – Press the key combinations of Win&I and when the Settings application comes into view, click Time & language. Instead, you can use any other method to launch the Settings program.
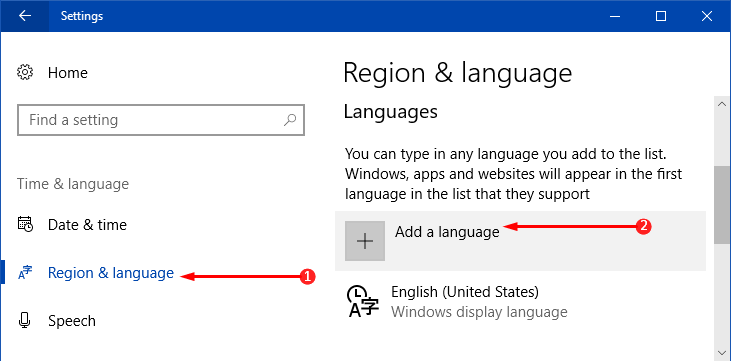
Step 2 – On the left sidebar, various sections are visible, click Region & language.
Step 3 – Moving ahead, click Add a language button on the right panel. You will find this button underneath the title Language.
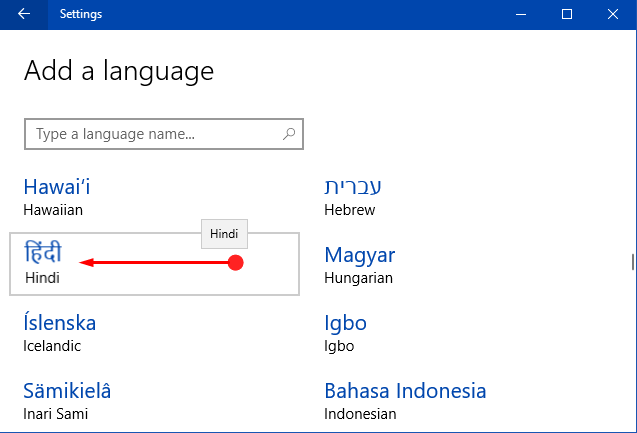
Step 4 – The following page displays several languages for you to install on your PC. The languages are listed in the alphabetical order, so locate select the one you wish to add. For example – Hindi.
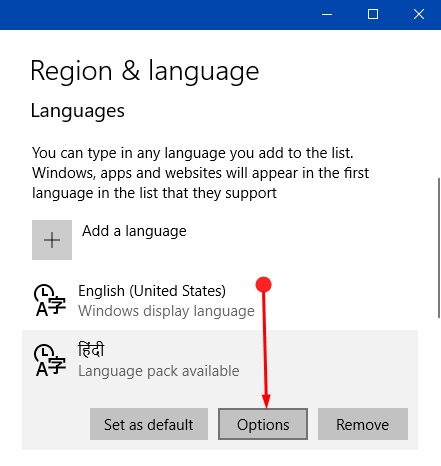
Step 5 – Head back to Region & language page and click on that specific language that you added in the above step. The selected language will show up three buttons, click Options.
Step 6 – Click Download button that is visible right below Download language pack.
Note – Depending upon your requirement, you can add the number of languages accordingly.
First of all, the most important task you have to perform is to add and install a language. After adding it, the OS offers you three distinct locations where you can Switch Default Language in Windows 10. These are –
1. Display Language
2. Language of Welcome Screen and New User Accounts
3. Keyboard Language
1. Change Display Language
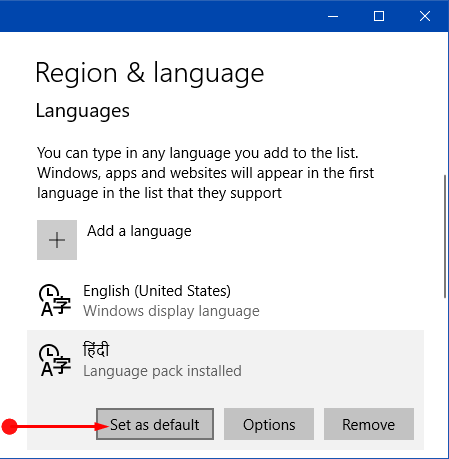
Step 1 – Stay in the Region & language page and on the right pane you will notice the language you have added. Select that particular language and click the button namely Set as default.
Step 2 – It will immediately show a notification as Will be display language after next sign-in.
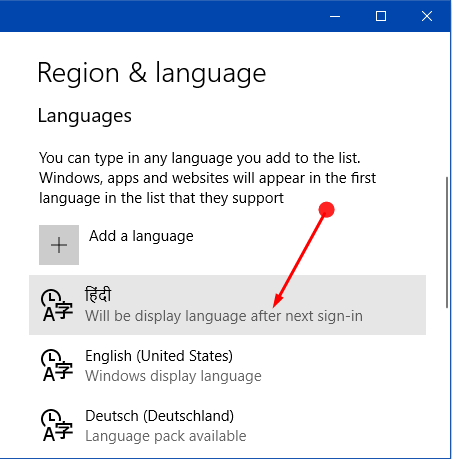
Step 3 – So, sign out and again log in to switch display language.
2. Change Language of Welcome Screen and New User Accounts
Adding and installing a language to a user account does not switch the default system language that is used in Sign in, Start Menu, Welcome, Shutdown and so on.
Step 1 – Type control on taskbar search field and press Enter when she displays Control Panel as the result.
See Open Control Panel on Windows 10 – Instant Ways to learn more.
Step 2 – Switch the icons into small view, then find and click Region.
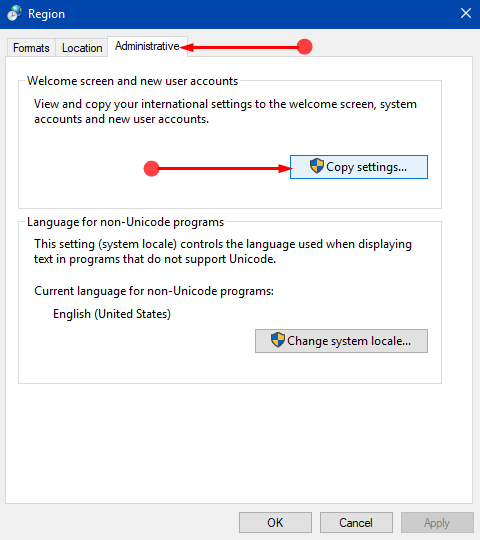
Step 3 – Region wizard will open up, shift to the Administrative tab. Click Copy settings button that is visible in the first section.
Step 4 – On the next pop-up, click the two options namely Welcome screen and system accounts and New user accounts.
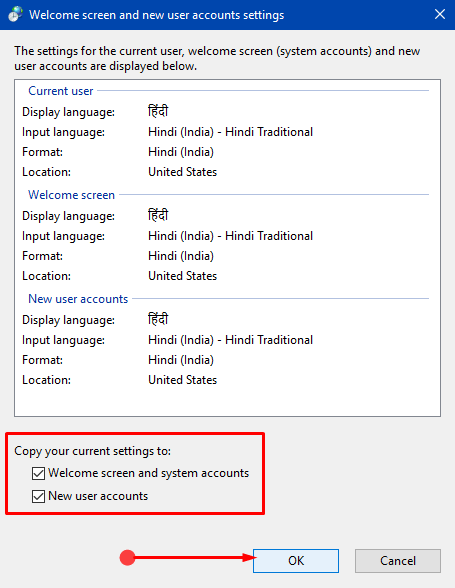
Step 5 – Click OK on the wizards to Switch Default Language in Windows 10. This will change the language on Welcome, Start Menu, Shutdown and so on.
3. Change Keyboard Language
Step 1 – To switch the keyboard input language, jointly press Win&Spacebar keys.
Step 2 – Alternatively, on the system tray click the current language. When you see other installed languages, pick up one of your choices.
Read How to Remove Language Bar from Windows 10 Desktop.
Conclusion
Hopefully, after pursuing the above instructions, you will be able to Switch Default Language in Windows 10 quite effortlessly. Moreover, you can also apply it to the PC. If you have any problem following the steps or have more tips on this topic, write to us.
