With so many antivirus programs in the market, a common user always remains confused as to which one is trustworthy. Realizing this Microsoft came up with its own antivirus protection program and made it a part of Windows 10. This October 2018 update includes various positive developments in this program. In fact, the name is also changed from “Windows Defender Security Center” to “Windows Security”. By using this application, you can stay safe in Windows 10.
The biggest quality of Windows Security is that it remains active from the time user runs Windows 10 Operating System for the first time. Furthermore, it actively protects the device by frequently scanning for different security threats such as viruses and malware.
Ways to Use Windows Security App to Stay Safe in Windows 10
What is Windows Security?
Windows Security provides the protection in real time. It scans the downloads and the programs being run on the device. Moreover, this program is automatically updated through “Windows Update” and it helps to keep the PC safe and protected from security threats.
Beside real-time protection, Windows Security provides various protection related updates such as:
- The last time your computer was scanned for security threats.
- Definitions are the files used by this program to keep your PC protected from the latest threats. So, it informs you when it last received these definitions.
- With the Device performance & health tool, it makes sure that your computer is running efficiently.
Features of Windows Security
When you use Windows Security, you will come across an interesting feature. If it traces out the presence of any third-party antivirus software in your computer, it turns off automatically.
In the latest Windows Security program, there are 7 different features. These features not only protect your computer but also allow you to choose the way you want to protect your device. They are:
1. Virus & threat protection: This feature monitors the threats to your computer (in real-time), runs scans, furthermore gets the latest updates so that the system can easily detect the newest threats.
2. Account Protection: It provides account related protection by giving you access to account settings as well as sign-in options. This includes Dynamic Lock and Windows Hello also.
3. Firewall & network protection: This feature manages firewall settings and monitors the real-time happenings with your internet connections moreover networks.
4. App & browser control: It updates the “Windows Defender SmartScreen” settings which eventually helps to protect the PC against potentially harmful files, apps, downloads, and sites. It also offers to Exploit Protection to help you customize the “protection settings” of the device.
5. Device security: It reviews built-in security settings and helps to protect your computer from serious attacks by viruses and malicious software.
6. Device performance & health: With this feature, you can view the status and information about your computer’s performance and health. It also keeps your PC clean and updated with the newest versions of Windows 10.
7. Family options: It lets you keep a track on the online activities of your kids and other devices in your house.
All these 7 features display a colored status icon. They indicate –
Green: Means that your computer is adequately protected and no recommended actions need your attention.
Yellow: Signifies a safety recommendation, requires your attention.
Red: This is a warning that something is wrong with that feature and needs immediate action.
How to use Windows Security to manually run a scan?
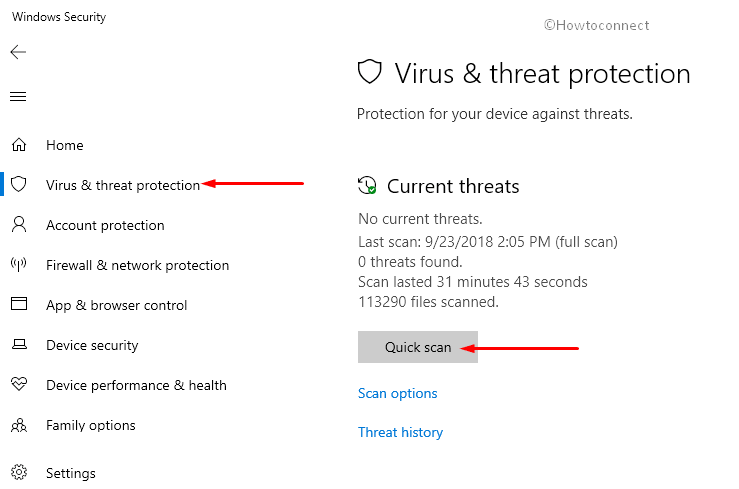
Windows Security keeps running in the background, provides you with real-time protection. But if you are suspicious about any virus or malware on your computer, you can immediately check by initiating a Quick Scan. It saves a lot of time especially when you do not want to perform a complete scan on all the folders and files present in your PC. Any user can use Windows Security to perform a quick scan.
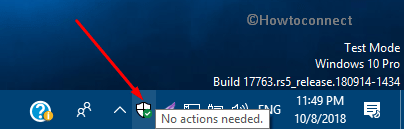
First of all, click the shield icon on the taskbar to access Windows Security.
Choose Virus & threat protection and then select the Quick scan option under the section, Current threats.
If you want to thoroughly check your computer for safety, perform an advanced scan in Windows Security. There are different options, you can choose the one that suits you most.
For the advanced scan, navigate to Virus & threat protection and click Scan options on the adjacent right side. You will get these three options:
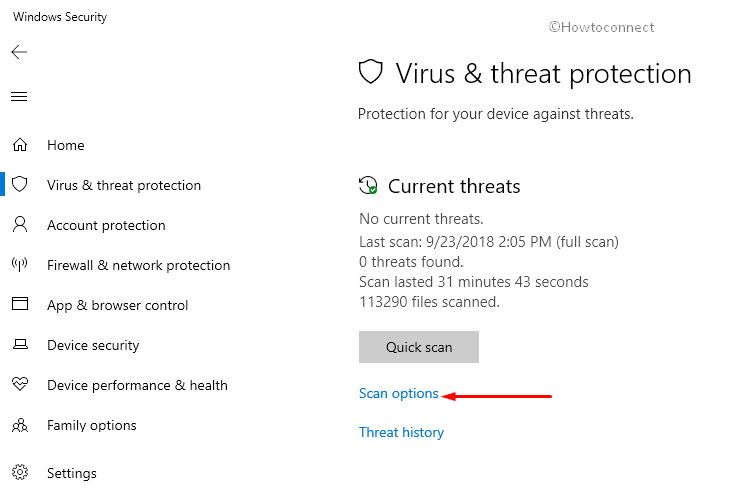
Full Scan: It checks the programs and files currently performing on your computer.
Custom Scan: This option lets you scan specific “folders or files” on the PC.
Windows Defender Offline scan: This scan is for the time when you suspect that the computer has been attacked, or can be attacked by a “malware or virus”.

Note that you can also right-click a folder or file in the “File Explorer” and click on “Scan with Windows Defender“.
How to use Windows Security to schedule a scan?
There are many advantages when you use Windows Security and one of them is scheduling a scan. Despite running in the background, it allows you to schedule a scan. You can set a separate time and frequency of the scan by following these simple steps:
Step-1: In the Search Box of your Taskbar, type schedule tasks. A list with appropriate results will appear, choose Schedule tasks.
Step-2: The “Schedule tasks” window will open. Move your cursor to the left side and expand the Task Scheduler Library => Microsoft => Windows. Now, scroll downwards and click on Windows Defender folder.
Step-3: Now, move your cursor to the top-center section and choose Windows Defender Scheduled Scan.
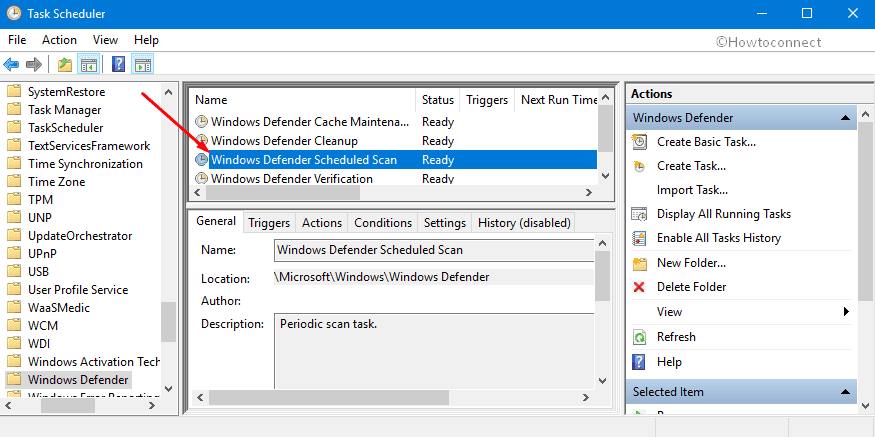
Step-4: Click on the Triggers tab, then New.
Step-5: Select your suitable frequency and time, and then click on OK.
See How to Schedule Windows Defender Full or Quick Scan on Windows 10.
How to use Windows Security to turn on or off the real-time protection of Windows Defender Antivirus?
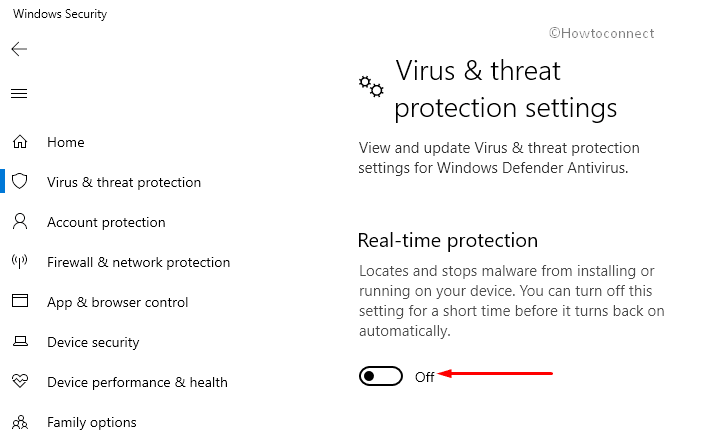
In some situations, you may need to turn off the real-time protection provided by Windows Security. Another amazing feature of this program is that it automatically turns on after some time and resume the real-time protection of a PC. When the tool is turned off, the downloads or the files opened are not scanned for security threats. To turn off the real-time protection, you should follow these steps:
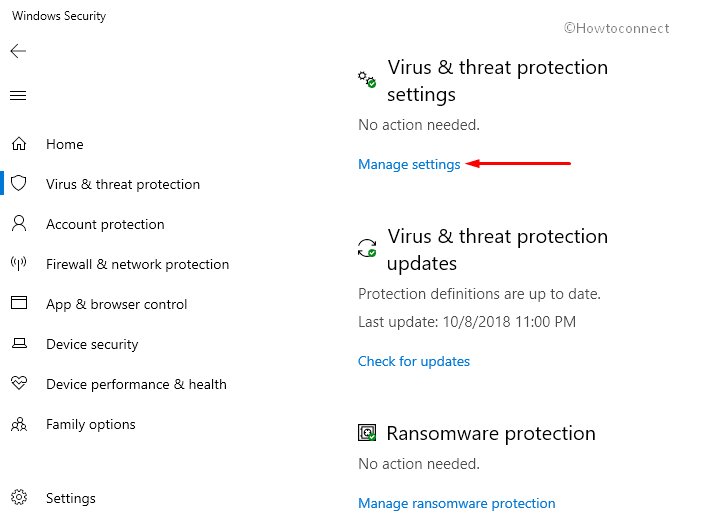
In the Windows Security program, click on Virus & threat protection. Then choose the option Manage settings as shown in the given screenshot.
Here, toggle Off the Real-time protection switch.
So, this is the best way to Use Windows Security App to Stay Safe in Windows 10.