Windows 10 offers Exploit protection settings that safeguard your device against malware attacks. This feature also provides a separate set of options to manage settings at both system level and program level respectively. After customizing the settings, you can effortlessly Export Windows Defender Exploit Protection Settings on Windows 10 OS in the form of XML format.
Directly from Windows Defender Security Center, you can edit, manage, and configure exploit settings for both of the program and operating system accordingly. After exporting, you can keep them as a backup or can deploy on a different machine. However, when you export the settings, the options for both program and system get saved. But to avail this facility, the PC should be running Build 16232 or higher. There are two ways for this task to happen, let us see them one by one.
How to Export Windows Defender Exploit Protection Settings on Windows 10
1. Through Windows Defender Security Center
Step 1 – First of all, access to Windows Defender Security Center. The easiest way to open it is from the system tray. Click the upward arrow and select the Defender icon.
Step 2 – On the home page of the application, click App & browser control icon as shown in the below-given picture.

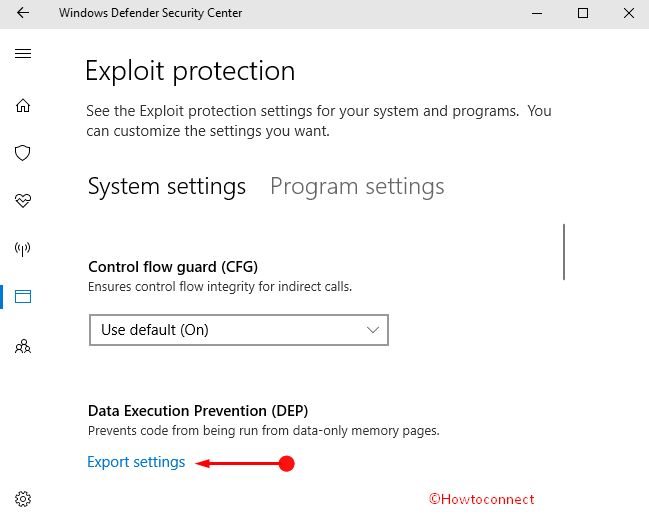
Step 3 – Here, scroll to the bottom of the page and you can see Exploit protection section. So, click the option namely Exploit protection settings.
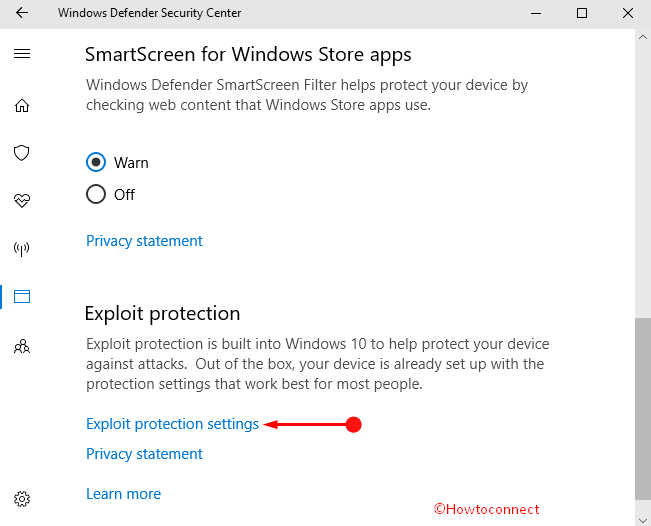
Step 4 – Moving ahead, make the changes for either System or Program settings. However, you can also modify both the settings as per preference. Once you change and implement the alterations, click Export settings option (see screenshot).
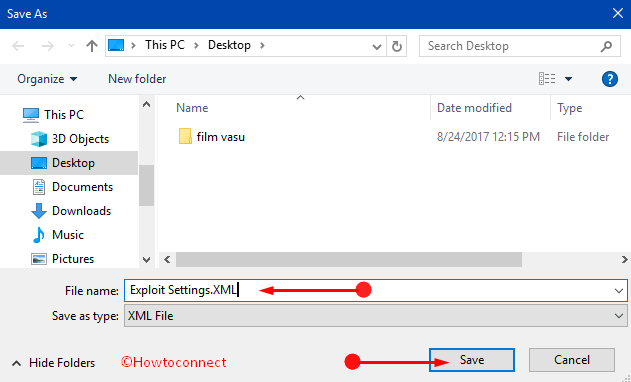
Step 5 – Navigate to the desired location where you wish to save the XML file (Exploit settings). Assign a name of your choice to the XML file and click Save button on the dialog.
Step 6 – That’s it and without much struggle, you can now Export Windows Defender Exploit Protection Settings anytime on Windows 10 OS.
2. Via Windows PowerShell
Step 1 – Use WinX keys to launch power user menu. Here, reach out to the option entitled “Windows PowerShell (Admin)” and click on it. You may confront UAC prompt, click Yes to proceed further.
Read more methods to Open Elevated PowerShell on Windows 10 After Creators Update.
Step 2 – Copy/paste the given piece of command and hit “Enter” to immediately Export Windows Defender Exploit Protection Settings.
Get-ProcessMitigation -RegistryConfigFilePath “$env:UserProfile\Desktop\ExploitProtectionSettings.xml
Step 3 – That’s all and now if you prefer you can close the PowerShell.
Windows 10 enhances the standard of Windows Defender comprising abundant of the features of “Microsoft’s Enhanced Mitigation Experience Toolkit” (EMET) within the Fall Creator updates. All this is made in the form of Exploit protection section in App & browser control. Using this, Microsoft makes this built-in Antivirus more effective and user-friendly. This feature is enabled by default and remove the EMET if it is available or installed previously.
When you Export Windows Defender Exploit Protection Settings on Windows 10 the data is saved in Xml format wherever you want on your computer hard drive. This will later work when you want to restore the same customization.
Conclusion
Hopefully, after completing any of the above procedures, you can pretty much easily Export Windows Defender Exploit Protection Settings. This specific feature sounds extremely helpful as you can keep them in the form of a backup. Also, you can deploy those settings on other computers as well and if you are aware of any other tip to export these settings, do write them to us.