cdd.dll or Canonical display driver is a system file that helps Windows to perform graphics related functionalities. Microsoft often finds this DLL file affected by vulnerabilities according to security Bulletins. So you might get a Blue screen error with – What failed: cdd.dll. This issue commonly appears with Page_Fault_in_Nonpaged_Area, System_Service_Exception, Kernel_Data_Inpage_Error, and System_Thread_Exception_Not_Handled.
Apart from vulnerabilities, the error may also occur due to obsolete driver, corrupted system components like DLL. When the file gets damaged it can not render the Graphics design interface and shows the Blue Screen of Death. The problem many times arises while playing games.
cdd.dll BSOD or Blue Screen Error in Windows 10
Here is how to fix cdd.dll BSOD or Blue Screen Error in Windows 10
1] Rollback graphics driver
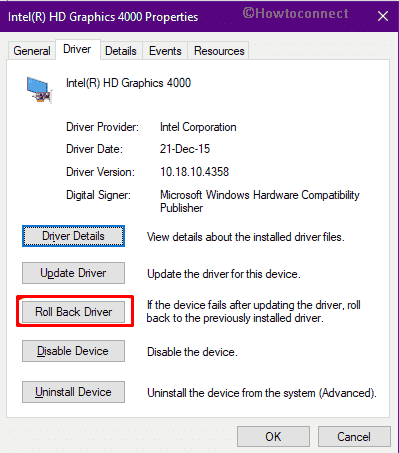
The currently running display driver is a common reason for this issue so roll back it to the earlier version –
- Press – Windows + S.
- Type in – devmgmt.
- Hit the – Enter.
- From Device Manager, double-click the – Display adapters.
- Right-click the graphics driver listed here and choose – Properties.
- Go to – Driver tab.
- Click the – Roll Back Driver.
- Provide a reason for rolling back and select – Yes.
- At last, restart the device.
2] Reinstall graphics driver
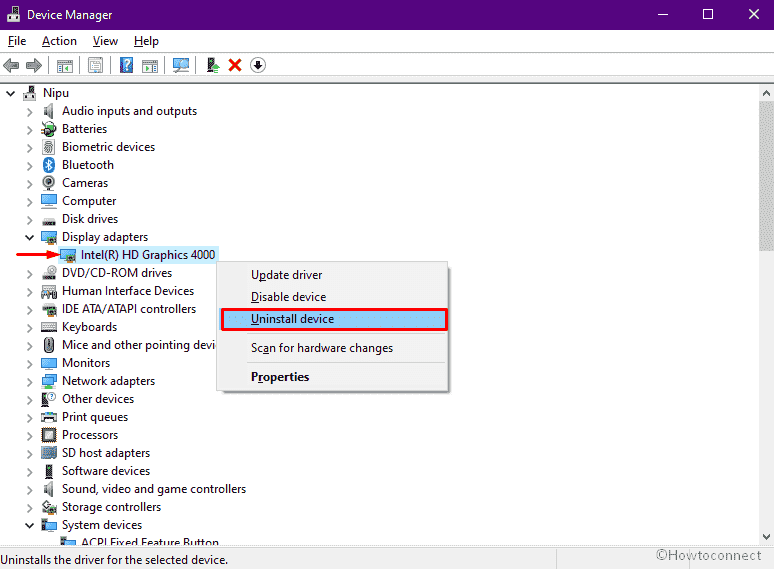
Damaged or broken display driver for some reason is unable to load the graphics elements in Windows 10. As a result, you encounter cdd.dll BSOD error. So, reinstall the same through the Device Manager following the steps –
- Press Windows key and type – devmgmt.
- Hit Enter to launch – Device Manager.
- Double-click the – Display adapters.
- Right-click the driver displaying here and choose – Uninstall device.
- Check the box set before Delete the driver software for this device.
- Click – Uninstall.
- Close Device Manager and restart Windows 10.
- After powering up, open a web browser.
- Visit the makers’ website of your graphics card.
- Find the updated and compatible version of the software.
- Download the same and install it as well.
3] Use Driver Verifier to fix BSOD cdd.dll
Driver Verifier is used to specifying corrupted function calls as well as to make the diagnosis process of driver issues. The utility is useful only when you are logged into your normal Windows and not in the safe mode. So run this tool to solve page fault in nonpaged area cdd.dll error.
Before running the Verifier, the first thing you need to ensure is enabling Minidumps. This file plays a crucial role in the diagnosis of BSOD.
First, enable Minidumps –
- Press – Windows + S.
- Type – sysdm.cpl.
- Hit the – Enter.
- Once in the System Properties window, go to – Advanced tab.
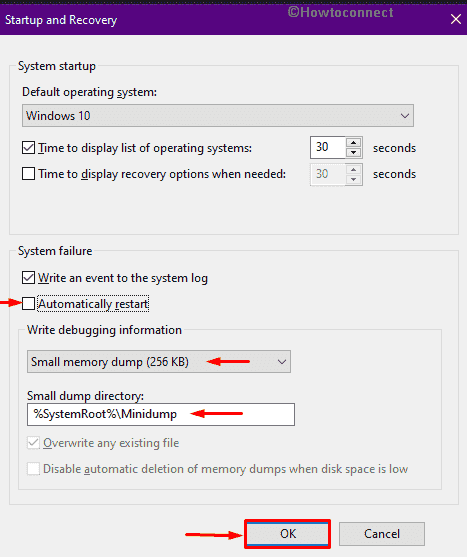
- Under Startup and Recovery click the – Settings.
- Uncheck – Automatically restart.
- Click the dropdown for – Write debugging information.
- Select the – Small memory dump (256 KB).
- Hit – OK.
- Close all windows and then reboot the device.
Then run Driver Verifier –
- Click – Search icon from the taskbar.
- Type in– verifier.
- Select the – Run as administrator.
- Once a User Account Control appears, click – Yes.
- When Driver Verifier Manager shows up, select – Create custom settings(for code developers).
- Click the – Next.
- Check every single option except Randomized low resources simulation and DDI compliance checking.
- Click the radio button set before- Select driver names from a list.
- Hit – Next.
- Select those boxes whose provider is not Microsoft.
- Click – Finish.
Check whether Driver Verifier is running
- Open Command Prompt as administrator.
- Type in – verifier /querysettings and hit – Enter.
- As long as the utility is running, it will return a list of drivers.
- If you don’t notice any list, follow the above steps again and run the driver verifier.
- After making sure it is running, reboot the device.
- Use the PC normally until it crashes.
- If anything specific triggers a crash, perform the same task time and again.
The above steps will make the system crash because the tool works to stress the drivers. After a certain time, the utility will present a full report of the crash that you can use to detect the reason behind cdd.dll BSOD. If the system doesn’t crash, allow Driver Verifier to run for at least thirty-six hours before stopping the same.
- Once you are done using Driver Verifier, press – Windows + I.
- Click the – Update & Security.
- From the left pane, select – Recovery.
- Go to the right.
- Click the – Restart now from under Advanced startup.
- When the system powers up, go to – Troubleshoot – Advanced options.
- Choose the option – UEFI Firmware Settings and click – Restart.
- When the system boots again, go to the Boot section and replace UEFI with the Legacy (or Legacy BIOS) option.
Note – If you find legacy option grayed out, set administrator password, and restart the device. Now, provide the boot password and access UEFI Firmware Settings again. This time, you should be able to enable the Legacy mode.
- Later on, open Command Prompt as admin.
- Next, type – verifier /reset.
- Hit – Enter.
- Now, download and install BlueScreenView.
- Launch BlueScreenView and load your Minidumps file from C:\Windows\Minidump or C:\Windows.
- After getting the information about which driver is causing blue screen cdd.dll, install the most recent version to fix the error.
- Finally, restart your PC.
4] Run SFC and DISM tools to fix BSOD cdd.dll
- Press the – Windows + S.
- Type in – cmd.exe.
- Hit – Ctrl+ Shift+ Enter.
- For appearing User Account Control, click – Yes.
- Once on the Command Prompt window, type – sfc /scannow.
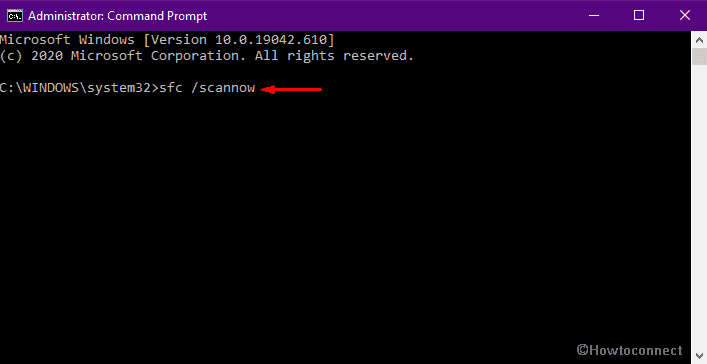
- Hit the – Enter.
- When the diagnosis finishes, execute the below command line in the same Command Prompt –
Dism /Online /Cleanup-Image /RestoreHealth
- This should fix all system image corruption but the device must be connected with active internet.
- To fix the corrupted system components from the repaired Windows source, run sfc /scannow command once again.
5] Place cdd.dll file in the correct directory
- Identify the program that is causing cdd.dll blue screen of death.
- Visit – C:\Windows\System32.
- Locate – cdd.dll.
- Right-click on the same file and select – Copy.
- Now, visit the directory that contains the program that is causing the issue.
- Paste the file you copied.
- Also, you can download the cdd.dll in a zip file from here.
6] Register cdd.dll file
After placing the cdd.dll into the correct folder you will need to register it again using the following instructions –
- Press the – Windows key.
- Type in – cmd.
- Select the – Run as administrator.
- When User Account Control comes up, click – Yes.
- Put regsvr32 cdd.dll in the Command Prompt.
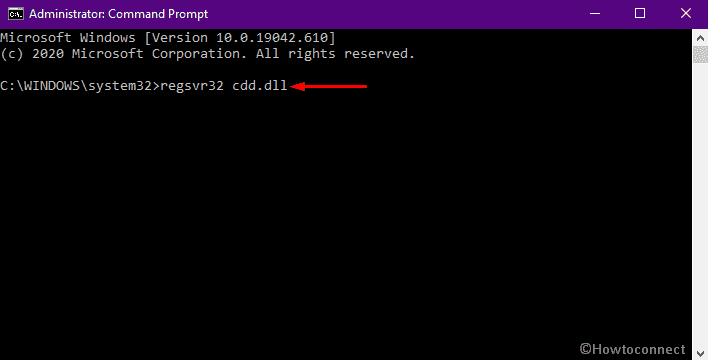
- Hit – Enter.
Methods list
1] Rollback graphics driver
2] Reinstall graphics driver
3] Use Driver Verifier
4] Run SFC and DISM tools
5] Place cdd.dll file in correct directory
6] Register cdd.dll file
That’s all!!
Reinstall graphics driver works for me! Thanks.