wmpnscfg.exe in Windows 10 is an issue associated with MSDN Disc 3715, a feature of the Operating System. Users notice a few issues with this while browsing through Task Manager. It’s indeed a WMP (Windows Media Player) process and you really don’t wanna have any error connected to it. Though it’s not some kind of other processes taking High CPU Usage, rather annoying as when you attempt to close the error text, restarts itself. The exe file has the latest version of 12.0.17763.1 and also having 1-star Popularity ranking with UNKNOWN Security rating.
Executable files alternatively .EXE files are those carrying necessary information from developers to open a program. These are useful Windows components and you cannot even think of an operating system keeping them aside. As a result, Virus developers nowadays became little tricky and used this weak chain for pushing malware inside the machine. Since the error is prominent, its needs immediate resolution. We will be guiding you through few effective Workarounds for this in this write-up. Before we move on let’s have a profound idea about wmpnscfg.exe in Windows 10, its causes and so on in below segment. Also read –
Solutions to wmpnscfg.exe in Windows 10
Let’s see first what the executable wmpnscfg.exe is meant for –
What means by Wmpnscfg.exe actually?
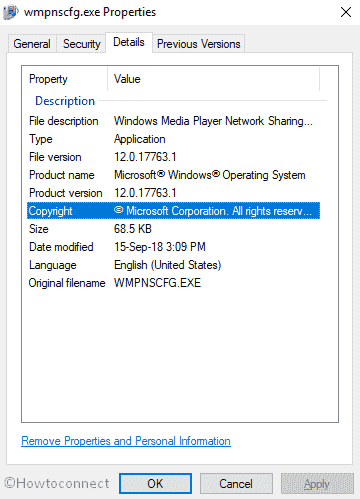
While playing Windows Media Player, if a new media shows up across the whole network, wmpnscfg.exe will immediately send a new notification and that will be visible through System tray. Once you hit that notification, WMP will open up again as to share that specific file. This .EXE file actually allows media Network Sharing. Simply this one allows the users to share a media file from computer to a Third party network like Xbox 360.
The error caused with it is actually from the infection through malware pushed by Virus originators. In most cases, these malware are disguised under the veil in the name of EXE files. Being spread with malicious websites and Spam Emails, they will start making your system unstable once you hit the link or visit such websites. Therefore, before downloading any exe files, we recommend you to scan it even if you get it from a trustworthy source.
Causes behind wmpnscfg.exe in Windows 10
As discussed before, the prime reason for this issue is a malware attack. Other reasons like missing or corrupted registry entries, invalid entries. However, few other causes are too responsible too like the following –
- Presence of Corrupted Windows registry keys associated with MSDN Disc 3715 or wmpnscfg.exe.
- Infection from malicious invaders causing corruption in wmpnscfg.exe file or connected to MSDN Disc 3715 program files.
- Installation of any similar program that has a conflict with wmpnscfg.exe file.
- Erasing of exe-related files by human error or in conjunction with another program.
- Missing of exe files due to its conflict with any newly installed program.
- Unaccomplished download of Windows update and its reference files.
- Accidentally terminating an installation of program files.
- Forcibly canceling an uninstallation of a program file.
- Conflict of a recently installed program with this one.
- Incomplete download of the program files aiming for Windows reinstallation or Updating it
Once you hit by the error, following error messages can keep on sticking your Screen-
1) “Wmpnscfg.exe Application Error”
2) “Cannot find wmpnscfg.exe”
3) “Wmpnscfg.exe is not a valid Win32 application”
4) “Error starting program: wmpnscfg.exe”
5) “Wmpnscfg.exe has encountered a problem and needs to close. We are sorry for the inconvenience”
6) “Faulting Application Path: wmpnscfg.exe”
7) “Wmpnscfg.exe is not running”
8) Windows failed to start – exe
9) The file “Wmpnscfg.exe is missing or corrupt
10) “Wmpnscfg.exe failed”.
How to Differentiate between a Useful EXE File and a Virus as Disguise
The error occurs during startup of Windows 10, while starting a new program or if you attempt to run a special it like Printing. Since viruses keep them hidden under a veil, you can’t really differentiate between an original exe file and a Virus. However, we are presenting a very simple trick to separate them. Try the following steps to do so –
- Perform a right click to the Taskbar from Desktop screen and select Task Manager to open.
- Once it is visible in a Window, select the Processes tab and move out to the Wmpnscfg.exe file.
- When you find it, do a right click and select Open file location.
If the location shown by the computer is in C:\Windows\System32, This is nothing but a simple windows component. In case of any alternative locations or unknown cases, the EXE extension front of you is a malware. Please read and comply with the following workarounds to get rid of it before it causes harm to the whole system in this situation.
Resolving the error Wmpnscfg.exe in Windows 10
When you are pretty confirmed that your Windows is already affected by the error, this will be legit to put the resolution processes into effect. Follow the instruction and get out of the cubical.
Terminate the task of Wmpnscfg.exe in a Normal way
To be honest, this workaround is a permanent heal. But it will definitely keep the error from spreading furthermore as well as will stop the issue for the time being.
Step-1: Hit the Ctrl+shift+esc altogether to launch Task Manager.
Step-2: When it shows up, click on More details.
Step-3: Jump to Details tab.
Step-4: Reach out to Wmpnscfg.exe from the available list, hit a right click on it and select End task.
Perform a Full scan for Virus
Windows 10 is well equipped with the most powerful anti-malware solution of this age Windows Security. A Full scan through this will remove all the malware from PC so you can get rid of the Wmpnscfg.exe in Windows 10 error.
- Do a click on the taskbar search from the bottom left part of the screen and type Security in the box.
- Once the result appears, choose Windows Security from the list to launch it.
- Moving ahead to the app, choose the Virus & threat protection icon from the left pane and shift to the adjacent right.
- Moving down to the page, follow the link Scan options here and proceed to the next page.
- Once the next window appears, select the radio button of Full scan and click on Scan now option from down there.
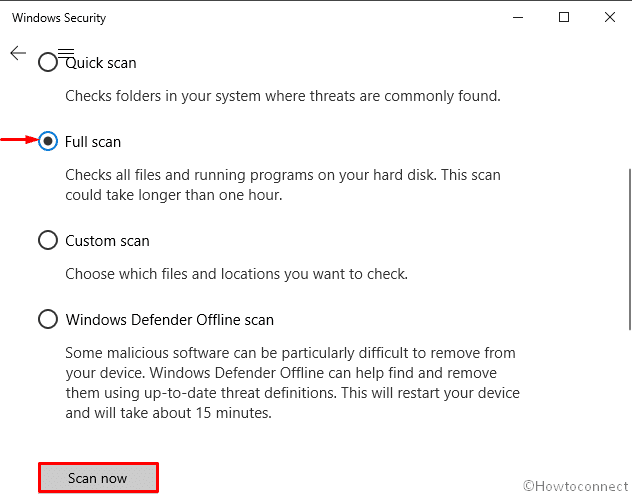
The scanning process will begin and threats will appear on the screen if found any. You can resolve the threats following the instructions appear on the screen.
Disable Windows Media Player Network Sharing Service
Since the exe file is attributed with WMP, disabling the service might help in this regard. To disable –
- Move the cursor up to taskbar search and make a click on it.
- Type Services in the empty space and select it once appears in the result.
- Move down to the list and reach out to Windows Media Player Network Sharing Service.

- Once found, make a double click on it and a popup window will be visible on the screen.
- Hit the General tab and proceed to the Startup type section.
- Do a click on the dropdown menu and choose Disabled from the list.

- Moving ahead, choose Apply and then Ok options from down.
With the implementation of this, the service will be disabled and the error must not show up again.
Execute System file checker for corrupt system files in Elevated Command Prompt
SFC /SCANNOW is a utility that checks and resolves any corruption in the system files. For that –
- Open the search on the taskbar from the bottom left corner of the screen and type Cmd in the search box.
- When Command Prompt appears in the result, do a right click on it and Select Run as Administrator for administrative access.
- Once a UAC prompts up, click on Yes to give Permission.
- At the base of the blinking cursor, type
sfc /scannowand hit the Enter button.
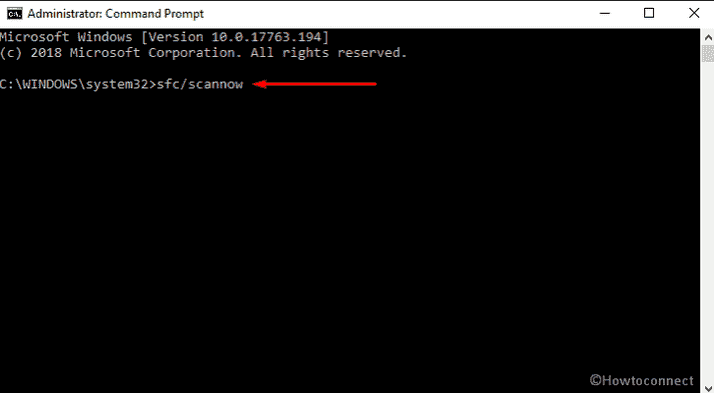
- The system will start checking all the files with the execution of the command and resolve automatically once found any.
Running DISM command
DISM is indeed a command-line tool that helps to repair all Windows components and sometimes save your time of reinstalling Windows. To make it effective –
- Press Win+R together to Invoke the RUN dialog on screen.
- Write cmd.exe in the empty text box. To open Command Prompt as administrator, make a combined Press of Shift+Ctrl+Enter.
- Now, wait for UAC to show up and ask for permission. Click on Yes.
- Once the Command Prompt comes into the sight, type the following text code and hit Enter –
DISM.exe /Online /Cleanup-image /Restorehealth
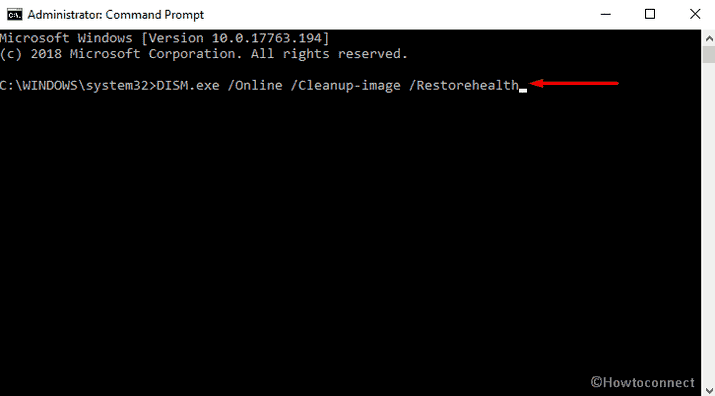
You can expect that it will fix issues Associated with Wmpnscfg.exe in Windows 10.
Perform a Disk Cleanup utility
- Hold down Windows key and Press R from the keyboard to Run dialog on screen.
- In the Empty space of this wizard, type cleanmgr and hit the Enter key.
- A pop-up will turn up. Select your desired drive using the drop-down menu.
- Disk Cleanup will start with first with calculating available space you can retrieve from the occupied.
- Choose the Temporary Files once the check boxes show up in the Disk Cleanup dialog box.
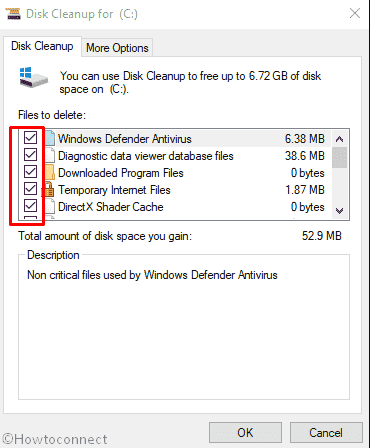
- Select the Ok button to delete these files and free up spaces.
Uninstalling Unnecessary Programs
In the causes, we have got to know that some programs might have a conflict with Wmpnscfg.exe file so causes the error to occur. Therefore, it is recommended to uninstall the unnecessary and suspicious applications you have in the system. To do so –
- Launch the Windows Settings app tapping Win+I hotkeys
- Move across the app and straightway move over to Apps tile.
- Open the Apps settings by clicking on it and select the Apps & Features option from the left pane.
- Shift over to the adjacent right pane and reach out to the apps that are suspicious.
- Do a click on the application and select the Uninstall button from the extended pane.
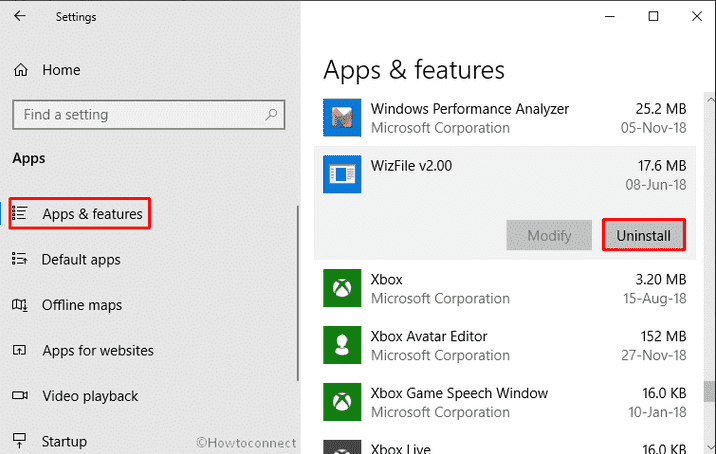
- Hit the Uninstall button once more when asked and also select Yes when UAC prompts you for removing the program.
Follow the on-screen instruction if shown to complete uninstallation in order to fix Wmpnscfg.exe in Windows 10.
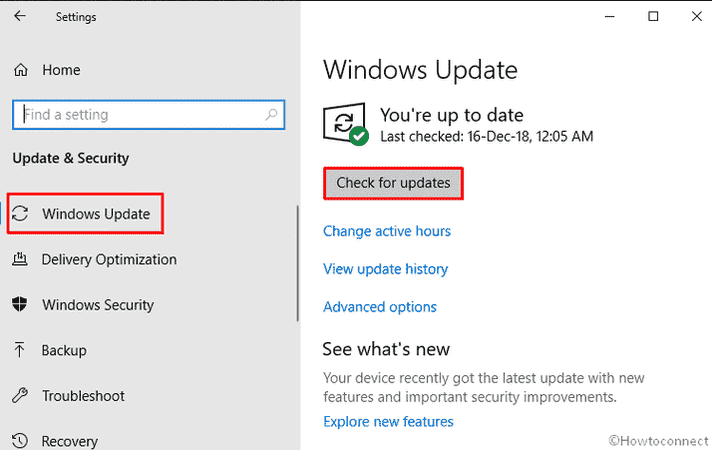
Install all possible Windows Updates
- Move the pointer to the bottom left corner of the screen and select Windows icon to open it.
- Perform a click on the Settings cog to launch the Windows Settings app.
- Moving ahead to the application, head to Update & Security tile and do a click on it.
- After the additional Settings page opens up, choose Windows update option from the left pane.
- Move aside to adjacent right and hit Check for updates option if you are up to date. Else, select Download option under the new updates available here.
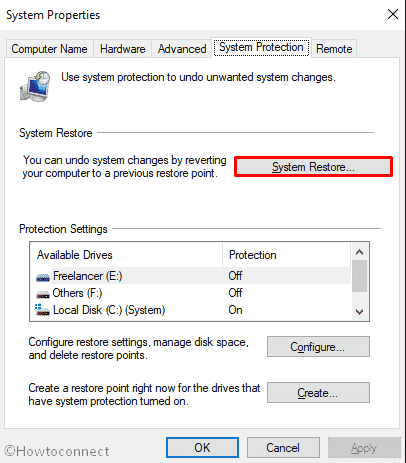
System Restore
System Restore usually reverts back the system to the previous shape if any recent changes take place to the Windows 10 operating system. You may have done something with the system and which caused Wmpnscfg.exe error to occur in your PC. Therefore, system restore will work on it and revert the full process back to the old state and the might not show up again. Here is the way you can do it –
- Type System Restore on Cortana and when the result shows up, hit Enter.
- Click System Restore button on the wizard that rolls out. This will revert back the system to a previous restore point and thus will undo all the recent modifications.
Reinstall Windows
Once you are done with all other above processes and in the result didn’t find perfect feedback, the last option rest in hand is the clean reinstallation of Windows. It is a flexible workaround that serves as cleaning all the junk, corrupted files as well as will also provide a new start to the system. Before Proceeding with the process, you must save the backup of the existing system files in USB or somewhere secured place. This will reduce the probability of losing valuable data after reinstallation. If you are not confident enough to perform this Workaround, we recommend you to seek help from skilled person to reduce the risk of further trouble.
That’s all!!!