As you know well installation of any Software in any system requires Administrative authority of users. Without Administrative power possibility of the installation could not be taken place. It means auto enabled Administrative Accounts paves the way of proper working of computer. Suppose that you are working in default admin account and it stops working due to troubleshoot (virus attack, invalid configuration, missing system file, lost password, or other) then what can you do?
Users have to do nothing but enable it Administrative Account for sure. The way of enabling Administrative Accounts in Windows 7 are mentioned below:\
Enable Administrator Account in Windows 7
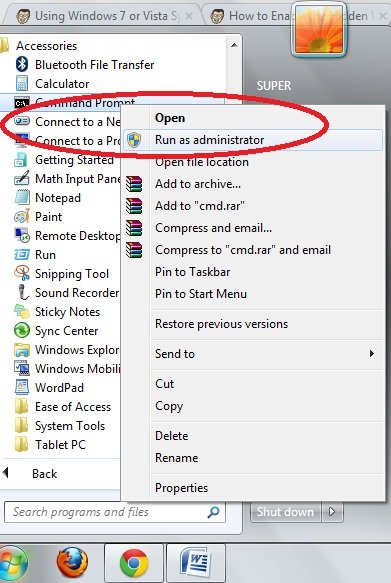
- Click on Start button and choose All Programs and click it.
- Find Accessories option in program lists and open it.
- Go to Command prompt in drop down menu list and open it through right clicking and select Run as administrator.
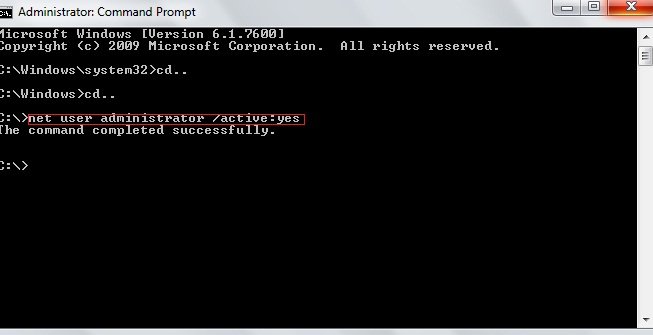
- In Command Prompt, type command – net user administrator /active:yes
- Now exit from command prompt
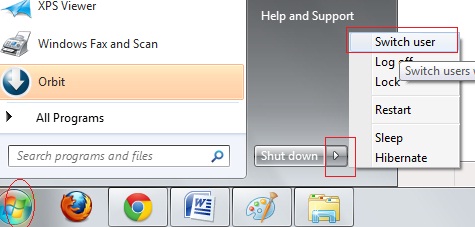
- Go to Shut down button on desktop select Switch User and click it.
- After login window startup screen, it will display active default admin account along with another local user account.
Disable Administrator Account
If you have enabled default admin account once and want to disable it.
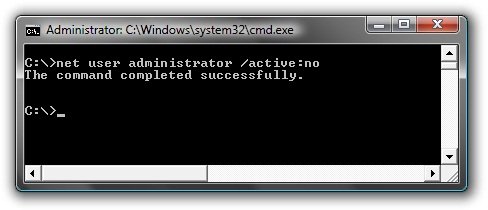
- login local account and open command Prompt same as above mentioned process.
- Now type command – net user administrator /active:no and press enter button on keyboard.
- Restart your Windows 7.
Now you are unable to view default admin account in window startup login screen.


paste the command with a space.
m unable to open administrator account…while doing (net users administrator /active :yes) its says access denid..please help me