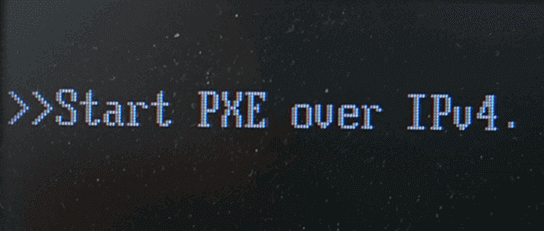
Start pxe over ipv4 is an error message that usually occurs when your PC tries to boot on LAN. This code immediately appears after the computer restarts or turns on. After showing this error the system keeps on loading with a circle of dots and takes around 2-3 minutes to startup. See another tutorial for Fix Windows 10 is Taking Too Much Time to Boot Up.
This error note actually happens when your computer boot is not correctly configured in the BIOS. When your system is unable to detect the bootable drive, it tries to load from your local area network and at that moment, the error comes up. Read Windows 10 – 5 Ways To Know BIOS Version of MotherBoard.
So, the best workaround to get rid of this error is to set the bootable drive as the Boot Priority. And to correct the priority, you have to enter BIOS.
Hook to the tutorial as we explore the solution step by step.
How to Fix Start pxe over ipv4 in Windows 10
1. Turn On PC and look for BIOS Setup Message
Step 1 – To start with, Restart Windows 10 PC or turn it On. Now, wait until you notice a small message on the PC screen.
Step 2 – The message usually comes at the lower corner of the PC screen and tell you to what key to press to get into the setup.
Step 3 – However, in most cases, it is Esc, Del, F2, F8, and F10. So, the moment you see the key number, press it immediately.
Note – You need to be quite alert and quick in this section as the message disappears within seconds.
2. Enter the BIOS Setup Utility
Step 1 – Once you press the correct key, the BIOS Setup Utility comes into view. The menu that appears depends from one PC to another because of their individual BIOS manufacturer.
No matter how the menu appears, but all the menu tabs on the top contains a similar collection of various settings. The alignment of menus and settings may be different based on your PC’s hardware.
For reference, you may like to know How to Access UEFI (BIOS) Settings on Windows 10, 8 and 8.1.
3. Locate and Correct the Boot Order
Step 1 – Switch to the Boot tab and to do so, press right or left arrow keys on the keyboard. Once you get into the Boot tab, you can see Boot Order. It shows any hardware that is connected to your PC and is capable to be loaded from such as, USB ports, optical drive, hard drive, LAN and so on.
Step 2 – As your boot order lists LAN on the top list, you are likely to see Start pxe over ipv4 error. So, correct the sequence and set the hard drive on top.
Step 3 – To bring hard drive on top of the list, use the + or – keys and set it at the first place.
Note – Ensure to see the instructions on the PC because there are chances that your BIOS may display other instructions to modify the order.
4. Save the New Boot Order
Step 1 – To resolve this Start pxe over ipv4 error, you need to save the changes you made in the above step.
Step 2 – So, click Save and Exit to come out of the BIOS utility. However, look carefully at the utility as you may have a different or slightly another similar name to save the changes.
Step 3 – Once you do this, the PC restarts with the effective changes and this should not show Start pxe over ipv4 error while the PC boots up.
Also, read How to Boot Windows 10 From USB Flash Drive.
Conclusion
Just correcting the boot order resolves the issue Start pxe over ipv4 error from occurring time and again. For some unknown reason when the boot priority is set to LAN, this specific error appears on the PC screen. In case you confront any trouble in resolving it, don’t hesitate, we will assist you in all possible ways.
What if it ISN’T an “error” and I actually want it to PXE boot? I have the LAN Cable plugged in and everything, and it still gives me this error. I have successfully used PXE boot many times before.