When your PC runs into a Blue Screen of Death (BSOD), it generates a dump file. These dumps get accumulated over time and again and consume a huge space of your drive. You can absolutely safely delete the items from your machine. So, today, we present you few simple ways to easily Remove System Error Memory Dump Files in Windows 11 or 10.
Let’s see –
5 Ways to Remove System Error Memory Dump Files in Windows 11 and 10
Way-1: Conduct Extended Disk Cleanup
Extended Disk Cleanup utility provides more options than a conventional one. It also shows additional details like the edition of Windows and all. Follow the below-stated guidelines for accomplishing the task properly.
Step-1: Press Windows + S.
Step-2: Type cmd here and Command Prompt shows up below the Best match. Right-click on it and select “Run as Administrator“.
Step-3: Upon opening the elevated Command Prompt window, type or copy/paste the following at the blinking cursor:
cmd.exe/c Cleanmgr/sageset:65535 & Cleanmgr/sagerun:65535
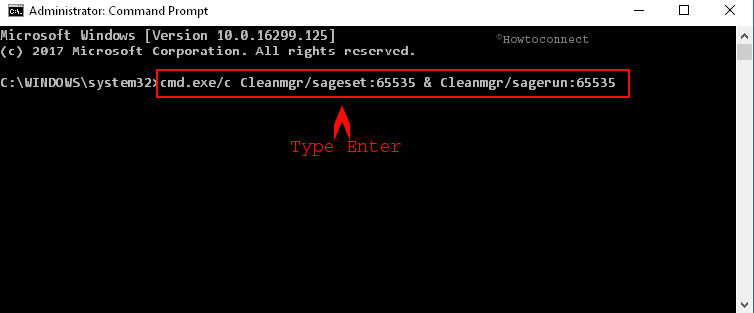
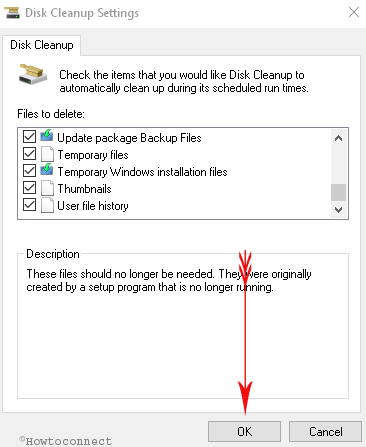
Step-4: Press Enter button and you come across a pop-up for Disc Cleanup Settings. Select the items in the list to clean and click OK afterward.
Step-5: Restart the PC and see if this made an impact on the machine as you successfully Remove System Error Memory Dump Files in Windows 11 or 10.
Way-2: Perform Elevated Cleanup
Here, you may raise a point as to why there is a need for an elevated cleanup. The regular cleanup fails to perform accurately when
1. The memory dump on your PC is waiting for the action to take.
2. The memory dump in the system is waiting to be examined.
In these cases. you need to carry out an elevated cleanup process and to do so, the steps are listed below.
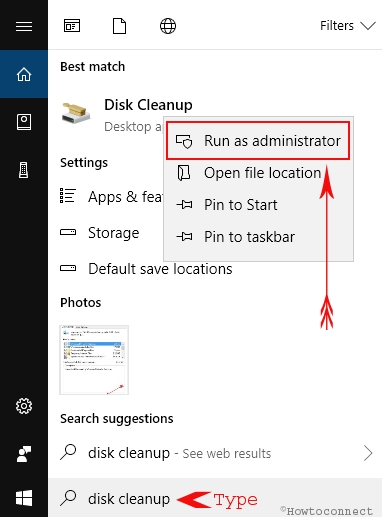
Step-1: Launch the search bar from the taskbar and type in disk cleanup.
Step-2: You can notice Disk Cleanup as the result on top. Right-click on it and choose “Run as Administrator“.
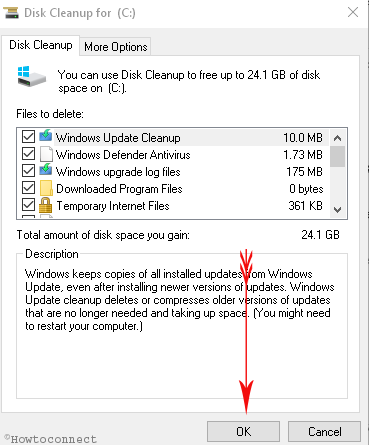
Step-3: Upon appearing the pop-up of Disk Cleanup: Drive Selection. Here, select (C:) and click the OK button. However, if your system drive letter is different, choose that.
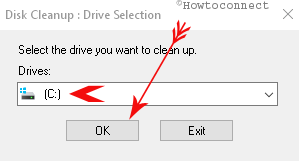
The system immediately scans all the files and checks what amount of space it can make free.
Step-4: Put the checkmark on the boxes you want to remove and click OK. These will be deleted and space will be freed as well.
To make this cleaning automatic, you can Schedule Disk Cleanup in Windows 10.
Way-3: Disable Indexing in Local Disk Drive C
Windows operating system maintains the index of the files using a service called Indexing. It is for recovery of files as well as improves searches. The system performs indexing automatically and keeps on updating its library too. But, sometimes, memory.dump occurs due to indexing too. This solution may come out effective if there is an existence of an unknown file(s) and that is occupying the space. So, pursue the below-given series of steps to disable indexing on your system drive.
Step-1: Click on This PC from desktop and select Local Disk C. If you installed the OS to any other drive, choose that one. Now right-click on this and reach out to Properties and click on it.
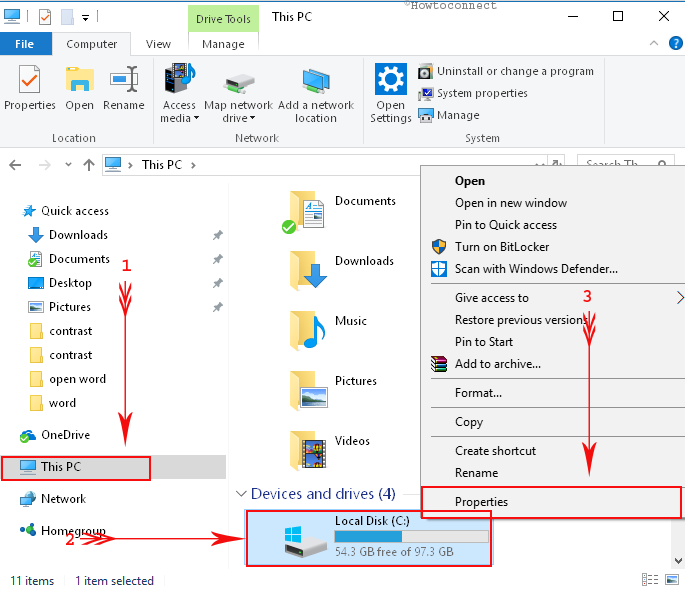
If you cannot see This PC on the desktop, read our tutorial to Bring This PC icon on Windows 10 Desktop Quickly.
Step-2: From the new dialog, select the General tab. Here, locate and uncheck the option namely ‘Allow files on this drive to have contents indexed in addition to file properties‘ (see screenshot).
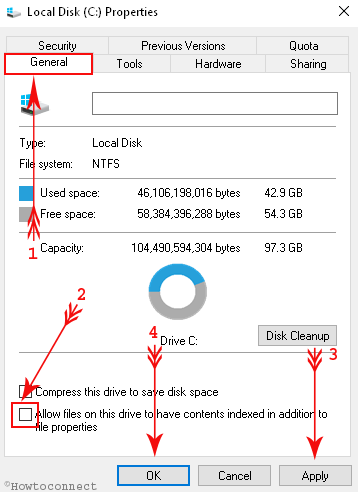
Step-3: Hit on Apply and then OK to make the changes effective.
Exit the Properties dialog and Reboot the PC.
Way-4: Through Command Prompt
Step-1: Launch the search box beside the Start menu from your computer and write cmd. When Search shows up Command Prompt on the top, put a hold on Ctrl + Shift keys and hit Enter key.
Step-2: Click Yes button at the prompt of UAC.
Step-3: On the following black window, copy/paste or type the given list of commands and press Enter key one after another.
fsutil usn deletejoumal /d /n c:
chkdsk /scan
compact /CompactOs:never
winmgmt /salvagerepository
del “%temp%\*” /s /f /q
del “C:I$Recycle.binl*”/s /f /q
del “%systemroot%\templ*” /s /f /q
vssadmin delete shadows /for—c: /all /quiet
Dism /Online /Cleanup -Image /StartComponentCleanup
/ResetBase
After finishing this task, leave the Command Prompt and Restart the computer. These commands will eventually Remove System Error Memory Dump Files in Windows 11 or 10.
Way-5: Manually Remove Dump Files
If you fail to resolve this issue by using the above solutions, you can try deleting them physically. At first, check the location of these files where the system created those. Navigate to the location using file explorer option and delete them. Follow these instructions to do so:
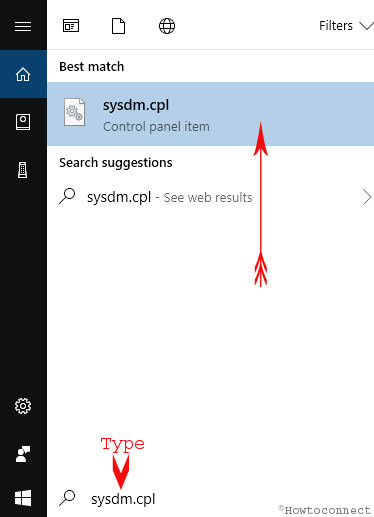
Step-1: Go to the search box, type sysdm.cpl, and hit Enter when you see the same command as the result.
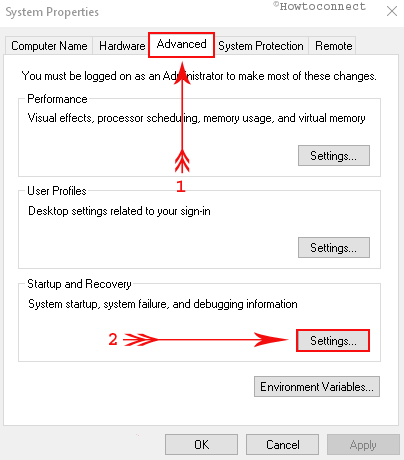
Step-2: This instantly shows up System Properties dialog on the PC screen. Switch to the Advanced tab and reach out to Startup and Recovery section. Click on Settings button as shown in the given picture.
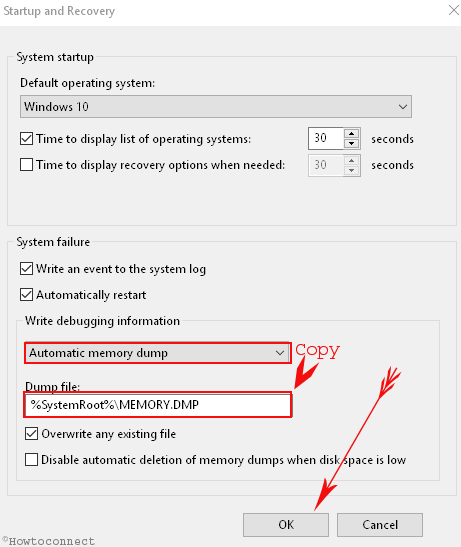
Step-3: From the new pop-up window, go to the Write debugging information section. Click the drop-down and choose Automatic memory dump.
Step-4: The next section Dump File displays the path by default. Copy this path and press OK button before leaving this window.
Step-5: Now, moving ahead, open the run dialog using Windows + R hotkeys. Paste the file path in the text field and press Enter key.
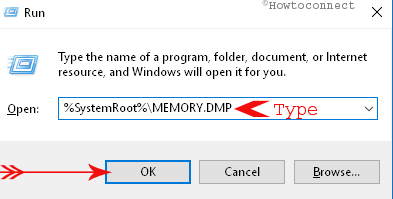
Step-6: Look for the files with name MEMORY.DMP and Delete it using the right-click option using the mouse. The system may prompt you for administrator rights for the sake of security, give permission for deletion.
However, users can try disk cleanup utility to eliminate this junk. Since it reaches out to a volume of 100 GB sometimes, you may need additional resolution methods. Therefore, we have discussed the best effortless ways to Remove System Error Memory Dump Files in Windows 11 or 10 OS.
Conclusion
So, you see that these dump files are a huge space-occupying element. Thus, it becomes a huge burden for you as they are piled up largely. So, you need to take care of these to avoid losing massive disk space. Therefore, you get to see certain effective methods to System Error Memory Dump Files in Windows 11 or 10. Read these methods properly and apply them carefully so that you can get rid of these dump files easily. If you are aware of any other methods, do write them to us.