Windows 10 and 11 let you Attach a Task to This Event in Event Viewer very smoothly. A Windows network admin knows the activity or change regarding an event using send an email and display a message features for the attached task.
In addition, you can also launch a program at the end. We will here provide you a detail of the ways here.
Attach a Task to this Event in Event Viewer in Windows 11 and 10
When you Attach a Task to This Event in Event Viewer in Windows 11 or 10 you can opt out of 3 different actions – Start a program, Send an email (deprecated), and display a message (deprecated). Let’s see how you will proceed –
Step-1: Type “eventvwr” on the taskbar search box and hit Enter key. To quickly launch it, perform a right-click on Windows logo icon and select Event Viewer.
Step-2: Make a double click on Windows Logs in the left pane and choose the desired component from Application, Security, Setup, System and “Forwarded Events”.
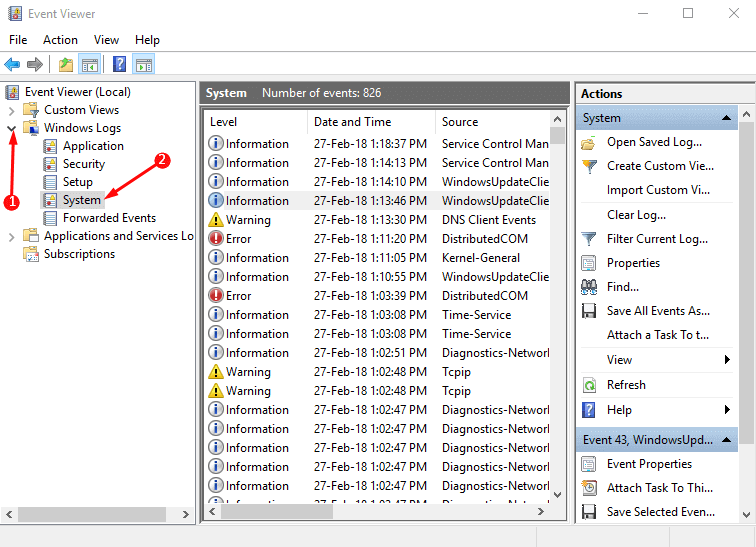
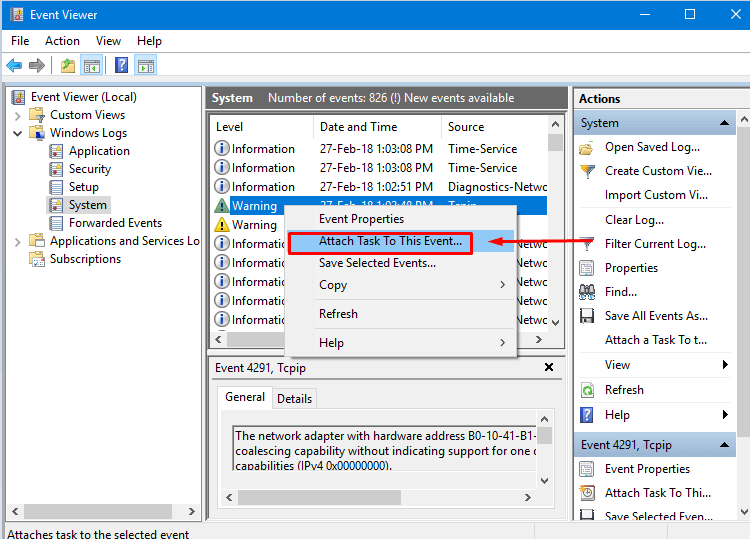
Step-3: Go to the middle section, scroll the events and locate the necessary event. Perform a right click on this one and select “Attach task to this Event..”.
Step-4: This will immediately open Create Basic Task Wizard on the screen. In the Name box, you will find the Event you have selected. Write about the task you are creating in the Description box, and click Next.

Step-5: Again, click Next on the following screen.
Add Action to be performed by task
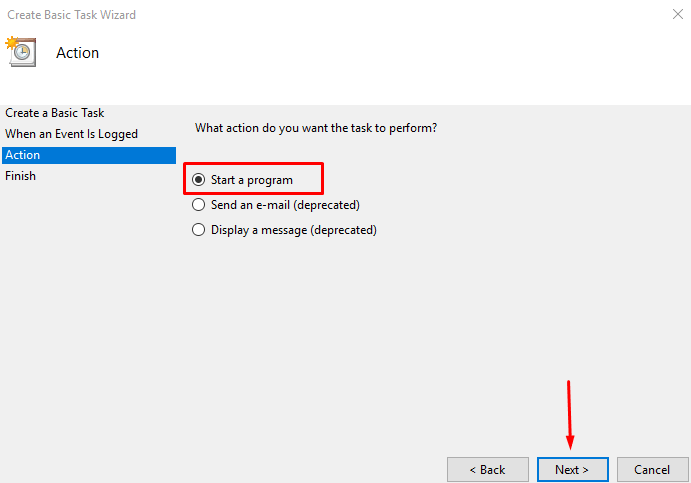
Step-6: Here you have to select an Action that the task will perform. Event viewer presents you three options –
i. Start a program: This triggers to launch another program or a script when the event occurs. For instance, you might want to run Chrome browser when you come across complications in TCP/IP.
ii. Send an email (deprecated): you can configure the system emails Whenever something happens to the log you are interested in.
iii. Display a message (deprecated): Windows will show an alert pop up regarding the occurrence of the event.
Note – Since Windows 8, Microsoft has removed these two actions (email and message) from Task Scheduler. However, it still allows to carry out them using PowerShell.
So, here, we will show you steps to Start a program only.
Step-7: Moving ahead, select the dot located before Start a program and click Next.
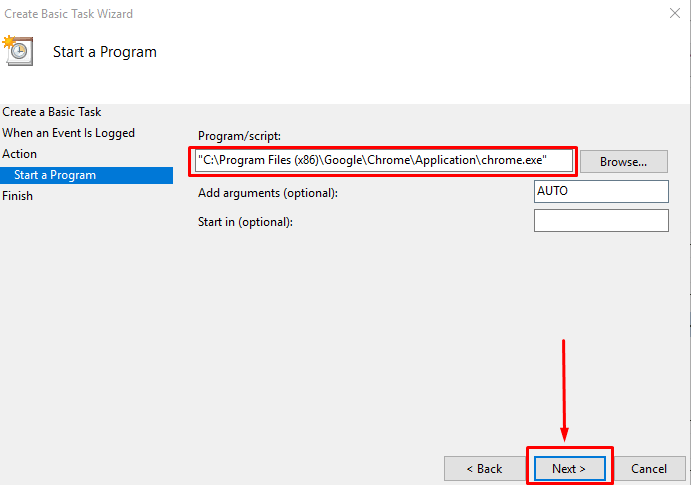
Step-8: Manually, type the executable file of the program you want to open. Else, click the Browse button and locate the program’s .exe file.
Step-9: Some programs support additional arguments. For example – let’s specify /AUTO here that will trigger the application to start automatically on a schedule and click Next.
Step-10: On the final screen, review the configuration you have made and click Finish.
However, to make additional changes in the task, ensure to tick Open the Properties dialog for this task when you click on the Finish button.
After you attach a Task to This Event in Event Viewer in Windows 11 or 10, the task scheduler automatically opens having the event. Here you can customize the task for a better execution.
How to Customize Event Viewer Task
Through General tab in Event Properties
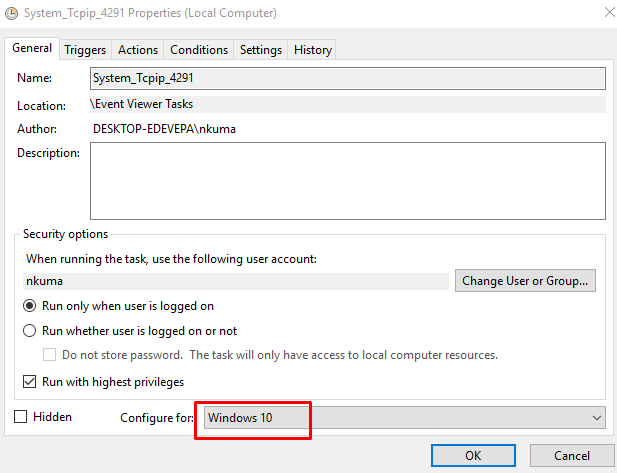
I. The Properties window of the new task will appear on the PC screen with various tabs. Stay on the General tab and check the box ahead of the option Run with highest privileges.
II. Click the Configure for drop-down and choose Windows 10.
Via Conditions Tab in Event Properties
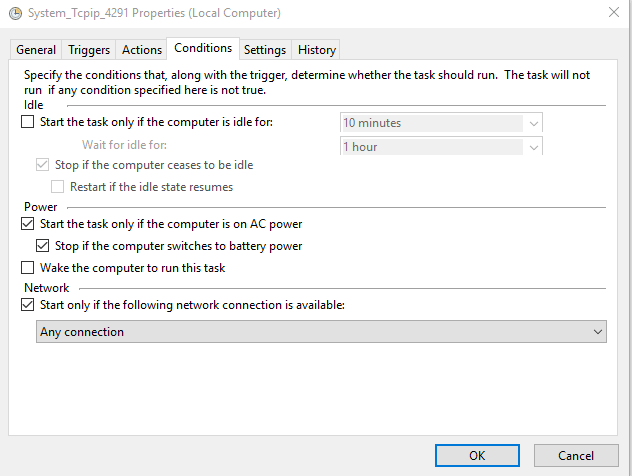
- Move to the Conditions tab which further displays three sections – Idle, Power and Network. The options here are –
- Start the task only if the computer is idle for: By default, this option is unchecked. To assign a time, check it and from the drop-down, choose the one as per preference.
- Idle – This setting is grayed out and to select this, first choose the above one.
- Stop if the computer ceases to be idle: Using this condition you tell your event to end when the computer freezes or crashes.
- Navigate to the Power section and choose appropriately in “Start the task only if the computer is on AC power”, “Stop if the computer switches to battery power”, and “Wake the computer to run the task”.
- In the Network segment, do according to your requirement for the choice “Start only if the following network connection is available”. If you want to select a specific network then click on the dropdown and choose one.
Using Settings Tab in Event Properties
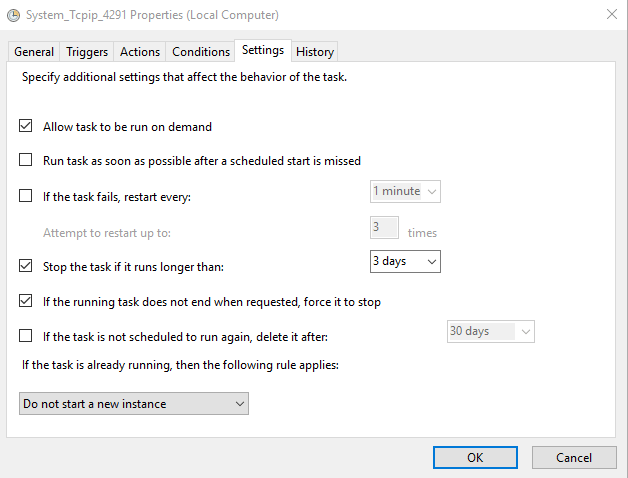
- Go to the Settings tab to specify the behavior of the task.
- Check the box before Allow task to be run on demand.
- Leave the box ahead of the option “Run task as soon as possible after a scheduled start is missed”.
- Click on the dropdown after If the task fails, restart every: and select suitable time.
- When you need to set a deadline, check the box before Stop the task if it runs longer than and choose days or hours.
- In order to forcefully finish the task, click on the checkbox against If the running task does not end when requested force it to stop.
- To erase the task, select the time of deletion. After finishing the customizations, click on OK button to save the event.
This is the method using which you can Attach a Task to This Event in Event Viewer in Windows 11 or 10. Thus, Windows 11 and 10 lets you create and run a task when a particular event occurs in the system. For example, you can restart a service quickly when an event displays a message notifying you of an error. Moreover, it also allows you to trigger another program when an event happens.