Another BSOD issue that is annoying users a lot is BITLOCKER_FATAL_ERROR in Windows 10. The Blue Screen of Death issue has bug check value 0x00000120. Users experience flashing on desktop and the pop-up of abnormal error messages during this problem. Moreover, the BSOD problem freezes the desktop as well which makes it inaccessible temporarily. The worst thing that happens is the auto restart of Windows.
BITLOCKER FATAL ERROR Stop error can show up in Windows 10 for so many reasons. Primarily evolved from outdated and defective device drivers, missing system resources and DLL files due to the collision of similar programs are also responsible. Besides, there might be malware or virus attack, defective Windows image files, running in low disk space and memory issues can call up the error also. We need to resolve it immediately once diagnosed with suitable fixes. In the following section, we will represent a collection of effective workarounds that can eliminate the issue. See the list of resolutions first –
BITLOCKER_FATAL_ERROR BSOD Windows 10 Solutions
Here is how to fix BITLOCKER_FATAL_ERROR BSOD Windows 10 –
1] Keep the Windows away from Restarting Automatically
Windows 10 intends to reboot automatically without prior notice once diagnosed with BITLOCKER_FATAL_ERROR. The issue is completely annoying and doesn’t allow sufficient scope to work out. Hence, we are considering this with the highest priority. Let’s disable the action so that we can make the way out for other resolutions. Move out with below proceedings –
As for primary caution, save and close if you are running an ongoing process. You can also minimize temporarily as well if many in number.
Step-1: Make the use of Win+D combination keys at once to load the Desktop area directly.
Step-2: On there, do a right click on the This PC icon and select Properties option.
Step-3: Now, System window comes up immediately.
Step-4: From the appearing window, select Advanced system settings from the left pane.
Step-5: Once a new wizard appears with System Properties, enter into the Advanced tab.
Step-6: Head to little downward to select Settings located under the Startup and Recovery section.
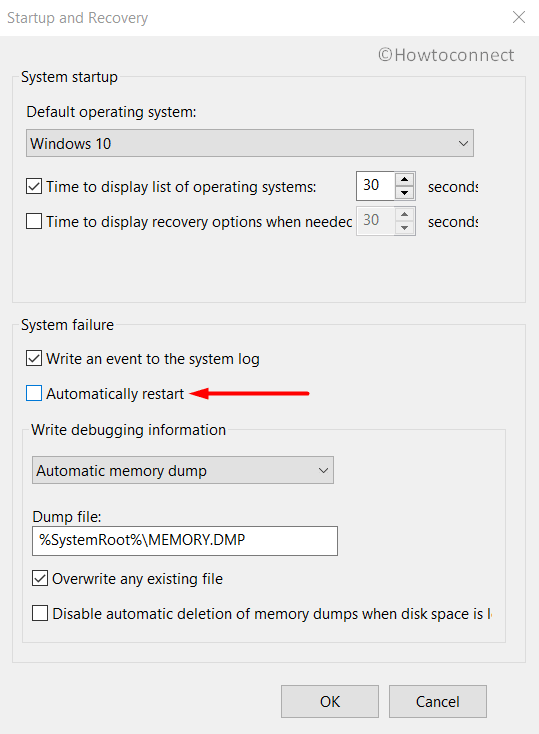
Step-7: Upon the appearance of a new wizard, go to the System failure section. Here, uncheck the box against the option Automatically restart (see screenshot).
Step-8: Finally, to implement the modifications, click the OK button.
When these changes are effective, Windows won’t prompt to reboot all of a sudden. Thus, there will be ample scope for deploying the rest of the resolutions.
2] Load only Basic Processes in Safe Boot Mode
From an earlier age, Booting in Safe Mode turned out to resolve most of the critical issues happened to Widows. Like all others, we can perform this workaround here also. This is a Startup process when Windows loads only basic programs. To boot the device in Safe Mode, here is the process –
- Press Windows Key to load the Start menu first.
- Hit the Gear icon to launch the Settings app.
- From the app UI, move to Update & Security and perform a click on it.
- When the consequent page opens up, choose the Recovery option lying the left overlay.
- Jump to the adjacent side, and do a click Restart now button under Advanced Startup section.
- Subsequent to the cycle of rebooting of Windows, it will ask you to select the next step.
- Choose Troubleshoot from appearing screen.
- Progressing ahead, make a click on Advanced options and then hit Startup Settings.
- When Windows notifies that device can be restarted with the use of additional settings one of which is Enable Safe Mode, select Restart to move ahead.
- When the device is back in operation after completing restarting second time, Press f4 in order to Enter into Safe Mode.
3] Run the default tool – Windows Blue Screen Troubleshooter
With BSOD errors in a notable number of devices, the Tech giant came up with a preferable solution. The Built-in utility namely Windows Blue Screen Troubleshooter was developed to resolve the issue internally. That has turned out to be the biggest relief ever. To have this utility, the minimum Windows requirement is Fall Creators Update or above. Afterward, follow the below guidelines and apply the tool –
- Open Windows Settings by making a combined press of Windows and I keys.
- While in the app interface, click Update & Security category.
- Do a click on it to load the additional settings page.
- From the next window upon appearing, select Troubleshoot from the left-hand side.
- Go to the right-pane, reach Blue Screen option available here and expand it by clicking.
- Hit Run the Troubleshooter once come in the view from the expanded pane.
After the scan gets over, this handy tool will eventually resolve BSOD related issues from the system. We can expect that the BITLOCKER_FATAL_ERROR will not show up anymore.
4] Update drivers to Fix BITLOCKER_FATAL_ERROR
Among all the causes BITLOCKER FATAL ERROR BSOD, we have found the defective, outdated and incompatible drivers are to take the blame. We need to take immediate action for updating them. Windows Device Manager is the right platform in this case. Outdated drivers are represented with identifying indication and that makes the task a lot easier. Here is how to update the drivers using the default app –
- Do a combined press of Win+S hotkeys and invoke Taskbar search on display.
- When it shows up, type in Device Manager in the provided text box.
- Select the Windows Device Manager from the visible result.
- Moving ahead to the app, you will see the device console. Have a proper glance for any Exclamation mark in them.
- If there is, do a click to split the driver list.
- Now, perform a right click on the drivers and choose the Update driver option from the menu.
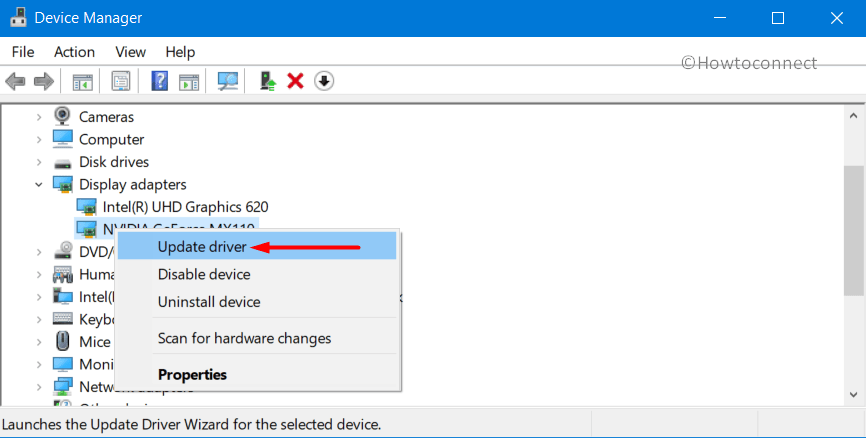
- Follow the instructions shown in display afterward to update the drivers.
- Do the same with all devices with a mark of Exclamation and get rid of BITLOCKER FATAL ERROR BSOD.
5] Make Windows 10 updated by installing all available patches
An outdated Operating System lacks strength a bit. It is also prone to get affected by bugs and problems. Considering the fact Microsoft also releases the update patches, major updates as to maintain this stream. If your Windows have so many pending patches, might suffer from BITLOCKER_FATAL_ERROR BSOD. Therefore, let’s make some time to install these available patches going through the following method –
Important – Try to get connected with Broadband Internet or Wi-Fi to get high Downloading speed. If you cannot manage and use the Mobile Hotspot, make sure to disable Metered Connection from Network settings. Otherwise, Downloading will not begin.
- Press the Windows key and upon opening the Start menu, select Settings cog.
- When the app opens up, move the pointer to Update & Security region and perform a click on it.
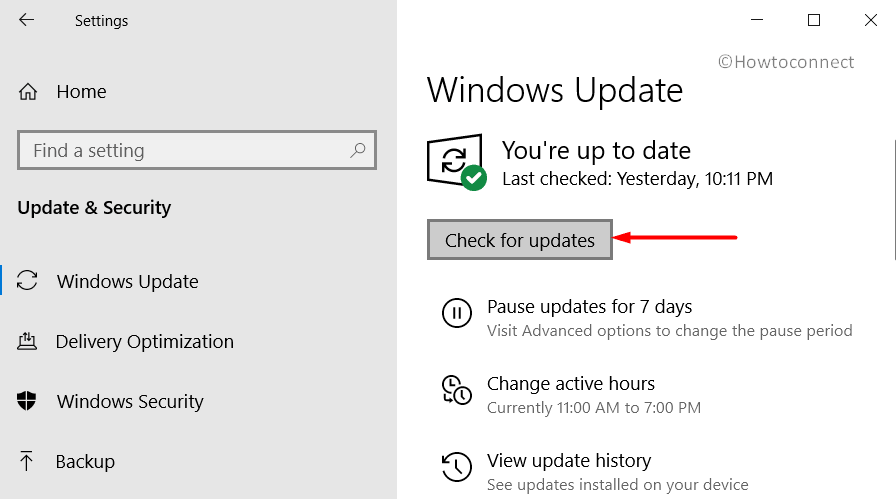
- From the following page after being loaded fully, choose Windows Update lying on the left pane.
- Switch to the right-hand side and perform a click on Check for updates button.
- When the patches are available, hit the Download button located under each patch.
- Once the download finishes, the installation procedure will start automatically.
- Follow the instruction windows provides in the display until the process ends.
6] Dismiss Malicious Invaders to fix BITLOCKER_FATAL_ERROR BSOD
In this Tech developed world, Malwares are rated as number one culprit. They are waiting everywhere on the web in disguise to cause issues. Whenever these viruses get the entrance to the Windows, delete system components necessary for running the Operating System. In the end, Windows suffers BITLOCKER_FATAL_ERROR BSOD. To dismiss those completely, Windows Security will be helpful. Here is the way to proceed –
- Roll the mouse pointer over Taskbar area and in the continuation, do a click on Up arrow indicating Show hidden icons.
- When the options spread up, select the shield icon and launch the Windows Security app directly.
- Joining the App UI, select Virus & threat protection residing in the left pane.
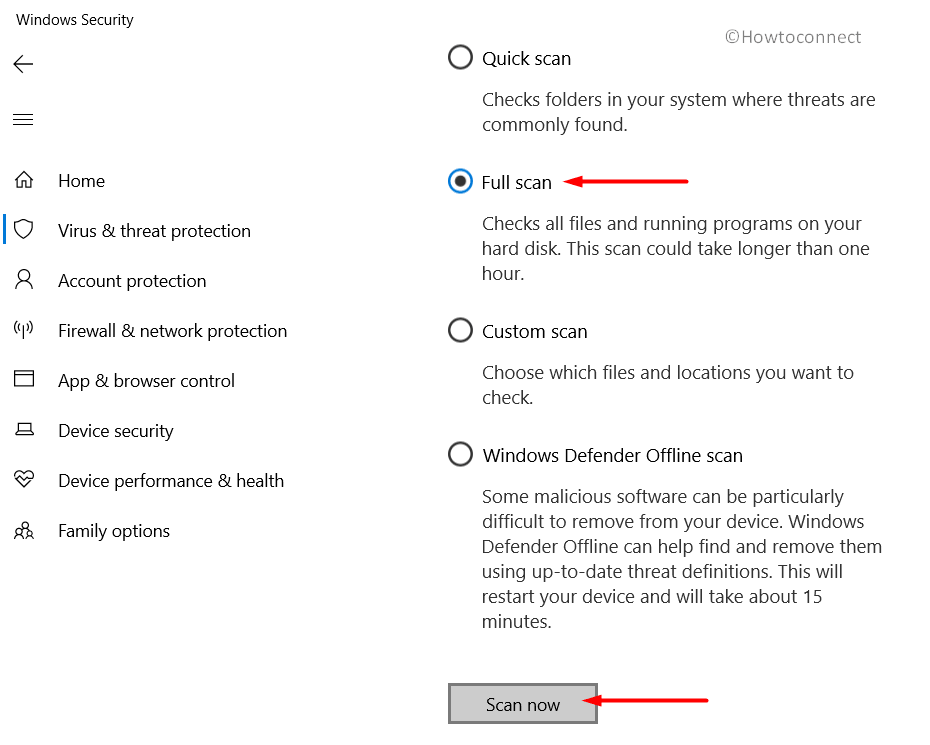
- On the right pane, click the link Scan options to proceed further.
- Choose the Full scan radio button.
- In continuation, select Scan now to start the detection process.
- Upon finishing the process, results will show up on display. If you see any potential malware, click the Clean Threat option to get rid of it.
- When the succeeding page loads fully, there will be three options available for you.
- Hit a click on Remove first and then Start actions to allow app for killing these viruses.
7] Clean the Disk Storage to Resolve BITLOCKER FATAL ERROR
The device produces lots of temporary files which become actually unnecessary later. These files keep on piling up in Disk Drive. When turning a bigger amount, occupy huge space in the drive. Ultimately, the storage runs low and regular functionality is also affected. There is also a sharp chance to have BITLOCKER_FATAL_ERROR BSOD error as well. To delete these files and make some space in it, Disk Cleanup Utility can help a lot. To use this handy tool, follow the below steps –
- First of all, open the Run dialog by pressing Win+R hotkey.
- Type cleanmgr in the empty space provided.
- When a small dialog box comes into view to pick up the preferable drive, click the dropdown and choose C:.
- Hit Enter key and Disk Cleanup tool will start opening up with calculating retrievable space at the beginning.
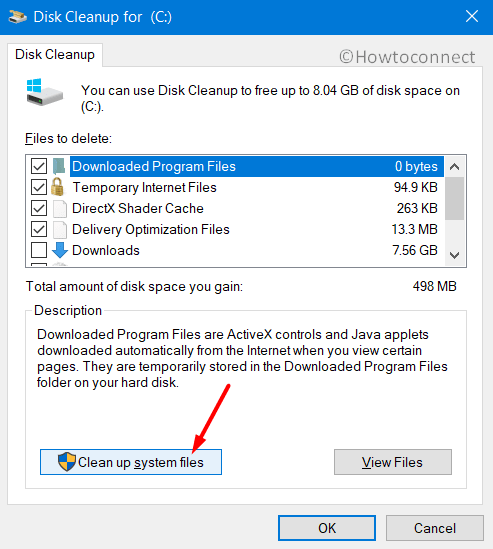
- Hit Clean up system files button as shown in the below screenshot.
- The small dialog box will re-appear asking same. Select C: in the same way and press the Enter key.
- Once Disk Cleanup for C: comes, move to Files to delete segment.
- Put tick mark all the checkboxes leaving Downloads only.
- Click OK to execute the freeing up process.
Note – We recommend before doing so, check the Recycle Bin once for checking if anything left out important. In case found any, restore in the proper location.
This process might be lengthy. Be patient and wait until finished. Hopefully, there will be no BSOD error in the system afterward.
8] Rectify the defective Windows Image files
The system might experience BITLOCKER_FATAL_ERROR BSOD due to the presence of dreadful Windows Image files also. Well, “Deployment Image Servicing and Management”, aka DISM tool can be deployed to deal with this task. To access the utility, proceed with the following –
- Press the combination of Ctrl+Alt+Del keys together initially to load startup page.
- Select Task Manager from the appearing options.
- From the app UI, select File option located at the top left end.
- Choose Run a new task from visible options.
- When a dialog appears, type cmd in the blank text area.
- Proceeding ahead, make sure to tick the box next to the option “Create this task with administrative privileges”.
- Select Ok to launch Elevated Command Prompt directly.
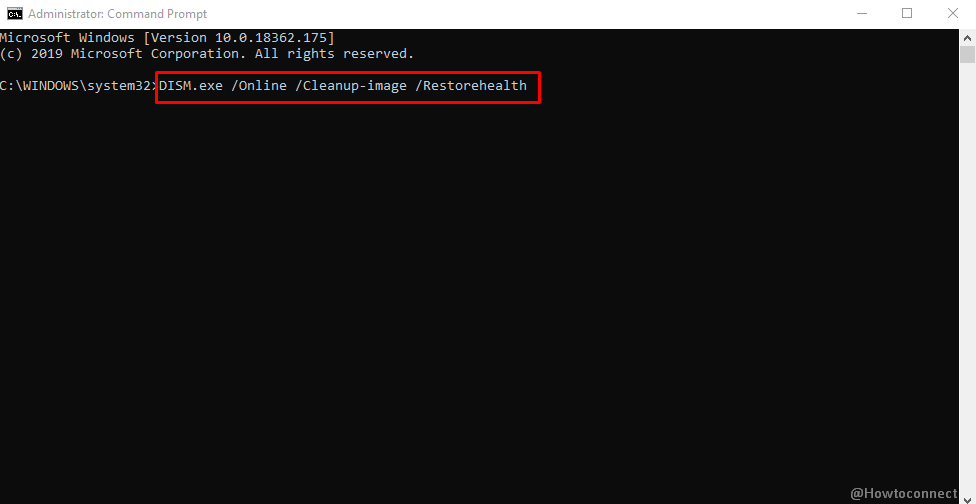
- Now, in the black window, type the command at the blinking cursor –
DISM.exe /Online /Cleanup-image /Restorehealth
- Press Enter key to activate the DISM tool.
- The tool will thereafter start working and fixes all the defective Windows image files automatically.
- Hold the nerve until the process gets over completely.
- Once the scan finishes, reboot Windows which will make this workaround effective.
9] Unplug Hardware Accessories for a while and reconnect later
People often have discovered BITLOCKER_FATAL_ERROR BSOD after connecting an additional Hard Drive with PC. Few users also reported that they encountered the issue even after connecting an additional DVD drive. This is just shocking as you need these devices besides for vibrant reasons. Well, the solution is simple enough, you just need to disconnect that for a while. Can reconnect again after getting confirmation that no BSOD is present. The procedure is as follows –
- First of all, disconnect the external accessories from the device.
- Leave them separate in a safe and accessible location.
- Restart Windows 10 PC using the usual method (Start menu => Power icon => Restart).
- After completing the rebooting cycle, check for the error in the system.
- If no BITLOCKER_FATAL_ERROR BSOD is found, connect all the separated devices with utmost care.
- Launch the browser and visit the manufacturer website for respective devices.
- Download and Install the latest driver to use flawlessly.
10] Use System File Checker to resolve BITLOCKER_FATAL_ERROR
A system with missing DLL files and corrupted resources are prone to have BITLOCKER FATAL ERROR BSOD. To rectify these vulnerabilities, we can access System File Checker. Follow the below guidelines to complete the task –
Step#1: Open the Taskbar search pressing Win+S hotkeys together.
Step#2: Type in or copy-paste cmd.exe in the blank text space given here.
Step#3: When the results are loaded, do a right click on Command Prompt and select “Run as Administrator”.
Step#4: Hit Yes to give consent once UAC prompts.
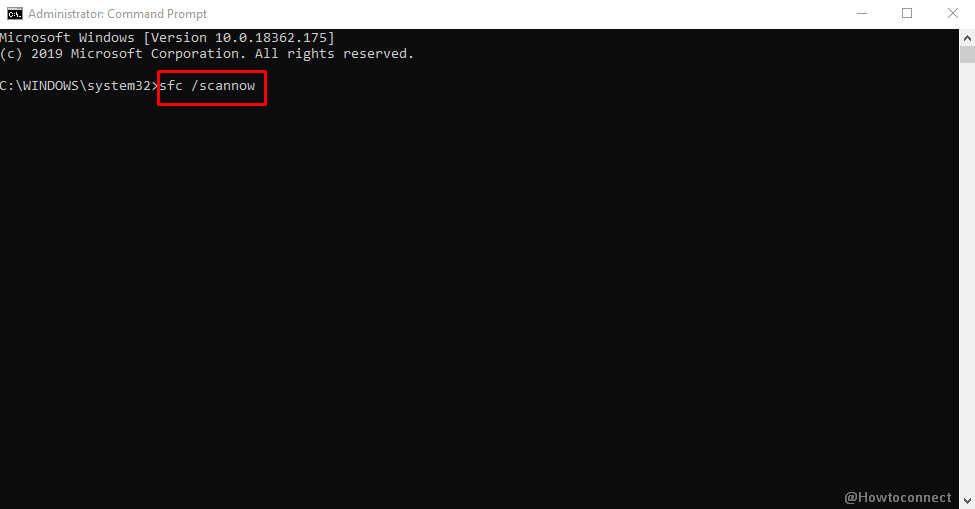
Step#5: In the dark Elevated Command Prompt window, type the following command line –
sfc /scannow
Step#6: Hit Enter key to power up the System File Checker. Rest of the fixing will be carried out automatically.
Step#7: It might be a lengthy process, but will be worthy as well. So, wait until the process finishes.
Restart the device when ends and upon coming to desktop, check if there is BITLOCKER_FATAL_ERROR BSOD in Windows 10.
11] Perform System Restore to Undo the current changes
When Windows registry senses any abnormalities, it might cause BITLOCKER_FATAL_ERROR BSOD error in the system. Changes in the registry are done when we install an application or uninstall something. We can easily escape the BSOD error performing System Restore only. The process will load back the previous state if you have created a restore point previously. To use the method, the instructions are –
Note- In case you don’t have a previously created restore points, ignore this solution and switch to the next workaround. Obviously, you cannot accomplish the task without having such points.
- Move the pointer to the bottom left corner of the desktop.
- Do a right click on the Start menu.
- Select Run from options.
- When the dialog shows up, type rstrui.
- Press Enter key and System Restore Wizard arrive on the screen immediately.
- Hit Next from the bottom of this appearing wizard.
- On the succeeding page, make a click on Show more restore points if want to see all the previous ones.
- Now, choose the recent one in the list and select the Next button again.
- From the window appearing next, select Finish to start the restoring process.
12] Abandon abnormally terminated Windows Update Files
Microsoft has made the whole windows updating system autonomous to facilitate users. When this system terminates abnormally, there is a chance of having BITLOCKER_FATAL_ERROR in Windows 10. You can easily reduce this chance by uninstalling these files. The guidelines are as follows –
- Launch the Settings app using any prevalent methods.
- Once the app UI unrolls, roll the cursor to Update & Security area and make a click on this.
- Choose Windows Update when the succeeding page loads.
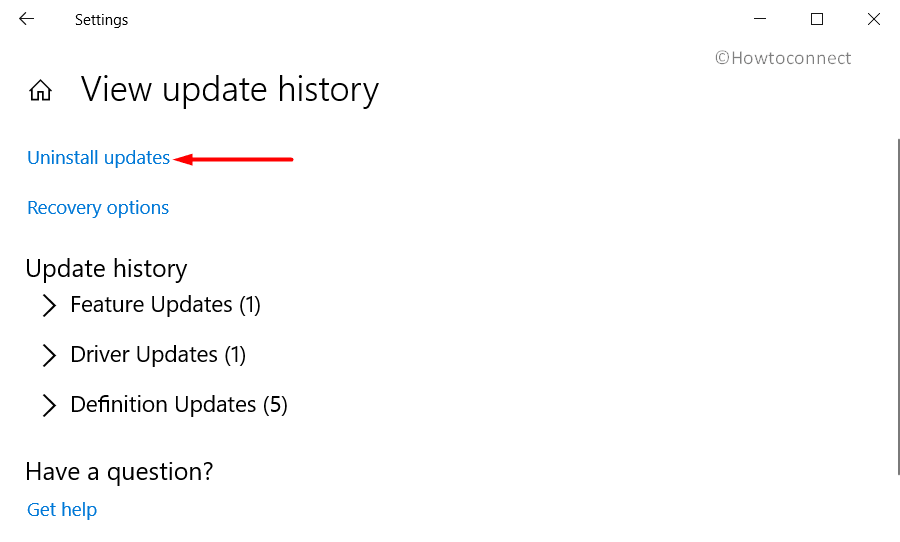
- Jump on to sideward pane and also do a click on the View update history link.
- From the page coming up next, hit a click on Uninstall updates link. The action will load the Installed Updates page.
- Moving to the appearing page, reach out to the latest patch you have installed.
- Do a right click on it and choose Uninstall option once visible.
- Follow the on-screen guidelines until these files get rid of them finally.
13] Settle Poor Hard Disc Sections using Disk Checking Tool
When the Hard Disk itself suffers from bad areas, BITLOCKER_FATAL_ERROR BSOD will be imminent. To settle this mess, Disk Checking tool is well famous. You have to move ahead through Elevated Command Prompt for activating the utility. The guidelines for that is as follows –
- Manage to launch the Elevated Command Prompt using the above guidelines we provided.
- After moving on to the black window, enter the command in the below format –
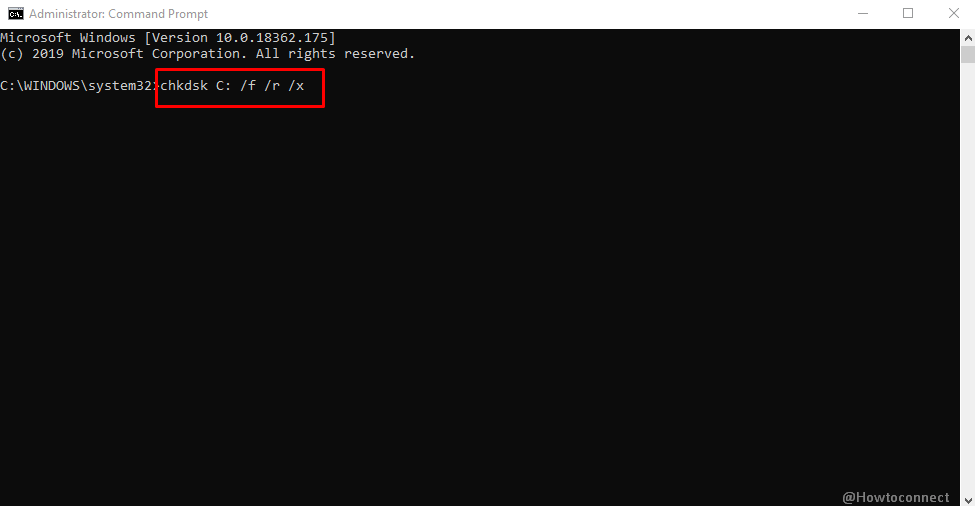
chkdsk [Drive:] [parameters]
- Now, hit the Enter key to activate the Disk Checking tool. Initially, the utility will start showing disk status only. To get the issues resolved, we need to arrange the command in the following way –
/f /r /x
In the above command line,
- f represents fixing the detected problems in volume.
- r for bringing out the bad areas in the Hard disk.
- x will split up the drive components to facilitate the process before it begins.
So, the final command seems like – chkdsk C: /f /r /x
Note – we have used C: as installed the OS in this drive. For your case, use any like D:, E: or any based on where you have installed windows 10.
- Now, hit the Enter button after typing the rearranged command line.
- This process will take a while for finishing up. Don’t terminate abnormally.
- Once finished, you can Reboot the PC and check whether there is BITLOCKER FATAL ERROR in Windows 10.
14] Limit the risk of Collison between similar programs by uninstalling them
We have come across an unwanted situation of colliding two similar apps while staying together in the same system. In the process, they remove plenty necessary OS resources and finally call in BITLOCKER_FATAL_ERROR BSOD Windows 10. We limit this risk, we have to uninstall the applications. Here is how to proceed –
- Press Win+I and call in Windows Settings app.
- Do a click on Apps.
- Select Apps & features lying on the left pane from succeeding page.
- Moving rightward, find out applications causing BITLOCKER_FATAL_ERROR BSOD Windows 10.
- Select the program and hit Uninstall from the elongated pane.
- Keep following the on-screen guidelines until it disappears completely.
15] Uninstall Third Party anti-virus program and Fix BITLOCKER_FATAL_ERROR
We really need Anti-virus applications to deal with malware. In absence of Windows Security, third-party programs were handy. But nowadays, they have become useless and furthermore, might call up BSOD issues also. Therefore, we can uninstall these applications to avoid the hassle. To complete the task, instructions are as following –
- Open the Run dialog by making a combined press of “Win+R” hotkeys.
- Write “appwiz.cpl” in the blank typing area.
- Press Enter key to load the Programs and Features window.
- Locate the third-party antivirus solution in the list of installed applications.
- Hit a click on the same and choose Uninstall option from the top ribbon.
- Choose Yes if User Account Control asks permission.
- Follow the guidelines coming afterward until this app uninstalls successfully.
16] End up all the Memory issues in Windows
Memory problems came out vigorously to form BITLOCKER_FATAL_ERROR in Windows 10. To call an end to these issues including problematic areas in RAM, Windows Memory Diagnostic helps a lot. Here is how to use the tool –
For initialization, save and close if you have any ongoing processes before starting the workaround. You might lose the progress due to windows restarting for the resolution.
- Launch Taskbar Search by pressing Win+S keys together.
- Type Memory in the blank typing area
- When Windows Memory Diagnostic arrives in the result, select the app.
- Go ahead with the option “Restart now and check for problems (recommended)” from the visible wizard as shown in the below figure.
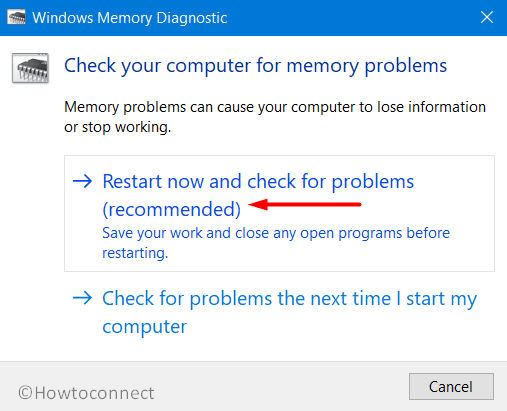
- Now, the Windows will reboot in accordance with the command initially. After it turns to operation onward, a blue screen will appear detecting memory problems.
- The machine will reboot automatically when the progress reaches 100%.
- Check the report of the diagnosis in Notification area once sign back in next.
In the above part, we have included all the possible workarounds that can resolve BITLOCKER_FATAL_ERROR BSOD in Windows 10. Hope that you have already solved the problem. Unfortunately, if you are failed to do so, we can suggest the last resort. This is to perform Clean Installation of Windows 10 again. This workaround might have professional attire but can serve the best.
If you are proceeding to reinstall Windows, make sure the computer is connected with a speedy internet connection. Concentrate on saving a backup for all the necessary items in the system and preferably take it out carrying in USB or external drive. Seek help from skilled people if you feel nervous. Hope, this time positive result will come out.
Methods:
1] Keep the Windows away from Restarting Automatically
2] Load only Basic Processes in Safe Boot Mode
3] Run the default tool – Windows Blue Screen Troubleshooter
4] Update drivers
5] Make Windows 10 updated by installing all available patches
6] Dismiss Malicious Invaders
7] Clean the Disk Storage
8] Rectify the defective Windows Image files
9] Unplug Hardware Accessories for a while and reconnect later
10] Use System File Checker
11] Perform System Restore to Undo the current changes
12] Abandon abnormally terminated Windows Update Files
13] Settle Poor Hard Disc Sections using Disk Checking Tool
14] Limit risk of Conflict between similar programs by uninstalling them
15] Uninstall Third Party anti-virus program
16] End up all the Memory issues in Windows
That’s all!!