When you encounter a nightmare as Blue screen issue and try to get rid of it, you need to provide a full memory dump of the system. These files are quite large and indicate the root cause of the bugs and problems. So, in this article, we will discuss two ways to Collect Memory Dump Files in Windows 11 or 10.
To create memory dump when the blue screen of death occurs certain configuration is required. These files have copies of computer memory at the instant of crashing. It helps to find and solve the issues that caused the system to crash. Generally, stopping errors mostly occur due to malfunctioning hardware drivers. Rest causes include hardware issues and Microsoft codes.
Ways to Configure System to Collect Memory Dump Files in Windows 11 and 10
Here is how to Configure System to Collect Memory Dump Files in Windows 11 or 10 –
Through System Properties
Step-1: Click Taskbar search box and type Advanced system settings.
Step-2: Press Enter.
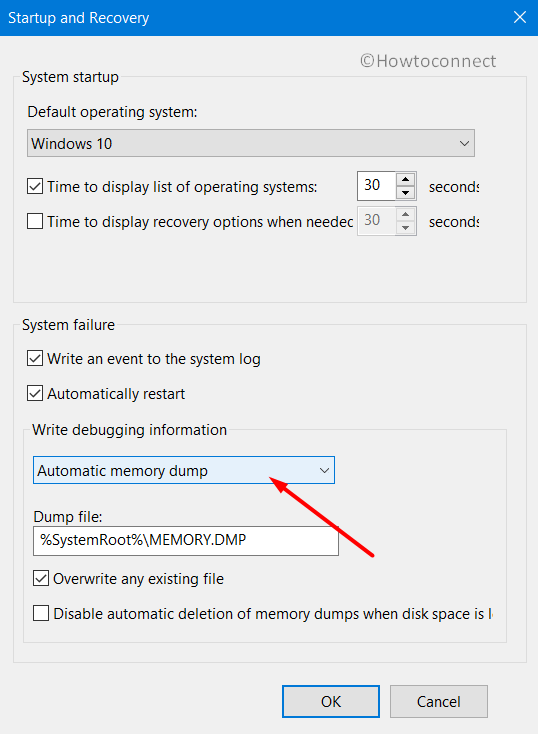
Step-3: Be on the Advanced tab on the System Properties box. Here, click the Settings button that appears in the section namely Startup and Recovery.
Step-4: In the new window, click the drop-down below the option Write debugging information. Depending upon your requirement, choose the preferred option accordingly. Click OK.
Using DumpConfigurator tool
- Click on DumpConfigurator tool link and it will start downloading the utility. Now, go to the Downloads folder on your device and extract the contents of the zip file.
- Double-click on sourceCode folder.
- Again extract the items of sourceCode folder and double-click on the file DumpConfigurator.hta.
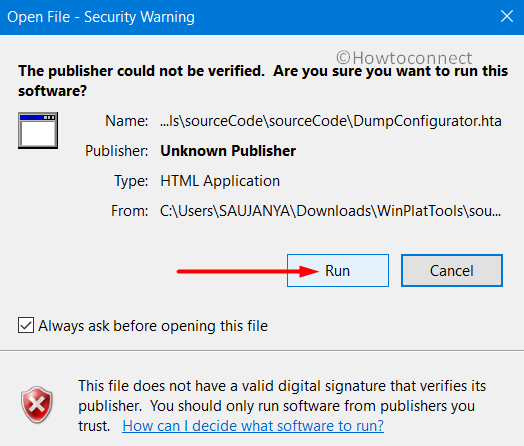
- In case you come across Open File Security Warning dialog, click Run to continue.
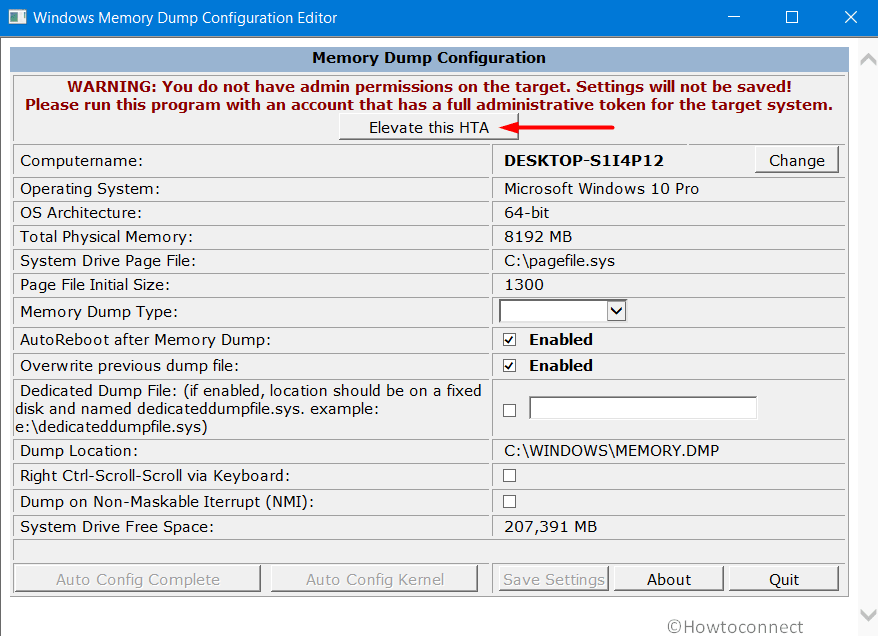
- On the Windows Memory Dump Configuration Editor, click the button Elevate this HTA (see snapshot). Click Yes on the prompt of UAC.
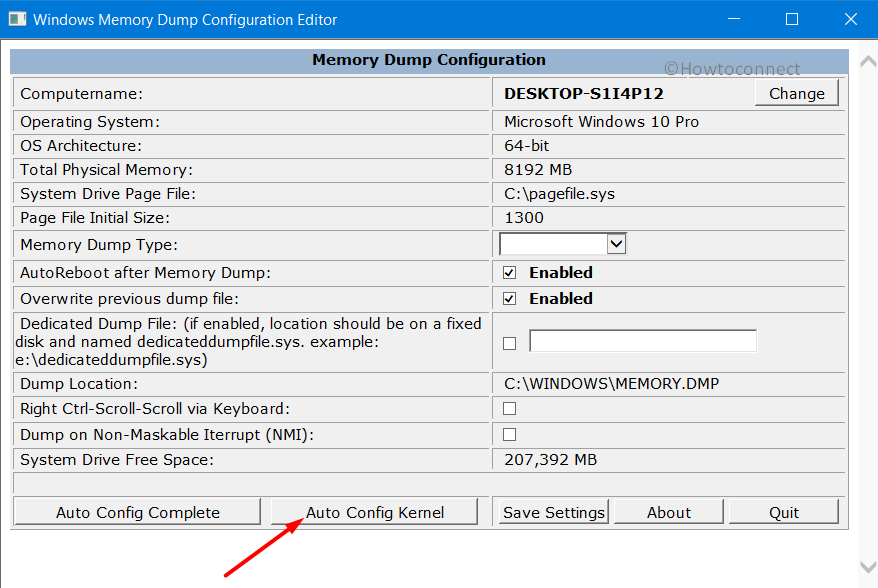
- Click Auto Config Kernel as shown in the picture below.
- Restart Windows 10 PC for the modifications to become effective.
- Now, get access to the Services and locate Automatic System Restart Services (ASR). Double-click on it and then disable and stop it. This is necessary to prevent dump files from being written.
Types of memory dump files
- Complete Memory dump: It is the largest of all the “memory dumps”. It contains all the data used by the Windows at the time of crashing.
- Kernel Memory dump: It is quite smaller than complete “memory dump”. It does not contains unallocated memory and only consists of memory available in the kernel and HAL as well.
- Small memory dump: This does not provide detailed and contains very little details about the system crash. It is the smallest of all the dump file types and occupies only 256 KB.
The memory dump file is saved at the below-given locations.
| Dump file type | Location |
| (none) | %SystemRoot%\MEMORY.DMP (inactive, or greyed out) |
| Small memory dump file (256kb) | %SystemRoot%\Minidump |
| Kernel memory dump file | %SystemRoot%\MEMORY.DMP |
| Complete memory dump file | %SystemRoot%\MEMORY.DMP |
| Automatic memory dump file | %SystemRoot%\MEMORY.DMP |
| Active memory dump file | %SystemRoot%\MEMORY.DMP |
That’s all!