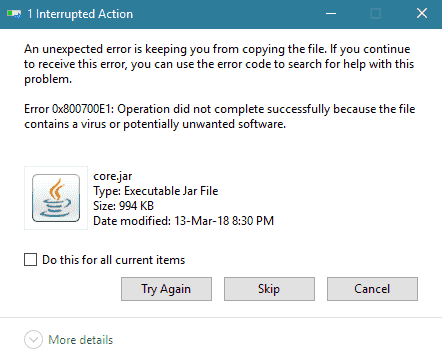
Error Code 0x800700E1 appears mostly when you copy a file or install a 3rd party software on Windows 10. Operation did not complete successfully comes as a prefix of this stop code. However, the software is never malicious or having a virus despite the system shows the message that the file contains a virus or potentially unwanted software.
The Error 0x800700E1 is the result of Windows Defender commonly which stops a valid software from installing because of extra cautiousness. In addition, the issue may trouble you due to corrupted system files. If something goes wrong while transferring files from USB Pen drive to external hard disk then the mess may also occur. You will come across various methods to curb this bug as – disabling Windows Defender, adjustment in the regedit, editing Policy setting.
Error Code 0x800700E1 Operation did not complete successfully in Windows 10 Solutions
Here is how to fix Error Code 0x800700E1 Operation did not complete successfully Windows 10 –
Temporarily Disable Windows Defender
Windows 10 includes a much powerful inbuilt antivirus program named Windows Defender to filter threats but sometimes it presents inconvenience before you. Error 0x800700E1 is an example, so you will need to disable this security tool. Later you should enable the same to keep the protection intact on your system.
There are three methods to turn off Windows Defender. Each one of them is described below:
Step-1: Simultaneously press Windows Key + I to launch Windows Settings.
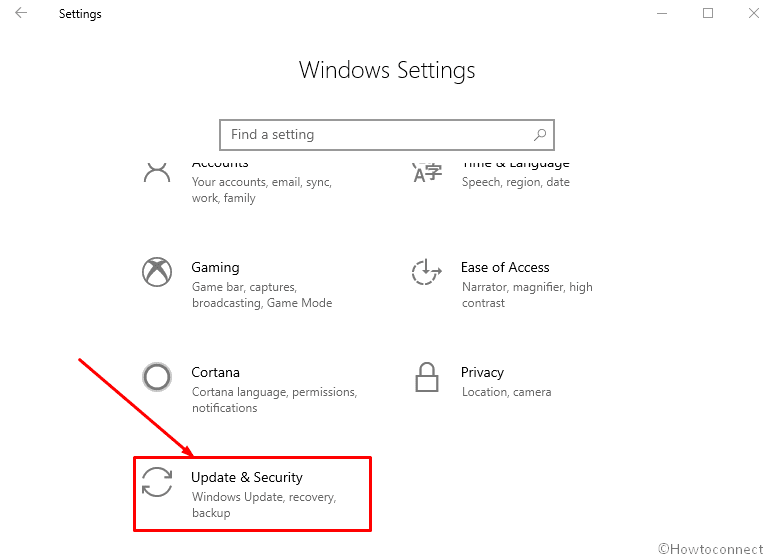
Step-2:Click on the Update & security option.
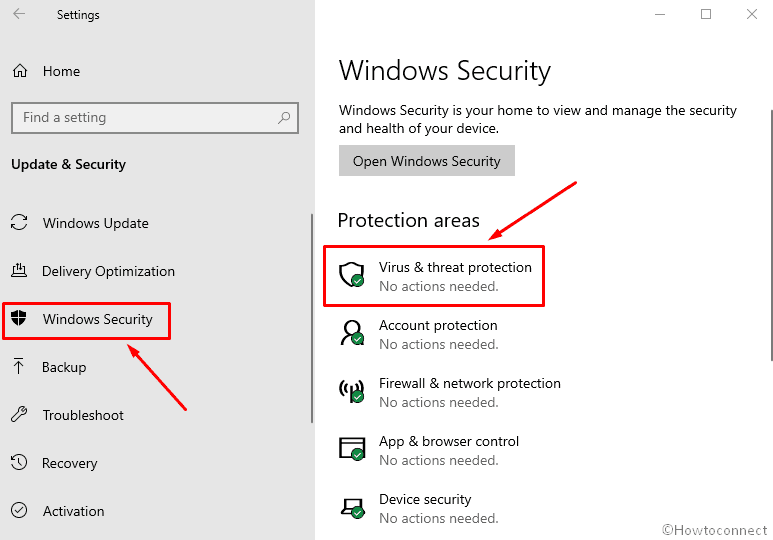
Step-3: On the left-hand side, click Windows Security (In the earlier versions you will have to click Windows Defender instead). Then go to the right pane and make a click on the first option “Virus &threat protection”.
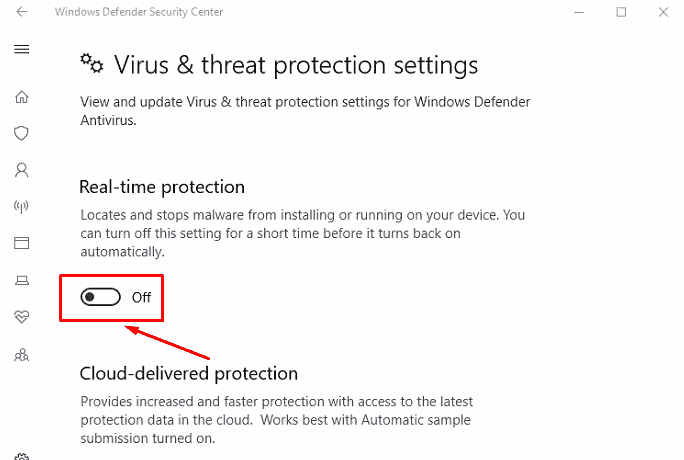
Step-5: Scroll down and click on Virus & threat protection settings.
Step-6: Disable the toggle switch from the Real time protection area.
Step-7: When UAC pop up prompts, select yes to go ahead.
Now install the software and enable the real time protection section.
Alternative method to disable Windows Defender
Sometimes Windows defender doesn’t get disabled by the normal method but you have an option to take help of Registry Editor in this situation. Follow the method –
Press Windows Key and R hotkey and type regedit under void box then OK to proceed forward.
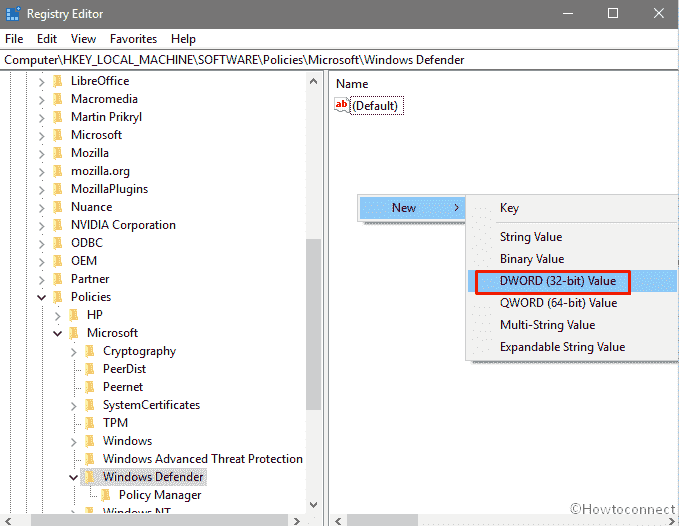
Move on the left pane and navigate to the described path: Computer\HKEY_LOCAL_MACHINE\SOFTWARE\Policies\Microsoft\Windows Defender
Find the DisableAntiSpyware DWORD located in the right pane. If you don’t notice the Value you can create a new one by right clicking in a blank area and selecting New > DWORD (32-bit) Value.
Put DisableAntiSpyware as its name and double click on it.
Lastly, double click on this, put 1 in the Value data field and click OK to save these changes.

The above method will permanently disable the Windows Defender and the error 0x800700E1 might be fixed. To enable Windows Defender via registry editor again delete the DWORD.
Note: Doing any unexpected changes under registry may corrupt your important files or operating system. So it is good to create a backup of your important files to rescue if anything goes wrong. Follow the instructions here in this concern – How to Import and Export Registry Editor on Windows 10.
Turn off Windows Defender using Group Policy Editor
If you’re worried about doing the change under registry as this is risky, enforce gpedit to disable the Windows Defender.
Press Win +R altogether and type gpedit.msc in the blank space then hit Enter.
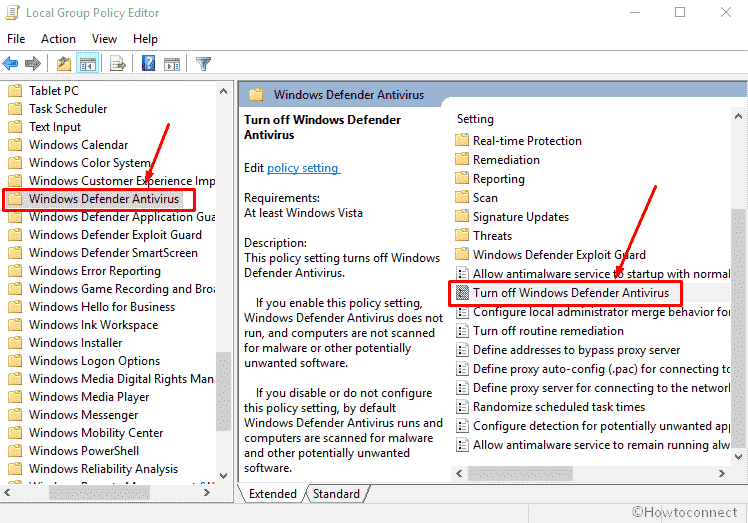
Once the MMC appears, shift to left-hand side navigate to this path “Computer Configuration > Administrative Templates > Windows Components > Windows Defender”.
Now switch to the right pane and double click on “Turn off Windows Defender” option.
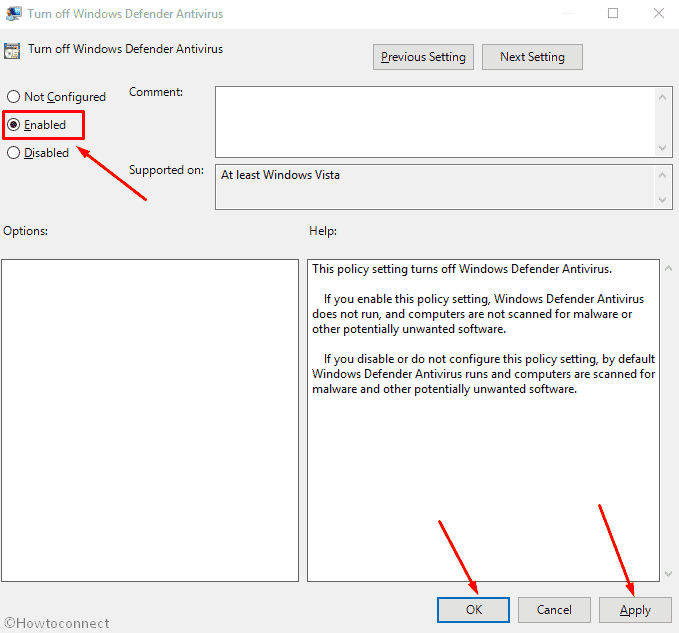
Mark Enabled check box then hit the Apply furthermore OK button to save changes.
Add the troublesome file to the Exclusions
There’s a possibility of Windows Defender to include the file that you are copying in threat list fallaciously. So, ensure that the same is not malicious and add as exclusions.
Again open Windows Defender Security Center as said in the 1st method.
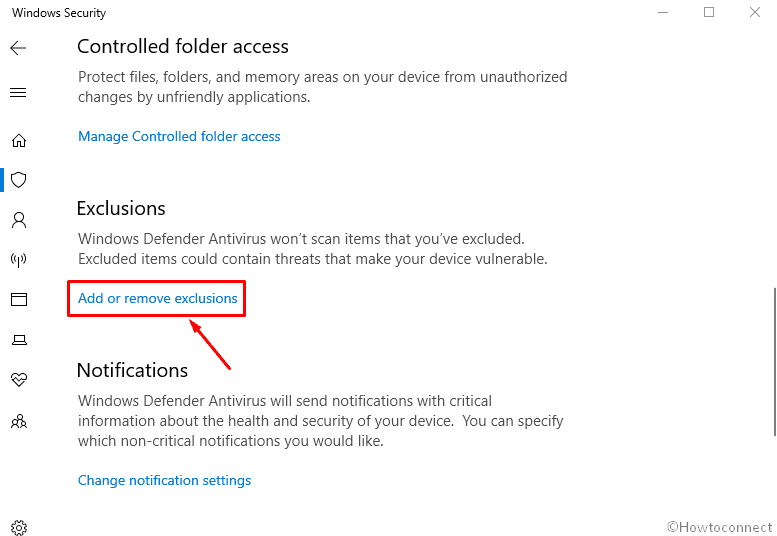
Click on Virus & threat protection settings.
When the next page comes into view, click on Add or remove exclusions.
Press Add an exclusion and select “File” from the dropdown.
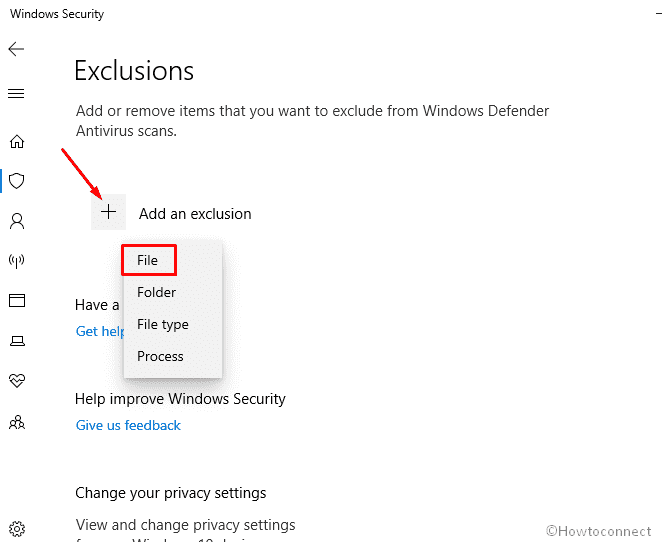
In the end, select the item and click on Open button.
Copy the file without getting Operation did not complete successfully in Windows 10 and cheer.
Turn off 3rd party antivirus if any
Windows 10 always presents a variety of errors for 3rd party antiviruses. Operation did not complete successfully error might be the result of the software not compatible with your OS. Here we will show you to turn off them one by one.
Uninstall Avast
Avast is the most popular antivirus that multiple users install on Windows 10. However, in certain cases it is found that Avast itself is responsible for popping up Error 0x800700E1: Operation did not complete successfully in your system. If you are in the same situation then you can follow How to Fix Avast Problem in Windows 10 April 2018 Update 1803. Additionally, you can find the help for How to Properly Uninstall Avast in Windows 10 if you get stuck.
Execute a Full Scan
When a virus attacks an individual file, it starts creating Operation did not complete successfully Windows 10. You can run a full scan in safe mode to solve this error by identifying the culprit and removing it.
Note: Make sure that before performing a detailed scan, enter into safe mode.
Here is the procedure to enter your PC into safe mode –
Click on the Windows key from keyboard and press the Power icon.
Now hold down the Shift key and select the Restart option from the context menu.
After reboot, you will directly reach safe mode.
Now Go to Windows Defender Security Center as you have seen in the first method.
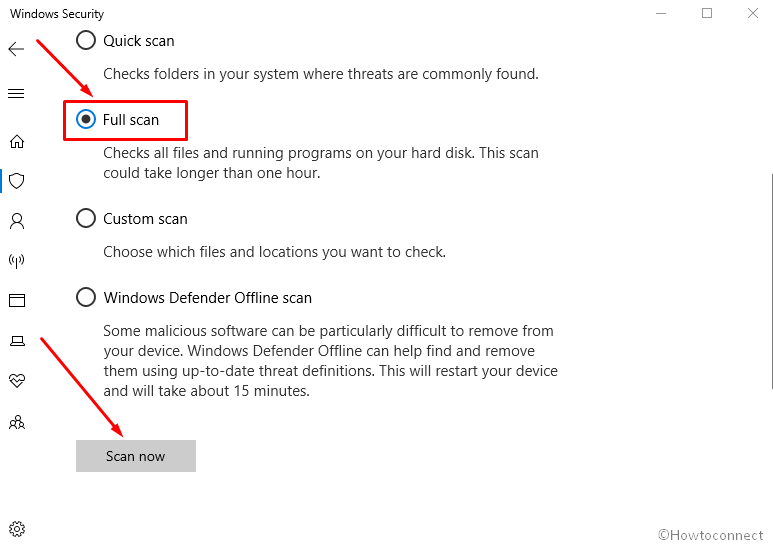
Click on Scan options link under Current threats.
Check the round cell of Full scan and press Scan now button.
Update the problematic software
There might be a possibility of using an outdated application which is responsible for this error while trying to run this specific program. If that’s the case just update or reinstall that particular application on your PC.
If you get some bugs while trying to download and install these applications you need to avoid these and let the app gets updated.
Repair the troublesome file
Command prompt is an amazing inbuilt tool for Windows 10 to resolve various issues. If the single file gets affected due to error 0x800700E1, the best way to easily wipe out this bug by going through this method –
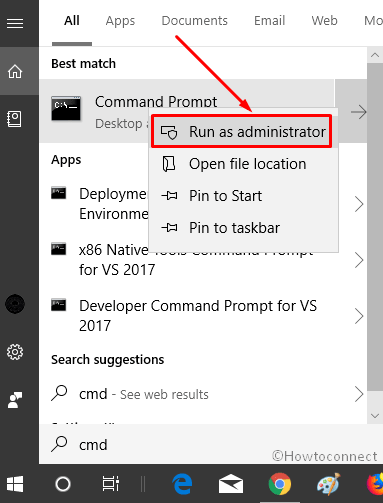
Press Windows and S keys in combination then type cmd.exe. Right click on the result in the Best match section and select Run as administrator.
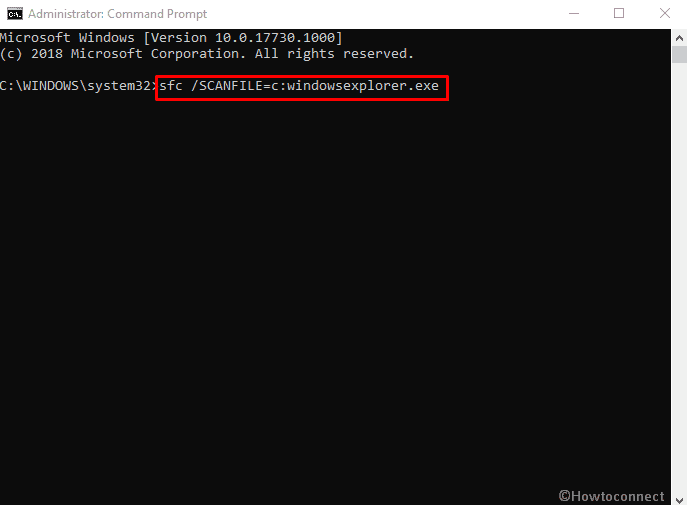
Write down the below commands and hit Enter to execute.
sfc /SCANFILE=c:windowsexplorer.exe
sfc /SCANFILE=C:WindowsSysWow64explorer.exe
Use Clean boot
If your computer is brimming with too many applications or third-party program, they might create conflict that ends up with error code 0x800700E1 on your Windows 10. So using clean boot will locate the application which is actually creating the error. Removing this program might be the solution to get rid of this bug.
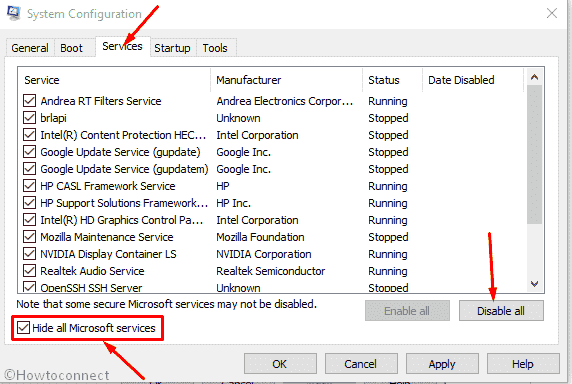
Click on Start, type Msconfig, hit Enter and let the System configuration appear.
Switch to the Services tab furthermore tick“Hide all Microsoft services” squarish checkbox.
Click on “Disable all” button.
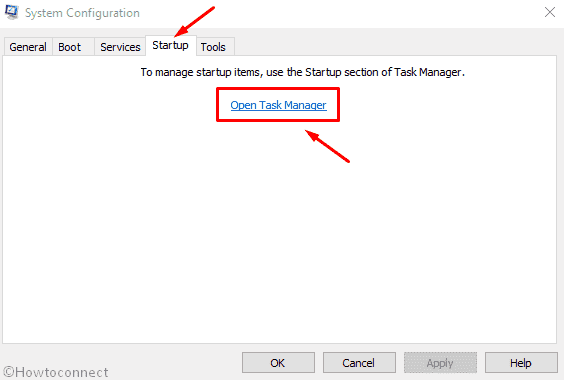
Now navigate to the Startup tab and click Open Task Manager link.
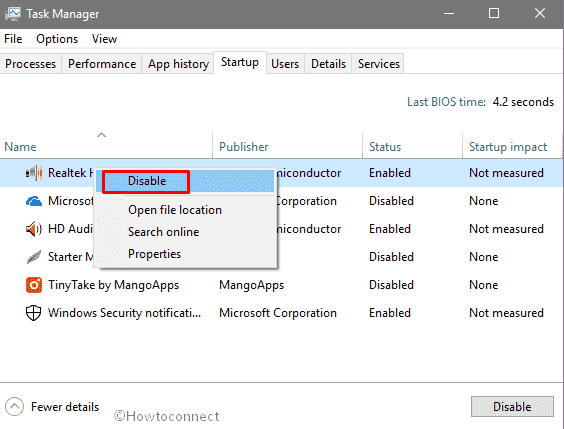
You will get the list of the entire startup applications here. Right click on each program and select the first option Disable from the context menu successively.
Read – How to Turn Off Startup Items in Windows 10 Using Settings.
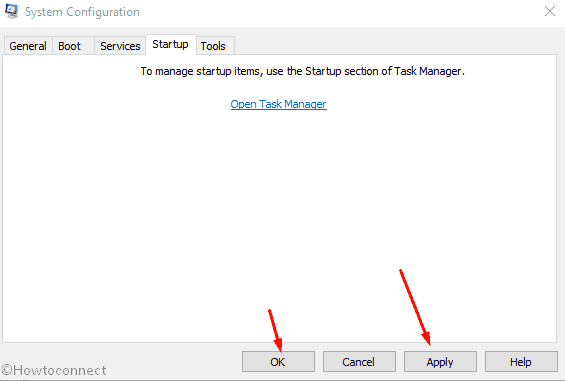
Once you complete, close the task manager and switch back to the System Configuration.
Click Apply moreover Ok button to save changes and restart your computer when the system asks.
Check which service is creating the error and disable the application associated with this one. Get back to the normal mode after enabling all the services on the MSconfig. Lastly, uninstall the culprit software and enjoy.
Run System Restore
System Restore is another way to help when you are struggling with 0x800700E1.
Simultaneously press Window and S hotkey, type system protection and then Enter. Select Create a restore point from the Best match section.
On the subsequent wizard that appears, make a click on System Restore...
Select Next button to invoke another window.
Choose a Restore point as per your convenience and click on Next.
Finally, select Finish and follow the onscreen guidelines.
Important: This method will work only if you have created a Restore Point earlier on your PC.
Reformat (Reset) Windows 10
If all the above methods fail to fix Error Code 0x800700E1 Operation did not complete successfully Windows 10 then reset is the ultimate warfare for you. We recommend that before proceeding, backup all important file and folder because following this will wipe out total individual works.
Go to the right end of the taskbar, click on the “Notification icon” and select All settings from quick actions.
Perform a click on Update & Security.
Select Recovery from the left column and go to the right.
Click on Get started underneath “Reset this PC” and go with the guidelines further.
Follow the instructions from this article – How to Reformat Windows 10.
That’s all.