You may encounter Bad File Descriptor in VLC when trying to open any media file through this program. VLC Media Player is one of the most easy-to-use program and widely familiar throughout the world. The capability of playing multiple formats of this utility makes it more popular among the users. In addition, this media player also supports online streaming that is able to convert language or information from one form of coded representation to another. However, if you are unable to open media files and get Fix Bad File Descriptor in VLC then here you will find quick and permanent solutions.
Multiple users complain that Bad File Descriptor in VLC issue starts appearing just after updating their Windows 10. Moreover, the problem may also persist when the file or the partition of your system is corrupted. If it happens, don’t be frightened by thinking that you will lose all of your favorite media files. You can easily solve the Bad File Descriptor with different tweaks as is not a serious issue. Related – How to Fix Video Stuck or Freezes on VLC on Windows
Bad File Descriptor in VLC Solutions
Here is How to Fix Bad File Descriptor in VLC –
Change the setting of VLC
If you are getting Bad File Descriptor error when open media in VLC, then you need to change its settings.
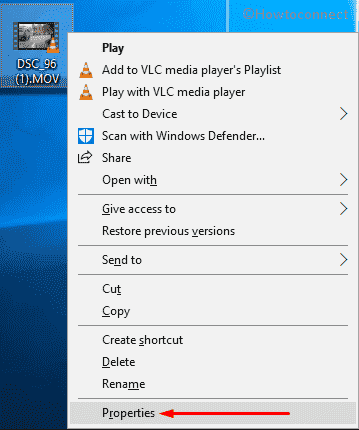
Step-1: Right-click on the VLC file that you were trying to open and Select Properties.
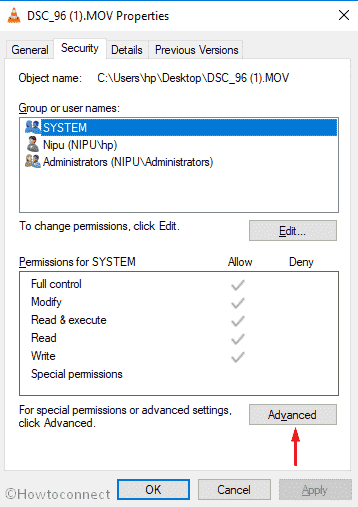
Step-2: Go to Security tab and click on Advanced.
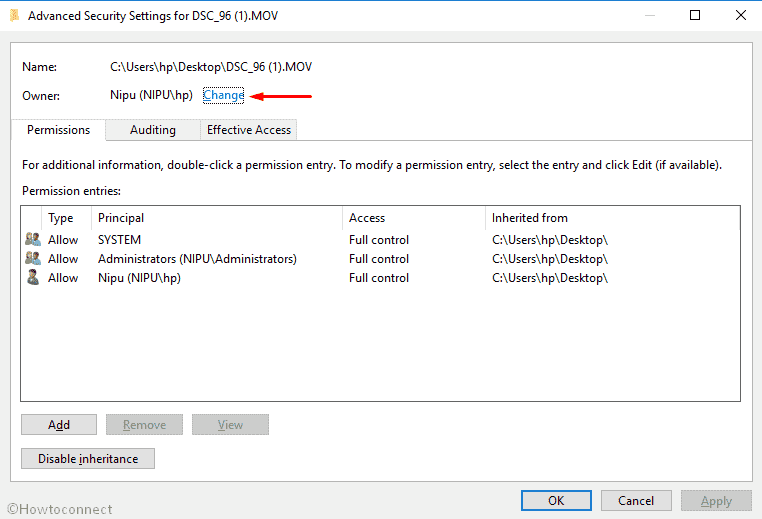
Step-3: Click on the Change link located beside Owner name.
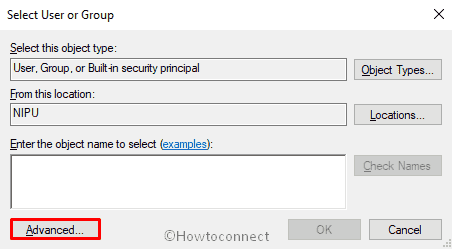
Step-4: Click on Advanced.
Step-5: On the subsequent window, click on Find Now from the right side.
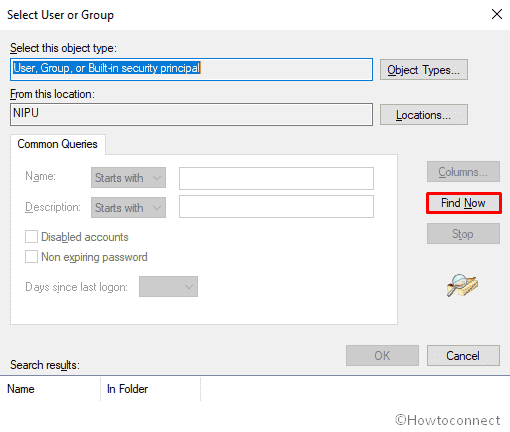
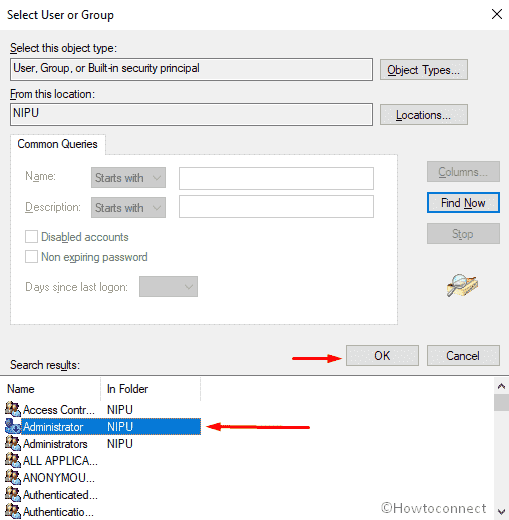
Step-6: Choose the Administrator with Desktop name (in my case it is Administrator DESKTOP-41D) and click OK. Press Enter to close Select User or Group window.
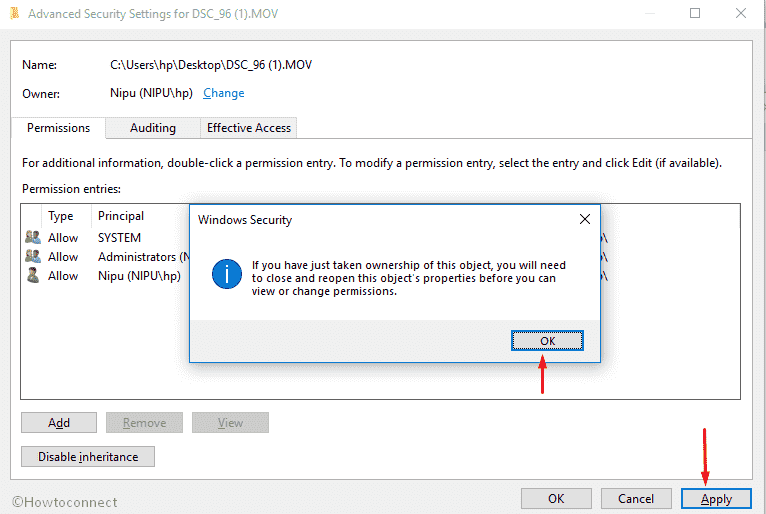
Step-7: Now, click on Apply in Advanced Security Settings window and when a pop-up shows up, Press Enter on your keyboard. Then close the window by pressing the Ok button. Also, put an end to the Properties wizard.
Step-8: After you have come back to the Properties, click on Edit.
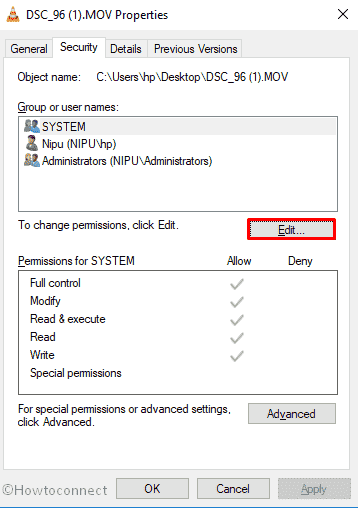
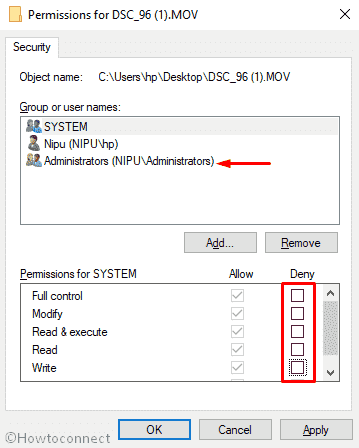
Step-9: Highlight Administrators option located under Group or users name section. Uncheck all the options of Deny and click on Apply and then Ok in order to save the changes. Make sure that Allow is checked in All the permissions.
Once done, the VLC file should run smoothly as this workaround worked well for most of the sufferer.
Perform CHKDSK
If corrupted file is causing Bad File Descriptor in VLC, you will have to Check Faulty Drives with Chkdsk for errors. Before that, give an attempt to open the file through Windows Media Player, as it is built-in application and work smoothly. If it doesn’t work follow the below method –
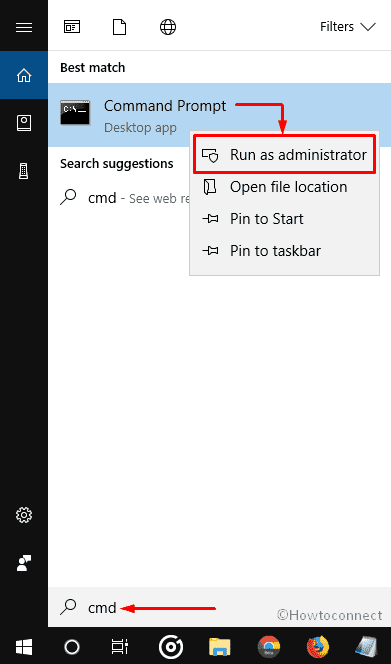
- Press Win and S at the same time and type in cmd in the Cortana search box. When the result turns up, right click on “Command Prompt” and Select “Run as administrator”.
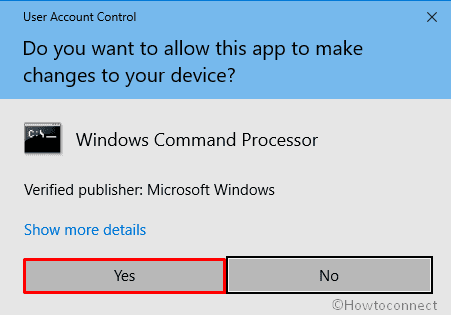
- If a UAC appears, click on Yes to give consent.
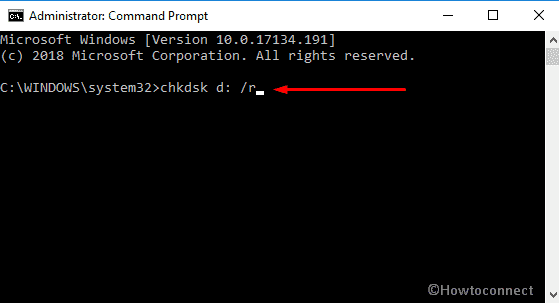
- Once the Command Prompt comes into the sight, write down the following command after C:\Windows\system32> and hit Enter –
chkdsk <partition letter>: /r
Note – In the place of partition letter, provide the name of the disk where the file is located.
When the process is done, Restart your computer and check if the VLC file is working fine now.
Reset preferences and cache of VLC
It’s a super easy way to fix Bad File Descriptor in VLC issue. Here’s the procedure –
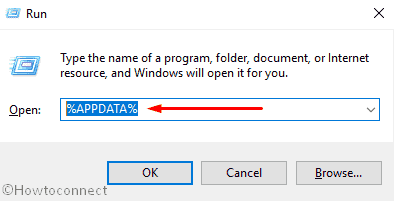
Press Win+R hotkey and let the Run dialog appear. Type %APPDATA% in the text box and hit Enter.
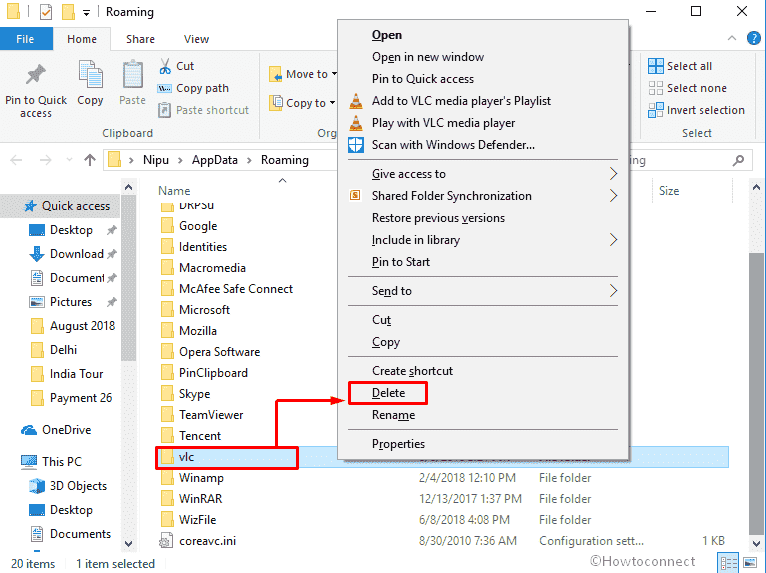
Locate and right click on vlc and Select Delete from the context menu.
You are done!
Change the preference of video output
Often VLC users experience that the state color of video becomes slightly gray possibly because of Bad File Descriptor. If your video card is installed on the onboard computer, here is the solution to fix it –
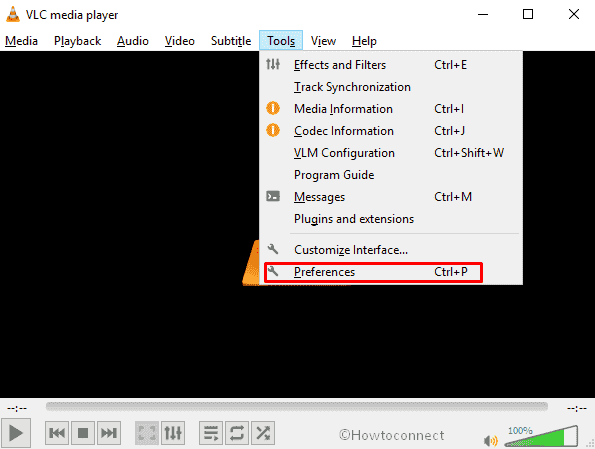
- Open VLC media player. Click on Tools and then Select Preferences.
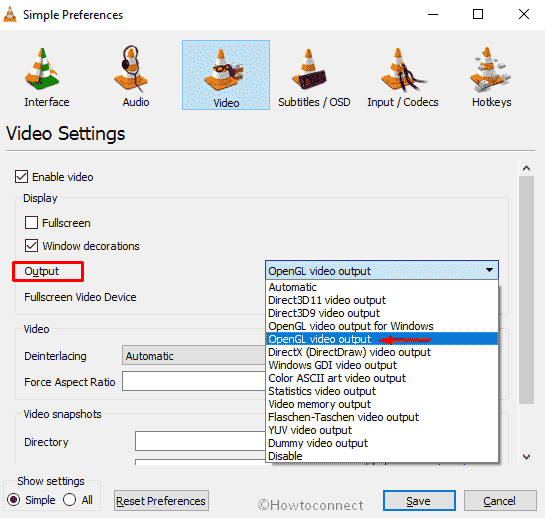
- Once it shows up, shift to Video tab. Select OpenGL video output from the drop-down menu of Output.
Save this setting and Restart VLC media player again to notice an improvement in the picture quality.
Update Graphics Card Driver
If you are still facing the same issue after trying all the above methods, the only option is left with you is uninstall the VLC media player and update the graphics card driver of your system.
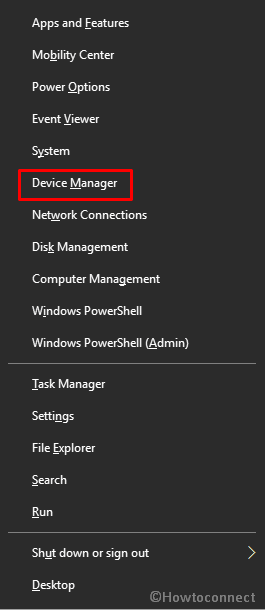
Make a right click on the Start button and choose Device Manager from the long list.
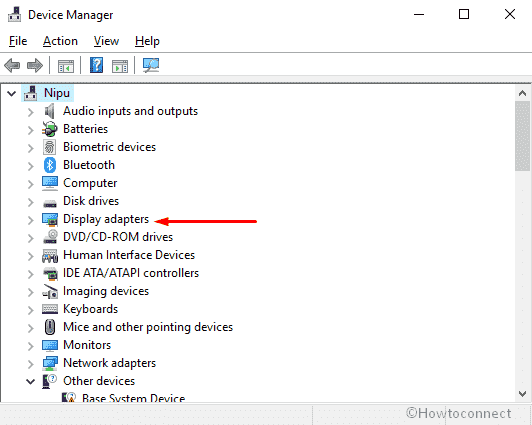
Locate Display adapters and unfold it by double-clicking.
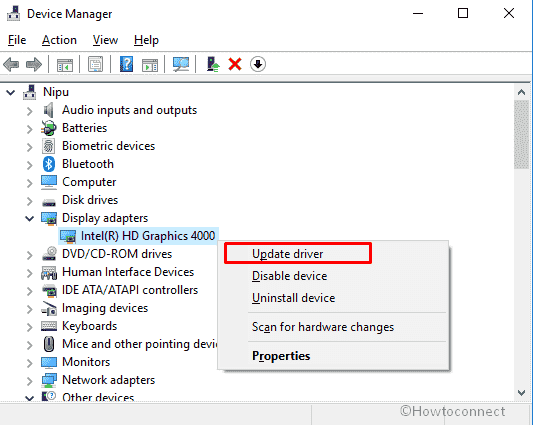
Do right click on the graphics driver and Select “Update driver” from the list of options.
Finally, download the most recent edition of VLC media player and install it following the on-screen guidelines.
That’s all.