In this article, you will get to know Everything You Can Do in Windows Defender Security Center, the built-in protection app on Windows 10 and 11. As the OS keeps on updating to new versions, it makes this security tool even more user-friendly, smoother and easy to work upon. It works to safeguard your system from malware, hacker attacks, threats of security defected and corrupted files, phishing emails and many more.
As Windows Defender Security Center works continuously in the background, you must check it on regular basis. By visiting this protection application, you can view PC’s report and configure the settings as per your requirement.
What Can You Do in Windows Defender Security Center
Here is everything you can do in Windows Defender Security Center on Windows 11 or 10 –
To make any change you will need to start the Windows Defender Security Center first. So see the way
How to Open Windows Defender Security Center
Windows 10 provides you various ways to access Windows Defender Security Center. However, the quickest to launch the application is through the system tray.
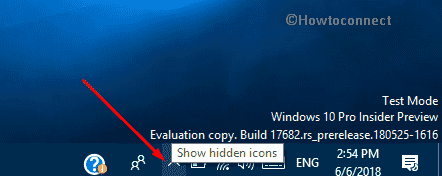
Step-1: First of all, go to the notification area of the taskbar. Here, you will see a shield icon. If you cannot find it there, then click the Show hidden icons upward arrow and locate the shield shape icon.
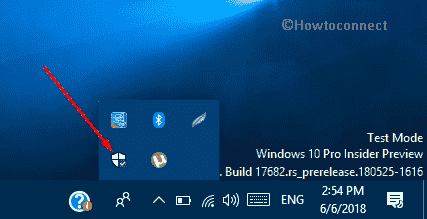
Step-2: Click on that icon as shown in the below snapshot and the application will show up on the PC screen.
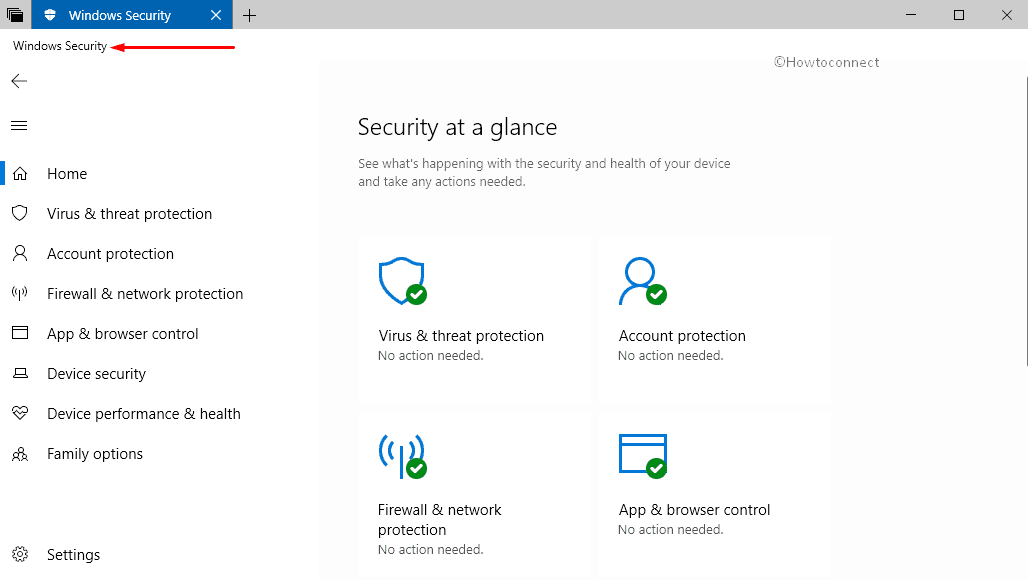
Once Windows Defender Security Center appears, its main interface will look like the below-given picture (as of build 17682).
Note: To quickly access the tool, you can Create Shortcut to Windows Defender Security Center on Windows 10.
Windows Security at a Glance
There are basically seven segments of the Windows Defender Security Center which helps in keeping the PC clean and secure. They are described below:
1. Virus & threat protection
2. Account protection
3. Firewall & network protection
4. App & browser control
5. Device security
6. Device performance & health
7. Family options
1. Virus & threat protection
Once you expand all the categories, this is the first one on the list. It is also a part of Windows Defender Antivirus. This tool basically provides you various scan options such as Quick scan, Full scan, Custom scan, moreover Windows Defender Offline Scan. In addition to these, it also lets you manage Virus & threat protection settings as well as keep the tool updated time to time. The best thing about this segment is that it includes a section for Ransomware protection also.
How to Scan Windows 11 or 10
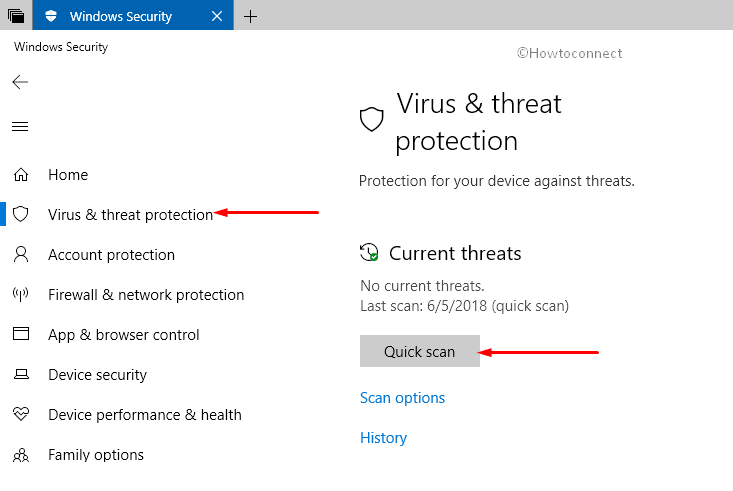
First of all, launch “Windows Defender Security Center” and click Virus & threat protection category.
Shift to its right pane and click the Quick Scan button. It will start detecting the presence of malware on your PC. This tool works to scan all the files and folders at a very fast rate. You can scan only those parts of the system where there is a probable chance of Trojan hiding.
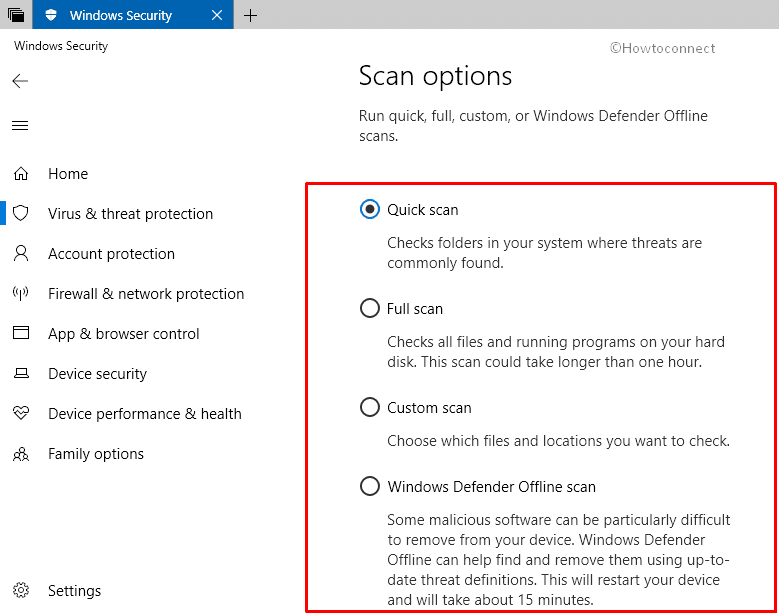
In addition to this Quick Scan, Windows Defender Security Center also provides you three other variety of scans. To explore them, click Scan options.
Full scan: This feature takes a long time to find viruses in the computer; however it scans all the files and apps which exist in your computer.
Custom scan: If you have a doubt regarding malware on a particular location in your PC, you can use this specific option to trace out viruses.
Note: In addition, you can also perform this scan by simply right clicking on a particular folder, drive or file. From the context menu, just select the option “Scan with Windows Defender”.
Windows Defender Offline Scan: Some malware is rigid and difficult to remove. A certain anti-malware program cannot remove them from Windows 10 and 11; however, you can offline scan the system to deal with it later. To use this tool, you have to close all applications which are active in the system.
Note: The system will restart and boot as “Windows Defender Antivirus” environment during the offline scan mode. If the system has an active internet while this process, the latest update of this app will be installed on the system along with the scanning process. If it finds out any malware during the scan, it will eventually eradicate or block the same all by itself.
See How to Schedule Windows Defender Full or Quick Scan on Windows 10.
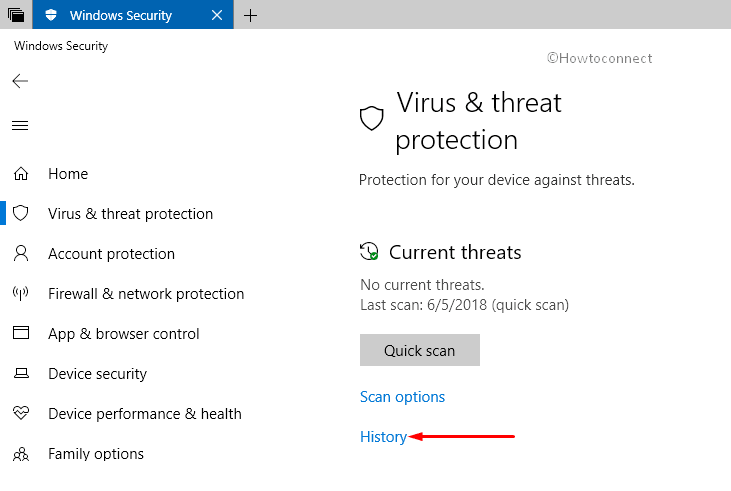
How to Locate Scanned file history
When you perform any scan on the PC, it will provide a list of different malware or ‘Trojan files’ which were present in the system. To study more about these viruses and understand the threats which it could cause on your PC, it is good to have a look at the list.
1. At first open Windows Defender Security Center and go to the “Virus and threat protection section”.
2. On the corresponding right pane, click the option History. You will be able to see any threat which has been detected, deleted. Furthermore, it will also display quarantined items too which haven’t been removed from your system during the scan. The items which were shown as the threat but allowed by you will also be shown in the scan history.
How to Manage Virus & threat protection settings
Get access to Windows Defender Security Center and from its main interface, navigate to Virus & threat protection category.
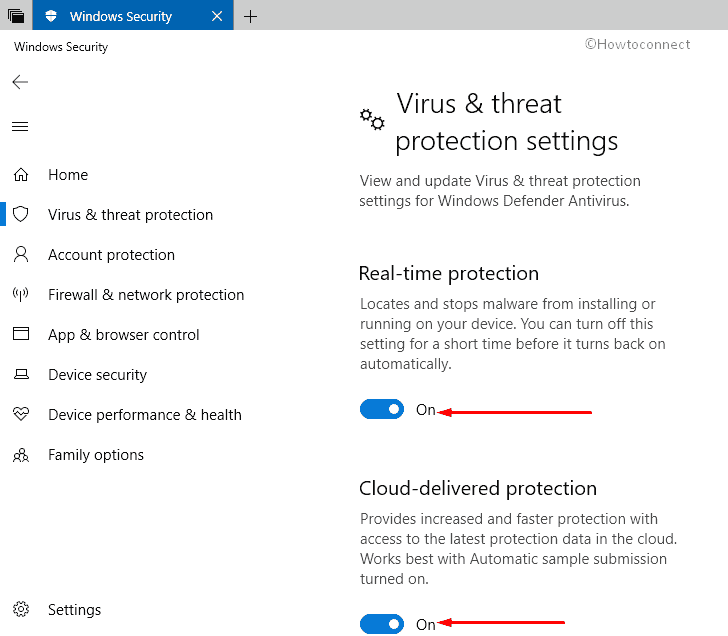
On its right pane, scroll down and click Manage settings that appear underneath the section “Virus & threat protection settings”.
The next page provides you various options to manage settings for “Windows Defender Antivirus”.
Real-time protection: If you turn it off, the system will trigger it on all by itself. When it is On, it locates moreover stops malware from installing as well as running on your device.
Read How to Disable / Enable Virus & Threat Protection in Windows 10.
Cloud-delivered protection: It offers faster and increased security with access to the latest protection data in the cloud.
See How to Set High Blocking Level for Cloud Protection in Windows Defender Windows 10.
Attack Surface Reduction (ASR): Turning this option will prevent applications that might infect your PC.
Automatic sample submission: To save yourself from potential threats and attacks, you can choose to send Microsoft sample files.
Controlled folder access:
Exclusions: The tool will not scan the items that you have excluded here. Click Add or remove exclusions and then you can manually add or remove the files accordingly.
Notifications: The tool will send notifications with critical information about health and security of your device.
How to Change notification settings of Windows Defender Security Center
This built-in security application notifies you from time to time whenever it carries out a scan on your PC.
– Launch Windows Defender Security Center and navigate to the given-below path.
Virus & threat protection => Virus & threat protection settings => Manage settings => Change notification settings.
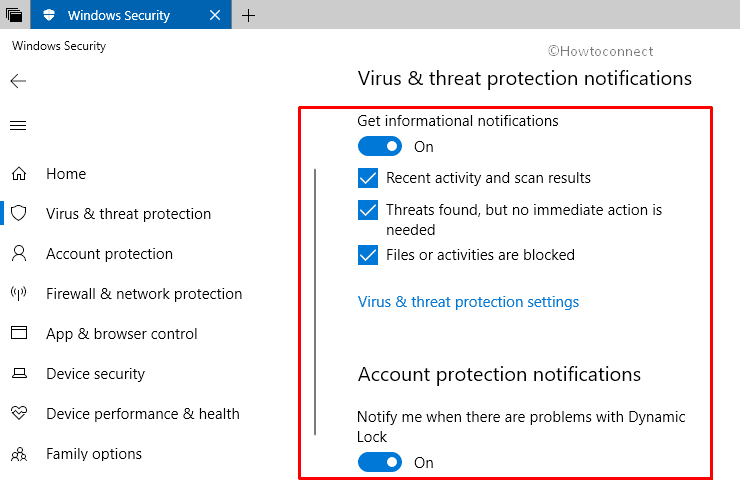
– So, after clicking Change notification settings you can individually specify which non-critical notifications you would like.
• Get information notifications: Turn this on or off to receive banners about the scan results.
• Recent activity and scan results: When you check this option, the tool will notify you about the recent scan history.
• Threats found, but no immediate action is needed: It will inform you when it detects threats in your PC.
• Files or activities are blocked: You will get instant notification when such kind of stuff gets blocked by the Defender.
• Notify me when there are problems with Dynamic Lock: When you are using Dynamic Lock for account protection, then by any chance you may face some issues. In such conditions, enabling this option will notify you about the same.
• Notify me when Windows Defender Firewall blocks a new app: It will tell you about the new applications that the firewall obstructs from running on your PC. You will further see three options underneath regarding this – Domain firewall, Private firewall, Public firewall.
Follow our full article on How to Disable / Enable Windows Defender Antivirus Notifications Windows 10.
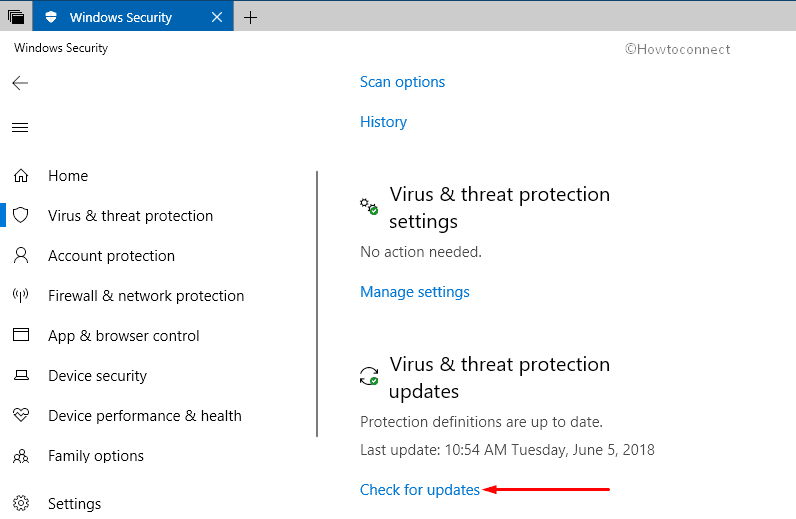
How to Update Virus & threat protection
The protection updates should always be up to date to perform accurately. Click Check for updates and protection settings will scan and install the updates if available.
Follow How to Check Protection Updates for Threat Definitions in Windows 10.
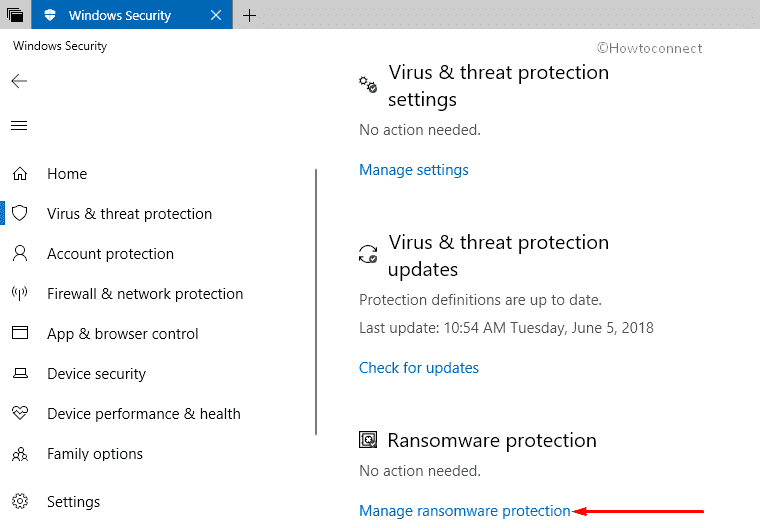
How to Manage Ransomware protection
You can protect your files against threats such as ransomware. Once you are into the “Virus &threatt protection” page, come down and click Manage ransomware protection to further deal with the setting.
On the next page, you can enable the option namely “Controlled folder access” to protect files, folders, and memory areas on your device from unauthorized changes by unfriendly applications.
2. Account protection
The next category is Account protection which provides security for your account and sign-in. When you shift to the right pane, you will find three sections – Sign in to Microsoft, Windows Hello, Dynamic Lock.
Sign in to Microsoft: It displays your ‘account info’ which eventually gives you access to enhanced security. To know more about your account, click View your account info link.
Windows Hello: If your device is compatible with this sign in feature, you can manage it from here also.
Dynamic lock: Manage this sign in setting from here. Windows can lock when devices paired with the PC go out of range.
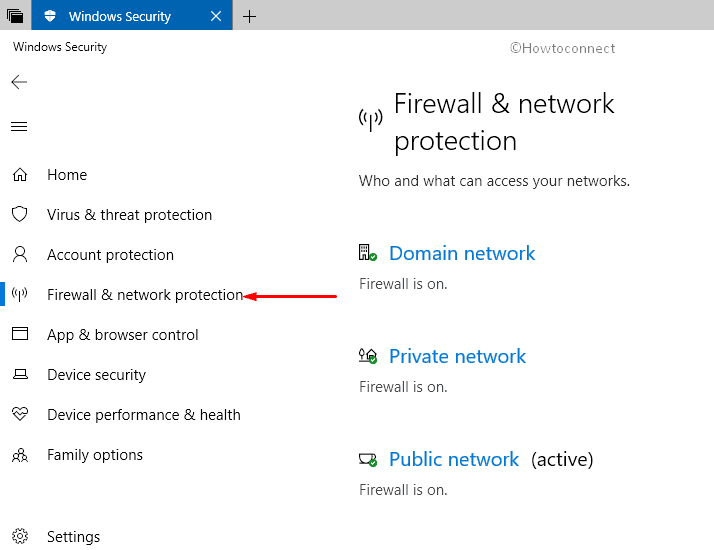
3. Firewall & network protection
This category helps in guiding about network connection, internet connectivity, and Firewall related issues. It also supports troubleshoot mechanism in Windows 10 to deal with slowing down of the system.
How to Enable Disable Firewall in Windows Defender on Windows 11 or 10
First and foremost, navigate to the Windows Defender Security Center, the built-in app of Windows 10. You can use any of your preferred methods to access the application.
On its main interface, go to the category Firewall & network protection.
Shift to the corresponding right pane and you will notice three sections namely Domain network, Private network, Public network.
Domain Network: These are the Networks at the workplace that are basically joined to a domain. You can see its Firewall status here. However, to manage it, click on the Domain network.
On the following page, toggle On or Off the option Windows Defender Firewall as per preference. When you turn it on, it will help you in protecting your device while on a domain network.
Moreover, you can also checkmark the box underneath the section “Incoming connections” if you wish to block all incoming connections to this network.
Private network: These networks are considered to be ‘discoverable’ especially at home or work where you know and trust the people and devices. Click on the Private network to further configure its Firewall settings.
On the next page, to disable or enable Windows Defender Firewall for a private network, toggle the switch accordingly. Here also, to prevent Incoming connections on this network, you can select the same.
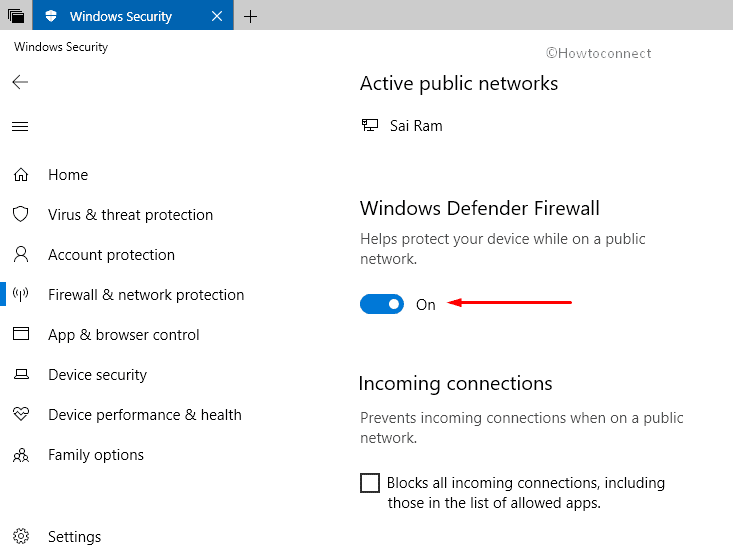
Public network: While using this network, the devices are set as not ‘discoverable’. These are the common places such as coffee shop or an airport. So to enable or disable the firewall, click Public network.
Under ‘Windows Defender Firewall‘, move the slider towards the right to enable firewall or towards left in order to disable it.
For reference, see How to Enable / Disable Windows Defender Firewall in Windows 10.
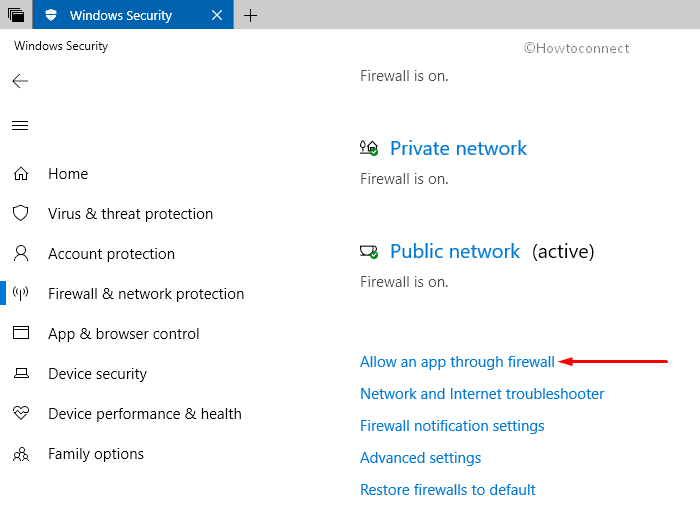
How to Allow an app through Firewall in Windows Defender Security Center
You can anytime allow applications as per your choice to communicate through ‘Windows Defender Firewall’.
– To do so, first, navigate to “Windows Defender Security Center”.
– Head to Firewall & network protection category on the left sidebar. On its adjacent right side, click on the option Allow an app through Firewall as shown in the image below.
– This will immediately open Control Panel on the PC screen. Here, click Change settings button.
– Now check the items from the list that you wish to add.
– Finally, after making necessary modifications, ensure to click the “OK” button to allow an app through Firewall.
How to Restore firewall to defaults
In case, if you ever want to roll back to the default state of Firewall settings, “Windows Defender Security Center” allows you to do so.
Go to Windows Defender Security Center by using any of the available ways.
Navigate to Firewall & network protection on the left side of the interface. Move to its adjacent right side and click the Restore Firewalls to default.
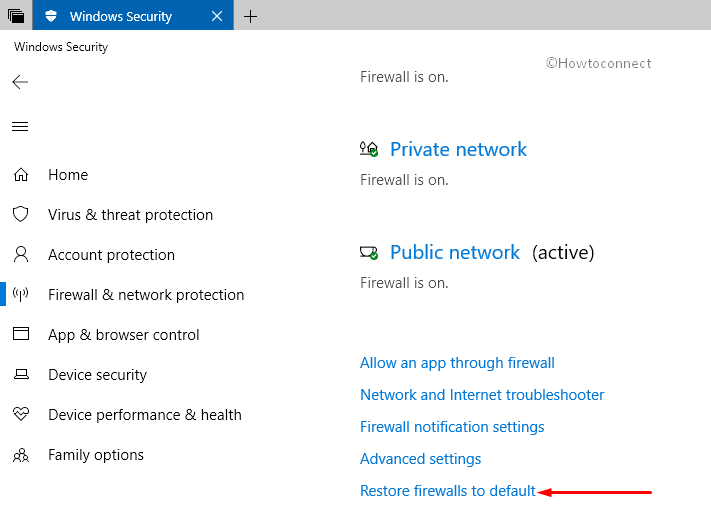
This will immediately launch Control Panel on your screen. Here click Restore defaults button.
How to Change Firewall notification settings through Windows Defender
‘Windows Defender Security Center’ provides an option to manage your security providers along with notification settings. Therefore, you can choose the notifications you wish to receive from Windows security.
In order to modify Firewall notification settings, navigate to the below-given path.
Open Windows Defender Security Center => Firewall & network protection => Firewall notification settings => click Manage notifications.
No go through the options and modify the notifications accordingly.
4. App & browser control
There is a possibility of corrupt and malicious code hidden in Apps, files or websites while browsing. This section helps in pro-activating the system against them.
In the “App & Browser control” include Smart Screen settings, where you can re-configure the settings to protect your PC from malicious codes hidden in files, apps, websites, etc.
By default, it provides standard settings which should be used. However, if you wish, you can always adjust the settings manually onto your PC. This Section has 4 Settings – Check apps and files, SmartScreen for Microsoft Edge, SmartScreen for Microsoft Store apps, and Exploit Protection. Let’s see one by one –
How to Enable SmartScreen on Windows Defender
SmartScreen protects your device by identifying and stoping unrecognized applications and files from the web. You can easily enable it
Open Windows Defender Security Center navigate to the categories located on the home screen.
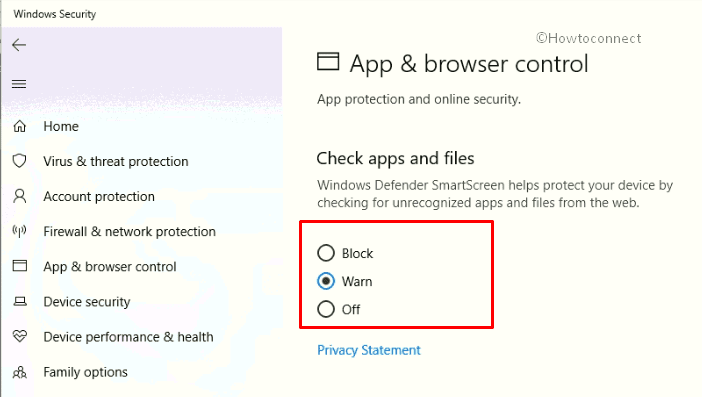
Make a click on App & Browser control and let the next page appear.
Under Check apps and files you will find 3 options -Block, Warn, and Off.
Block on SmartScreen will automatically restrict the 3rd party software that you commonly install on your system.
Warn is the built-in setting and ask you to confirm before you start the installation. You would be quite familiar with this setting as when you open a Setup file a user account control appears on the screen.
Off is a dangerous status because it does neither prevent any program nor give you a warning.
So click on a suitable option considering the threat level on your PC.
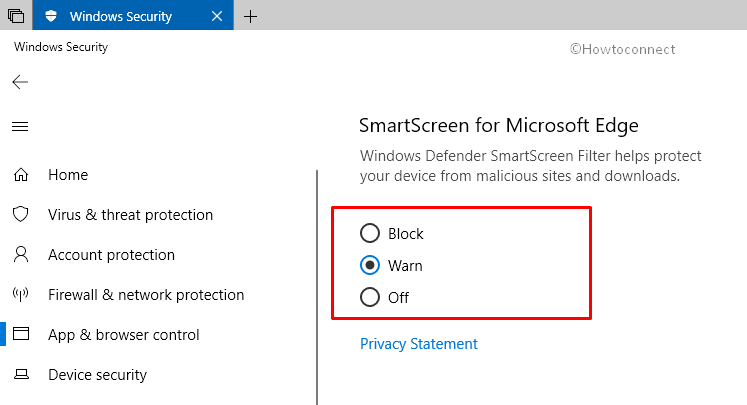
How to Enable SmartScreen for Microsoft Edge
This is an enhancement of the SmartScreen and now the filter accompanies the Windows 10 built-in web browser Microsoft Edge. Similar to Apps and files the Setting for the browser has 3 options Block, Warn, and Off.
Once you reached “Windows Defender Security Center”, navigate to App & browser control.
Go to SmartScreen for Microsoft Edge section and choose your preferred option.
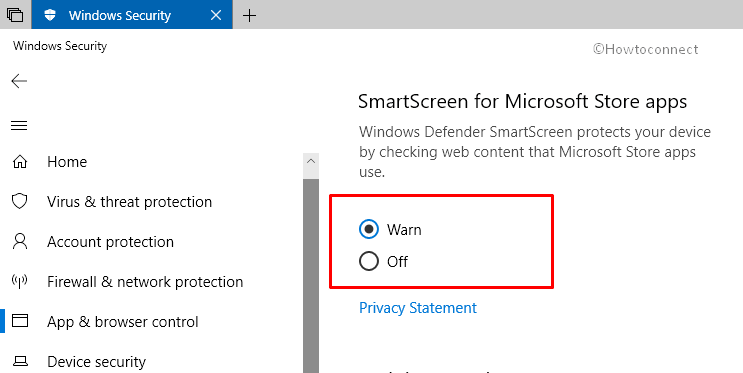
How to Enable SmartScreen for Microsoft Store apps
Windows 11 or 10 has the arrangement to input the SmartScreen filter to Microsoft Store apps. The setting is effective like on Microsoft Edge, Apps, and Browser.
Again launch Windows Defender Security Center and jump to App & browser control.
Scroll down to SmartScreen for Microsoft Store apps field and check either of the 2 options Warn, and Off.
How to Customize Exploit Protection on Windows 10
“Exploit protection” in Windows 10 or 11 lets you safeguard your device against threats and attacks. Out of the box, your device is already set up with the protection settings that work best for most people.
Access Windows Defender Security Center and choose the category “App and browser control” from the group of icons existing on the home.
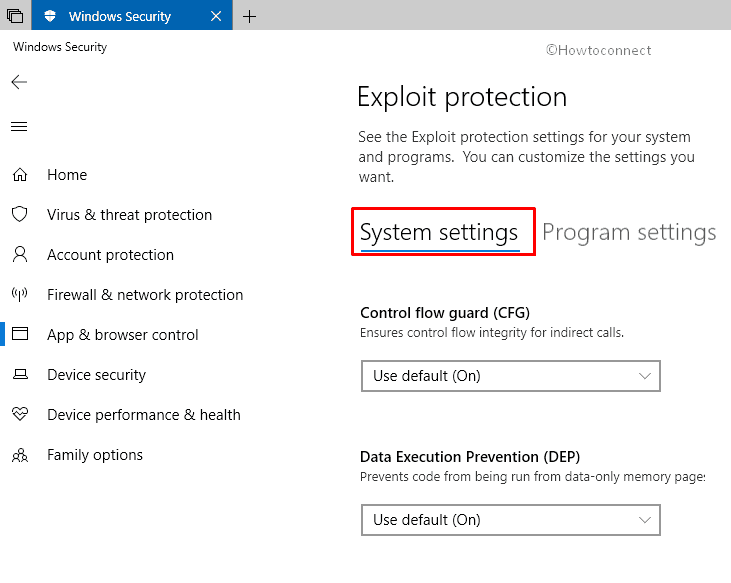
On the subsequent page, scroll down to the bottom area and make a click on the link Exploit protection settings. However, you can see a brief about each of the options in the following part –
Here, you get two sections – System settings and Program settings. System Setting includes dropdowns for Control flow guard (CFG), Data execution prevention (DEP), Force randomization for images, Randomize memory allocations, High entropy ASLR, Validate exception chains (SEHOP), and Validate heap integrity.
System settings
First of all, Windows 11 or 10 keeps the default options as per requirement of your system, so we suggest to not change anything in Exploit Protection for System Settings.
Control Flow Guard is an extremely improved platform security feature to fight memory corruption vulnerabilities. Via CFG technology, Windows 10 and 11 makes it much stronger for exploits to execute arbitrary code.
Data execution prevention is an arrangement of hardware and software technologies that manifest additional checks on RAM in order to block malicious code.
Force randomization for images – This Exploit protection setting forcibly relocates images not compiled with /DYNAMICBASE. The feature can optionally fail loading images that don’t have relocation information.
Randomize memory allocations – This Exploit protection Randomize locations for virtual memory allocations.
High entropy ASLR – Increase variability when using Randomize memory allocations.
Validate exception chains – makes sure the integrity of an exception chain while dispatching.
Validate heap integrity – Terminates a process when heap corruption is detected.
How to add a Program to Exploit Protection Settings in Windows 10 or 11
You can add and customize such as override, and block system image a program to Exploit protection Settings in Windows 10.
To add click on the + (Plus icon) before Add a program to customize.
Select a method from Add by program name and Choose exact file path as per your convenience.
Choose the program or write the name and click on Open or Add.
Once you add a Program Setting dialog will appear. Choose the options according to your preference and select Apply.
Read – How to Export Exploit protection settings in Windows 10.

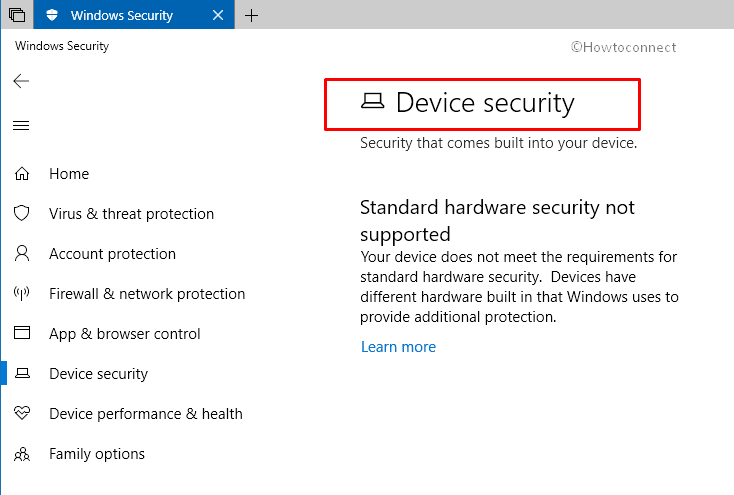
5. Device Security
This Setting depends and varies from device to device according to the manufacturer. If your PC is not compatible you will view – Security that comes built into your device Standard hardware security not supported.
You can hide or show the “Device security” section from the users of the system using Group Policy Editor (gpedit).
For changing the appearance, browse Computer Configuration => Administrative templates => Windows components => Windows Defender Security Center => Device security.
Right click on Hide the Device security area and select Enabled to keep it hidden.
6. Device performance & health
This section shows you the Health report of your device based on the information collected during the last scanning. The report includes Storage capacity, Device driver, Battery life, and Apps and software each having a green tick mark in case of good health. If anything going bad you will find red warning mark instead of asking you to take an action.
Fresh start
If something is not right in the health report of your device you can choose Fresh start to restore a clean and up-to-date installation of Windows. The Fresh start will recover your personal stuff, certain settings, but wipe out some of the apps that could damage the Windows. In many circumstances, the tool may boost the startup and shutdown experience, memory consumption, the performance of Store apps, and battery life.
Follow our full article on How to Fresh Start Windows 10 to Reinstall and Update As per Need.

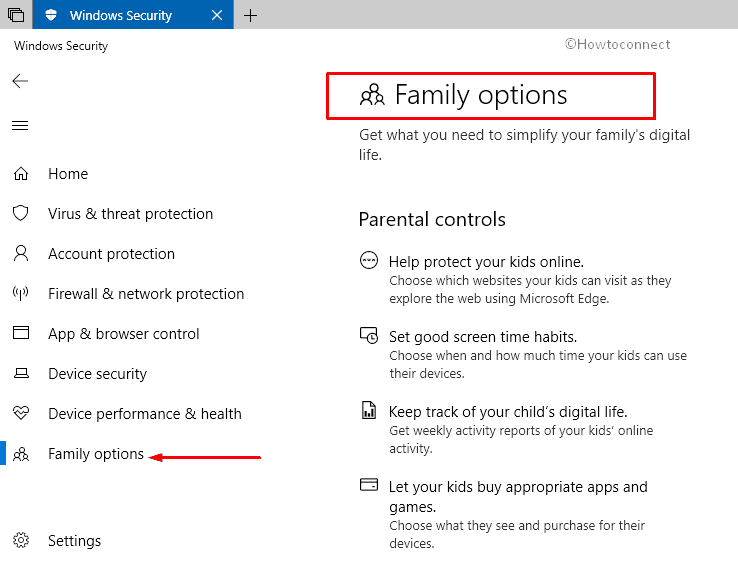
7. Family Options
This section of Windows Defender Security Center is dedicated to simplifying your family’s digital life. You are able to safeguard your kids online and choose which websites are suitable for them to explore the web using Microsoft Edge. Moreover, you can help them set good screen time habits and decide when and how much time your kids can use their devices. Family Options allows you keep track of your child’s digital life. Weekly activity reports of your kid’s online activity are anytime available here.
This setting takes you to Devices page of your account where every little information about your child’s online activities is available.
Go through How to View and Change Family Account Settings in Windows 10.
That’s all about Windows Defender Security Center that you should be aware of!