Local Print Spooler Service is Not Running is one of the most annoying problems that users confront after installing KB4524147. This security update caused several issues to the printing where the printer queue crashes down abruptly. Even after restarting the service, it does not respond and throws various error messages including the aforementioned one.
In addition, with the installation of KB4524147, people are also facing Start Menu issues. Though Microsoft is attempting to resolve them, users are ending up with other problems. Therefore, the simplest solution to mitigate this printing trouble is to uninstall the latest patch from the system. However, you can also try out some effective workarounds as discussed below –
Local Print Spooler Service is Not Running in Windows 10 Solutions
Here is How to Fix Local Print Spooler Service is Not Running in Windows 10 –
1] Uninstall KB4524147
The key solution to get rid of Local Print Spooler Service is Not Running error is to simply remove the KB4524147 package. The bug in this patch created several issues and therefore you should uninstall it and see if this makes the printing work again.
- Open Win+X menu and click the cog icon to access Settings.
- Navigate to the Update & security tab and click on it.
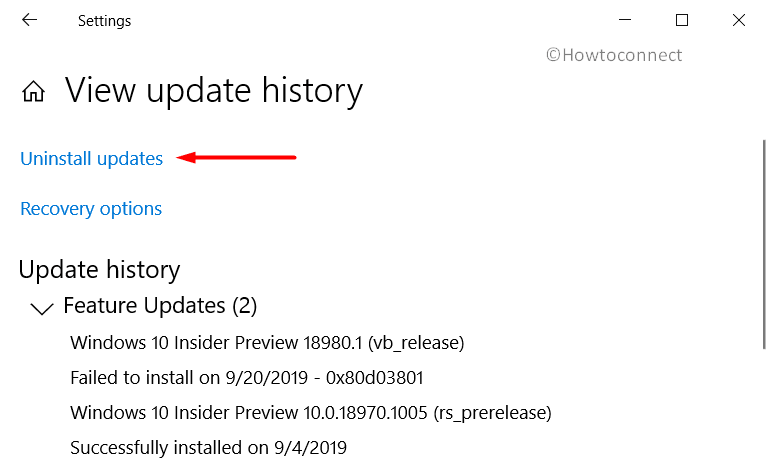
- Switch to the right pane of the following page and click on View update history.
- Click Uninstall updates link as shown in the below snapshot.
- Locate and select the KB4524147. Hit the Uninstall button on the top to remove the patch from the system.
2] Reset Print Spooler
Resetting the Print Spooler is considered one of the best workaround when it comes to any issues with the printer. This will first stop the service from functioning, then remove the entire contents from the printers folder, and finally, will reboot the service.
You have two different ways to carry out this workaround – Command Prompt and Services respectively. Let us explore both of them and you can use anyone to Reset Print Spooler –
Through Command Prompt
Step-1: Use the Win + R hotkeys to quickly open Run dialog box. Once it is visible, type cmd and press “Ctrl + Shift + Enter” to Open Command Prompt as Admin from Run.
Step-2: Upon the prompt of UAC, click Yes to proceed further.
Step-3: Once the black window comes into view, insert the below command and hit Enter after each line to start the resetting procedure.
net stop spooler
del /Q /F /S "%systemroot%\System32\Spool\Printers\*.*"
net start spooler
The above command will stop the print spooler, wipe out the printer’s folders content and reboot the service as well.
Step-4: After you execute the commands, you would be able to print a document without encountering Local Print Spooler Service is Not Running error.rr
Using Services Manager
- Launch the taskbar search, type “services.msc” and hit Enter.
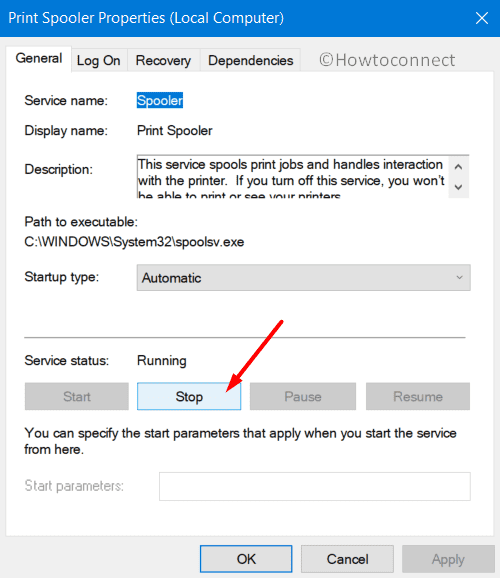
- Once the Services opens up, find out Print Spooler, right-click on it and select Properties.
- Be into the General tab and click the Stop button (see picture).
- Now, press “Win logo + R” keys to access Run dialog. Insert the below path in it and hit Enter.
C:\Windows\System32\spool\printers
- If a pop-up shows up with a Continue button, click on it.
- This will launch the Printers folder, select everything and press Delete key to remove the entire contents.
- Get back to the Properties wizard of Print Spooler and click the Start button.
- Click OK and this will restart the service.
3] Run Printer Troubleshooter to Fix Local Print Spooler Service is Not Running
Microsoft provides several troubleshoot options to fix the complications that you face with hardware and software. As you are encountering Local Print Spooler Service is Not Running error, you may give an attempt to the Print Troubleshooter. This will detect the potential reasons behind the problem and eventually tries to repair it right away. Let us see how to put this into action –
- Press the Windows key and select the cog icon to open the Windows Settings app.
- Navigate to the category namely Update & security.
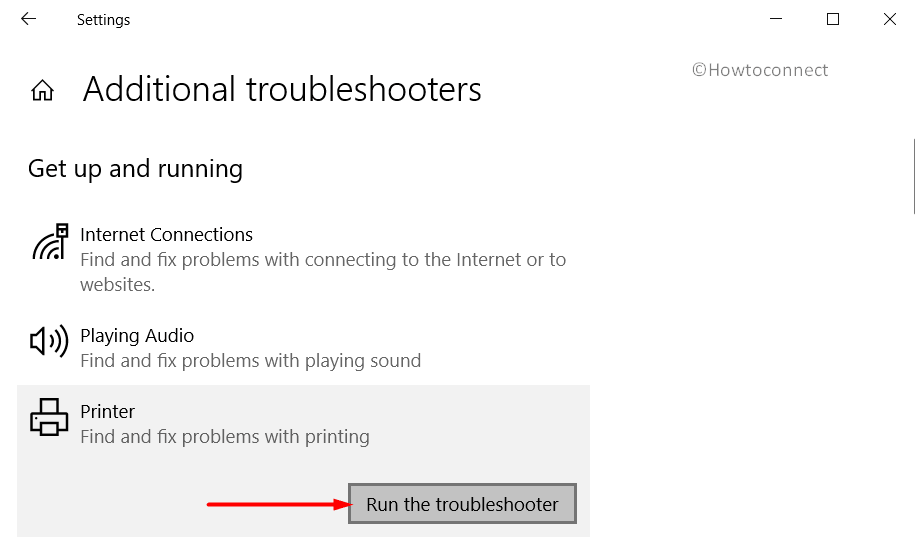
- The following page will display certain subsections, select Troubleshoot. Switch to the right pane and click on the link Additional troubleshooters.
- Locate and select the Printer option and click Run the troubleshooter button (see picture).
- The utility will start detecting the issue and will list down some common printer problems. Choose the one related to Print Spooler and let the system fix it for you.
- Once you are done, Restart Windows 10 PC and check if it helps in mitigating the error.
4] Change Startup Type of Print Spooler
Though the Print Spooler service is designed to operate automatically, sometimes its startup changes. When such a situation happens, you may likely to confront the error Local Print Spooler Service is Not Running. Therefore, try to modify its startup type and see if this resolves the print issue.
- Hit Win + Q combination of keys and when the taskbar search box appears, type services and press Enter.
- Once the Services Manager is visible, locate and right-click the service namely Print Spooler.
- Choose Properties option from the flyout menu.
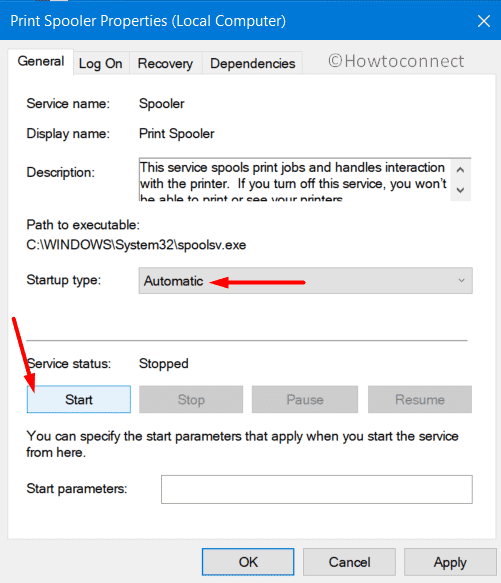
- Click the drop-down against the option “Startup type” and select Automatic. Now, head to the Service status and click the Start button beneath it.
- To bring the modifications into effect, click Apply and OK buttons.
- Finally, attempt to take a print and see if this resolves the error.
5] Resolve Local Print Spooler Service is Not Running by Updating Printer Drivers
If the Printer drivers are obsolete or faulty or outdated, then you can easily become prey to the Local Print Spooler Service is Not Running error. Therefore, first, remove the existing one and then install the updated driver. Go through these series of steps and see how to execute this task –
- Perform a right-click on Start and choose Run, insert the command “control printers” and hit Enter.
- Once into Devices and Printers window, locate the previously installed printer driver. Conduct a right-click on it and select Uninstall.
- Reboot the device to complete the uninstallation of the driver. Now, upon startup, get your device connected to the Internet and then plug in the Printer to your device.
- The system will automatically install the latest drivers.
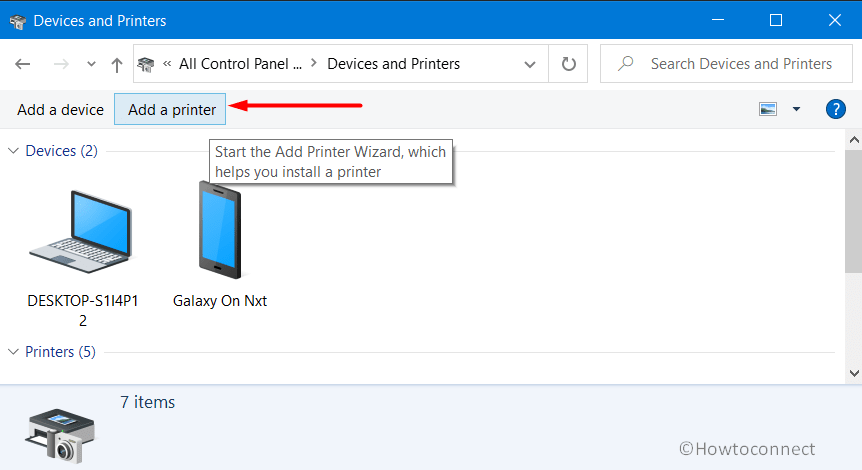
- If it fails to do so, use the “Add a printer” option and download the drivers from the manufacturer’s website.
That’s all!!!