Devices running Windows 10 are always prone to some kinds of complications, incompatibility issues, bugs, and more. Out of several problems, Blue Screen of Death is the most annoying one as it reboots the PC without prior warning. Moreover, it turns the screen into a blue color and shows an error message along with a stop code. Today, in this article, we will discuss UCMUCSI LIVEDUMP Error which has a value of 0x000001D4.
This indicates that UcmUcsi.sys driver encountered trouble. There are various reasons for BSOD to occur out of which outdated drivers, malware, faulty Windows image files, etc, are the common ones. Explore the below list of possible workarounds and see which one resolves the problem and keeps your computer free from such error codes.
Solutions to UCMUCSI LIVEDUMP Error BSOD in Windows 10
Here is how to fix UCMUCSI LIVEDUMP BSOD Error in Windows 10 –
1] Repair the Corrupted System Resources
The computer faces a lot of problems due to corrupted system resources and missing DLL files. It is also the reason for UCMUCSI LIVEDUMP Error which is the costliest one for a user. You will settle this mess employing a single tool named System File Checker which works within an elevated command prompt. Here is how to perform this action –
- Type cmd.exe in the taskbar search box. Right-click on Command Prompt and go ahead by selecting Run as administrator. Click Yes on the UAC prompt.
- Now, type in or copy-paste the following command in the black window and press Enter.
- This tool will search and detect corrupted system resources, missing DLL files and fix it automatically.
- Wait for some moment and let the process complete.
- Once the scan gets over, perform a reboot which would resolve all your problems.
2] Install all the Windows Update Patches
Whenever a new patch comes, it carries major features and most imperatively consists of several fixes for various bugs and issues. The outdated operating system is always prone to encounter problems which makes it weak and further calls for UCMUCSI LIVEDUMP Error. For this reason, to keep your system up to date, you have to give priority to these cumulative updates, preview builds, and more. For reducing time consumption, make sure you have a speedy internet connection.
- Firstly, click Start icon and choose Settings.
- Click Update & Security.
- Do a hit on the Check for Updates button to the right of the following page. If you see a message “You’re Up to Date” then ignore it. If any updates are pending, Windows will download automatically moreover let you check the progress in the same interface as well.
- Click the Download button to grab the updates.
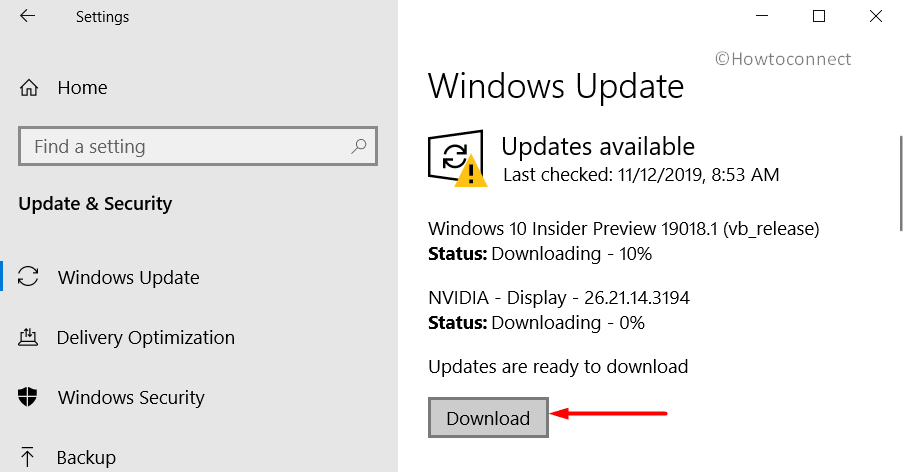
- Restart Windows 10 PC to complete the installation of the updates.
3] Settle bad sectors in Hard Drive
Hard Disk may be influenced itself evolving bad areas inside it because of continuous utilization. You will be able to settle these portions by executing the Disk Checking tool. To get to the utility and access it, move with the below series of steps –
- Press Win+R to bring up the Run dialog.
- Insert the text cmd in the provided space and press “Ctrl+Shift+Enter” keys to Open Command Prompt as Admin From Run Dialog.
- Once the black window loads successfully, enter the following command line and press Enter.
chkdsk C: /f /r /x
- After a while, Disk checking utility will detect and fix the problematic areas automatically.
- Once the process is complete, perform a restart to the device to fix the affected areas of the hard drive.
4] Scan and Dismiss Malware using Windows Security
An accidental click on the malicious links lets virus like Trojan horse, Autorun virus, etc, instantly gets into the system. On top of that, these threats break down the framework assets and corrupt DLL files as well. In addition, UCMUCSI LIVEDUMP Error occurs due to the virus or malware attack in the operating system. Windows Security was introduced by Microsoft to eliminate these kinds of threats from damaging your device. The app is designed to remove and clean all the malware from your system and present you with a fresh virus-free computer.
- Go to the rightmost corner of the taskbar and click on the arrow Show hidden icons.
- Choose the shield icon and let open the Windows Security app on the PC screen.
- Select Virus & Threat Protection from the left pane.
- From the right side of the app click on Scan options.
- Press the radio button before Full Scan, after all the methods are obtainable.
- Furthermore, click on the Scan Now button and let the process begin.
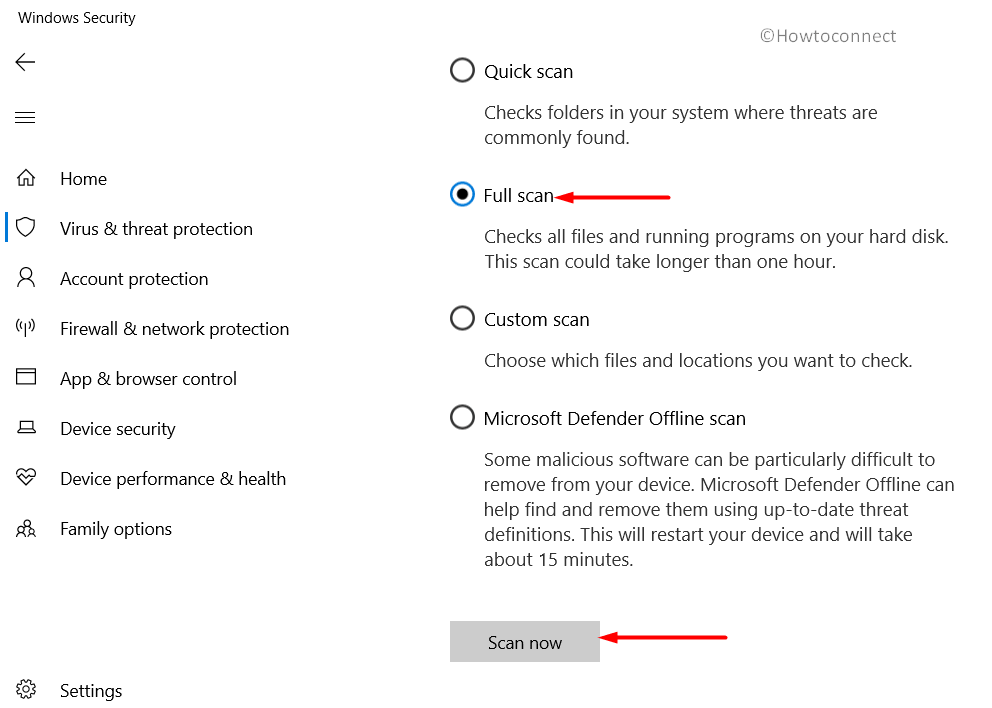
- After finishing the scan, the app interface will show you the result.
- If it scans out any virus, hit the Clean Threat option.
- Firstly, select Remove then Start Action to get rid of the malware right away.
- Once the device is free from virus, it will not encounter BSOD errors anymore.
5] Rectify the Defective Windows Image Files
The presence of defective Windows image files can also lead to the occurrence of UCMUCSI LIVEDUMP Error. By using the DISM tool you can fix these resources. Follow the instruction given below –
- Take the cursor on the taskbar, do a right-click and choose Task Manager.
- Click File from the menu bar and choose Run a new Task.
- On the dialog that appears, type “cmd” in the text box.
- Check the box saying “Create this task with administrative privileges”.
- Click OK and when User Account Control prompts up, select Yes.
- In the black window type the following command.
DISM.exe /Online /Cleanup-image /Restorehealth
- Press Enter and it will activate the Deployment Image Servicing and Management (DISM) tool.
- This process may take a longer time as it will rectify all the troublesome Windows image files.
- After the process completes reboot the computer and see for the BSOD error.
6] Utilize Windows Blue Screen Troubleshooter
By know, you all came to know how serious and annoying is UCMUCSI LIVEDUMP Error for your computer. It can harm your whole system to a great extent. Microsoft has introduced Blue Screen Troubleshooter that can detect and fix the BSOD issues pretty efficiently. As it is a built-in tool you do not need to install any additional application. Here is how to proceed –
- Press Win+I to open Windows Settings and then navigate to the Update & Security tab.
- Choose the Troubleshoot section from the left sidebar of the subsequent page.
- Move right and select the Blue Screen option.
- Click Run the troubleshooter button to start detecting the possible causes. In the end, the tool will inform you about the scan details.
7] Resolve Memory issue as soon as possible
Fault in RAM is one of the most vital causes of BSOD errors. Defective and inaccurate allotment of memory can be so perilous to cause UCMUCSI LIVEDUMP Error. However, computers experiencing this kind of memory issue needs to solve it immediately. There is a Memory diagnostic tool in Windows, which can be pretty much helpful to resolve this problem. Now follow the steps to troubleshoot –
- By pressing Win+S keys simultaneously open Taskbar Search.
- Type memory in the text box and choose Windows Memory Diagnostic under best match results.
- After the tool displays the options, select “Restart now and check for problems (recommended)” (see snapshot).
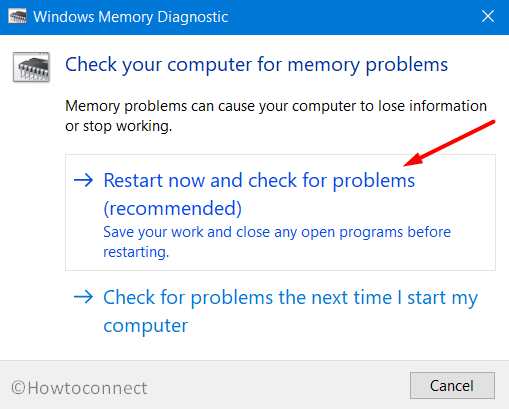
- When the detection progress hits 100 %, Windows will prompt to reboot again.
- Upon startup, the result of diagnosis will be available in the System tray.
8] Update all the Problematic Drivers to solve UCMUCSI LIVEDUMP Error
The major problems which cause BSOD error are outdated and defective drivers. The problematic drivers fail to address any issue with the device and also lead to certain incompatibility problems as well. In this scenario, Device Manager makes things a lot easier by displaying a yellow warning sign next to the faulty drivers. Here is how to continue further –
- Press the combination of Win logo + R key to quickly open Run dialog box.
- Once the dialog shows up, input the command devmgmt.msc and click OK.
- When the console comes into view, look for a mark of exclamation in a device and click on it to expand.
- Do a right-click on the drivers listed down there and choose Update Driver.
- Select Search for software automatically on the update wizard. Go through the guidelines on the screen and complete the installation of the update. As an alternative, you can also visit the manufacturer’s website and grab the latest version from there.
9] Boot up the device in the reliable Safe Mode
Safe mode troubleshoots the operating system by limiting the functions. Windows was a little bit unstable in solving issues since it has started its journey. This solution would help to resolve UCMUCSI LIVEDUMP Error as in this booting methods, Windows only loads basic programs. To boot your computer in Safe Mode follow these steps –
- Press Win + I to open Windows Settings, the built-in app.
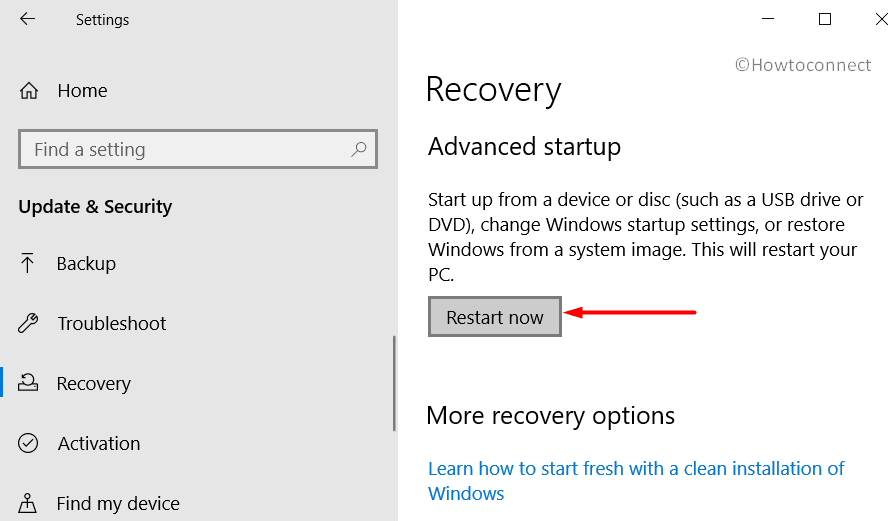
- Select Update & security category.
- From the left pane, go to the Recovery subsection. Point to the Advanced Startup and click on the “Restart Now” button.
- Choose Troubleshoot from the visible screen.
- As a next step, click on Advanced Options followed by a hit on Startup Settings.
- Select Restart when Windows will tell you that the device can be restarted with “Enable Safe Mode”.
- Press F4 and see if you still receive UCMUCSI LIVEDUMP Error after you enter Safe Mode.
10] Uninstall programs which have the same functionality
The programs with similar functionality often do a conflict while performing the same jobs. On the contrary, this results in losing the necessary system resources. As an impact, it causes UCMUCSI LIVEDUMP Error in Windows 10. You can able to limit the programs from collision by uninstalling one. The method is as takes after –
- Access the Run dialog and type appwiz.cpl in the provided box and press Enter to call up Programs and Features window.
- Locate and select the programs that are listed.
- Click the Uninstall button at the top ribbon. Reboot the device after the program is uninstalled.
- Again check if the problem still exists.
- Install the removed app if necessary in case the problem is still there.
11] To Fix UCMUCSI LIVEDUMP Update BIOS
Making changes in BIOS, an important part of a computer system can also help to solve UCMUCSI LIVEDUMP Error. In spite of the fact that being a program component, numerous hardware elements are totally subordinate to BIOS. Outdated BIOS can be a reason for several BSOD and hence you need to update it right away.
- Firstly, execute a right-click on Start icon and select Run.
- There you will find the empty text field, type msinfo32. Press Enter.
- In System Information interface, locate and note down the value of the item BIOS Version/Date.

- Afterward, launch any web browser and navigate to the manufacturer site for your BIOS.
- Find and download the latest version of it and while doing so, ensure to keep the laptop plugged in to avoid any complications.
- Now, find the downloaded file then double click on it to install it.
- Once you successfully update the BIOS, restart the device.
- Keeping BIOS up to date will fix the bug and will recover missing resources of the system.
12] Perform cycle of disconnecting-reconnecting Additional Hard Disk
After using additional hard drive many users have faced UCMUCSI LIVEDUMP Error. We often need to use additional devices in order to do our work but it is so disturbing to have several issues for using such a necessary device. Therefore, the problem can be solved temporarily disconnecting the hard disk.
- First of all, safely remove the hard drive and store all the important files from there somewhere safe.
- Reboot the system and check if the UCMUCSI LIVEDUMP Error occurs or not.
- In case the error does not persist, plug the additional device back in.
- Visit the manufacturer’s website and install the latest drivers.
13] Use Disk Cleanup to Fix UCMUCSI LIVEDUMP Error
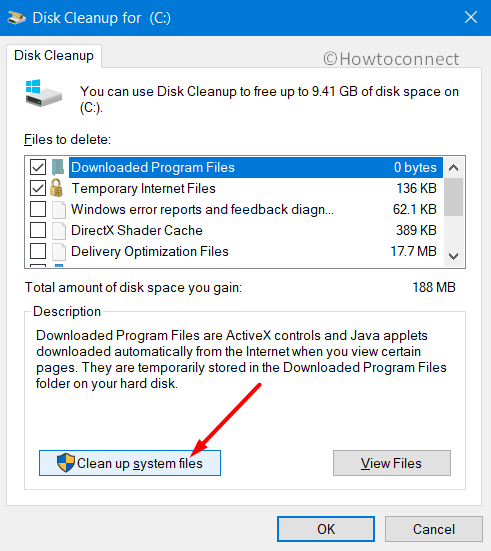
Accumulation of junk items, temporary files, internet browser cache, and more such things often occupies an essential space of the disk drive. As a result, the storage becomes short which makes the functionality of the PC slower. To make more space and run the device smoothly you can delete those files by using Disk Cleanup Utility. Here is how to continue –
- Press Win+Q to launch the taskbar search. Then type Disk Cleanup in the box and click on it.
- After a while, a box with drive names will appear, select the drive (preferably C:) you want to clean.
- Click on the OK button and the Disk Cleanup tool will become visible. Click the Clean up system files button at the bottom of the wizard.
- Again choose the same disk drive letter that you have selected in the above step.
- From the list that shows up, select all the options and click OK to start clearing out the junk.
14] Remove annoying Windows Update Files
The process of updating Windows is smooth and flawless through the Settings app. But unfortunately, at times, certain files get corrupted or fails to install properly. The presence of such files also causes UCMUCSI LIVEDUMP Error in the system. To prevent this fault, we need to remove the defective files from the system. Follow the instructions –
- Get access to the Settings app and head to the Update & security category.
- On the right pane of Windows Update subsection, click on View Update History link.
- A new Installed Update window will appear by default. Find and select the latest receive patch and click Uninstall on the top.
- Observe and carry out the instructions on the screen to complete the removal process.
15] Disable Automatic Reboot to Fix UCMUCSI LIVEDUMP Error
The first syndrome that every computer faces after affecting by BSOD error is an automatic restart of the system. It happens so quick that you will not get enough time to decide what to do. While troubleshooting blue screen problems, this specific feature stands as a barrier. Hence, you have to disable the automatic reboot setting at the earliest.
- At first, save all the ongoing processes or minimize it temporarily to proceed with the further steps.
- Now, directly move to the Desktop area by making use of the shortcut Win+D.
- Then move the mouse pointer to This PC icon and right-click on the same followed by selecting Properties option.
- There will come up System window, select “Advanced system settings” situated in the left pane.
- After the System Properties popup appears, you will find yourself into the Advanced tab.
- Click “Settings” under the Startup and Recovery section.
- Navigate to System failure and uncheck the box before the “Automatically restart” option.
- Click OK and henceforth the system will no longer reboot automatically. This small tweak will let you carry out other workarounds smoothly.
16] Uninstall 3rd party Antivirus
In the era of technical advancement, you got so many 3rd party antivirus solutions to fight against malware. They are easy to access and most of them are free. But most of the time, they become the reason for UCMUCSI LIVEDUMP Error. It will be wise to uninstall them and to do so –
- Right-click on Start and choose Apps and Features option from the Win+X menu.
- From the list of programs, look for the 3rd party antivirus.
- Select the app and click the Uninstall button.
- If UAC asks for permission, hit Yes to finish the deletion procedure.
- In the process, ensure to remove all the components, settings of the antivirus and make the device free from the aforementioned errors.
17] Perform System Restore to Fix UCMUCSI LIVEDUMP Error
Many times doing changes in an integral part of the system can be the reason for UCMUCSI LIVEDUMP Error. Whenever a user installs or uninstalls the app it edits the Windows registry accordingly which may be risky for your PC. However, if a user faces a problem after making such a change, he or she can easily turn back to the previous settings by performing a system restore. For doing such an action follow the instructions –
- Type rstrui in the taskbar search box and press Enter to open System Restore wizard.
- Select “Show More Restore Points“.
- Choose the latest one from all the available points and press Next to continue.
- Afterward, choose Finish to start the restoring process.
In conclusion, all the processes mentioned above would help you to fix UCMUCSI LIVEDUMP Error in Windows 10. If you have some more tips to solve Blue Screen problems, do write them to us.
Methods:
1] Repair the Corrupted System Resources
2] Install all the Windows Update Patches
3] Settle bad sectors in Hard Drive
4] Scan and Dismiss Malware using Windows Security
5] Rectify the Defective Windows Image Files
6] Utilize Windows Blue Screen Troubleshooter
7] Resolve Memory issue as soon as possible
8] Update all the Problematic Drivers
9] Boot up the device in the reliable Safe Mode
10] Uninstall programs which have the same functionality
11] Update BIOS
12] Perform cycle of disconnecting-reconnecting Additional Hard Disk
13] Use Disk Cleanup
14] Remove annoying Windows Update Files
15] Disable Automatic Reboot
16] Uninstall 3rd party Antivirus
17] Perform System Restore
That’s all!!