Microsoft uses to release new updates for Windows in frequent intervals via cumulative patches and builds. Similarly but sadly, bugs are common generating error codes and blocking the Windows Updating Process. 0x8007042b 0x2000d error in Windows 10 and 11 is a comparable issue that will restrict you from installing the latest build. Furthermore, the issue will cause some internal problems in the computer as well. Even you try multiple times for updating the Windows, the same error will show up every time.
Windows update error 0x8007042b 0x2000d in Windows 11 and 10 is dissimilar to other update issues and occurs usually due to some common problems. The most quotidian causes are corrupted system files, faulty USB connection, defective Windows image files, pending update files from before, having a third party anti-virus program in the system. Therefore, some effective methods can easily fix this error and resume installing the latest patch immediately.
Update error 0x8007042b 0x2000d in Windows 11 and 10
Here is how to fix update error 0x8007042b 0x2000d in Windows 11/10 –
1] Disable all the windows features
In some versions of Windows, Optional features itself disturb the installation of update or upgrading procedure and show an error. Therefore you need to disable all of them using PowerShell at a time before starting using the following instructions –
- Click the Start, type “PowerShell” without quotes and hit – Enter.
- Copy-paste the following command
Get-WindowsOptionalFeature –Online | Where-Object {$_.State –eq “Enabled”}

- Now you can see a full list of all Windows Features in the PowerShell. Run the below commands to disable them one by one –
Disable-WindowsOptionalFeature –FeatureName "FeatureName" -Online
Note – replace the “FeatureName” with the name from the list (with quotes).
- Restart your PC after disabling each optional feature.
2] Do a clean boot
Clean boot is an environment on Windows where only basic and essential services run and there is no issue coming out of third party applications or additional built-in features. So switch to the feature by following the steps to minimize the possibility of update error 0x8007042b 0x2000d –
- Click Search on Taskbar, type MSConfig and then hit Enter.
- Select the “Boot” tab after System configuration appeared.
- Check the Safe boot followed by Minimal.
- Click the Apply and then OK.
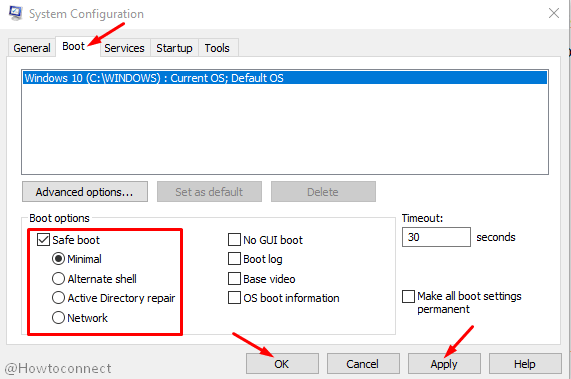
- Choose Restart on the confirmation dialog.
3] Change the name of Migration directory to Migration.old
Many times only renaming the Migration file settles update error 0x8007042b 0x2000d in Windows. For that, follow the below instructions –
- Press the – Windows key and E.
- Copy the following path, paste in the File Explorer address bar, and hit Enter –
C:\ Windows\System32\Migration
- Right-click the Migration folder and select Rename.
- Change the name to Migration.old.
- Once the changes are made, restart the computer.
- Try installing the update, this should work fine now.
4] Remove all the window store apps
Windows Store apps are another factor that can trigger the installation error so you need to remove them using the underneath procedure –
- Launch the PowerShell in the elevated mode as explained in the 1st method.
- Type –
Get-AppxPackage *windowsstore* | Remove-AppxPackagecommand and press Enter. - Restart your PC and upgrade Windows without getting error 0x8007042b 0x2000d.
5] Run the SFC Scan to repair corrupted Windows components
Windows system files consist of fixed internal components and they form a definite structure to make it executable. Due to some unexpected malware attacks or faults at the time of carrying out Windows update, these files become corrupted. A damaged file lacks essential components and appears as unreadable within the system and generate the Windows update error 0x8007042b 0x2000d.
To resolve this error and resume installing the latest update patch, we have to fix them and make executable again. Windows default utility System File Checker can be the ideal tool to take over this task. This powerful tool is executable via the Elevated Command Prompt if you follow the below instructions –
- Press – Win+S.
- Write – cmd.exe.
- Select – Run as Administrator option.
- When the User account control prompts up, click – Yes.
- Type the command line now – SFC /Scannow.
- Hit the – Enter.
- System File Checker will take some time to diagnose and fix the corrupted components.
- Once done, restart the computer and try installing the patch again.
6] Temporarily remove the problematic Hardware accessories
Oftentimes you might encounter Windows update error 0x8007042b 0x2000d due to a problematic USB device connected to the port of your laptop or desktop. The solution is quite simple and you have to disconnect the troublesome hardware accessory for the time being. After that, restart the Windows and try installing the update via the Settings app.
However, if the error is still unresolved there might be a problem in the hardware components for which you can try running Hardware Troubleshooter. To run the tool, follow the below guidelines –
- Access elevated command prompt as said in the previous method.
- Enter the below command here –
msdt.exe -id DeviceDiagnostic
- Press Enter and allow the Hardware and Devices Troubleshooter to appear.
- Click – Next.
- Scanning will start in a moment and the tool will fix any problem in the hardware automatically.
- Restart the Windows and check if the installing patch is taking place without any trouble.
7] Remove Third-party anti-virus program
A third party anti-virus program is not truly necessary in Windows for additional security reasons. Windows Security is the best utility to dismiss any kind of potential threat being a built-in utility. However, a third-party tool can cause trouble, block a few essential files at the Windows Updating process. Therefore the system will encounter 0x8007042b 0x2000d and deprived of new changes in the build.
Any other third-party app might cause additional harm therefore, uninstall such programs now using the below steps –
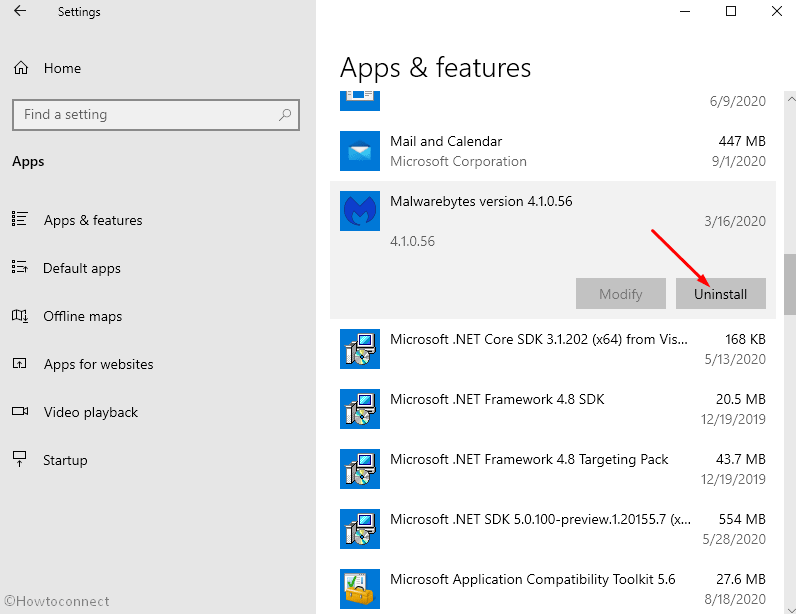
- Open Windows Settings.
- Select – Apps.
- If you are using Windows 11, choose Apps & features from right pane.
- Locate the third party antivirus program on the right-side.
- Once found, click it to expand.
- Hit – Uninstall.
- Follow additional instructions from the screen to complete the uninstalling task.
- Restart the computer and try installing the update file again.
8] Install the previous pending updates
Windows updating process is automatic and should take place once the files are released. However, Windows often delays the process and the system fails to download the latest patch often. If your Windows has some pending update, error 0x8007042b 0x2000d may appear on display.
Manual approach for installing the latest patches is always ideal confirming there is a stable internet connection. This will save you from additional trouble, unexpected errors, and carry out a seamless updating. To resolve the update error, you can manually download the pending updates and try installing it using the instructions –
- Note down the KB number for the latest update patch.
- Visit the Microsoft Update Catalog
- Type the noted KB number on the search box.
- Press Enter.
- Check and match the KB number of the patch.
- Click Download for the correct update.
- Once the download finished, run the .exe file to install the patch.
9] Repair defective Windows image files by running DISM scan
With the update patch comes out, ISO files are also delivered ahead of any Windows Upgrade. When these files get corrupted due to malware attack or from the effect of a third-party tool, you may encounter error 0x8007042b 0x2000d in Windows 11 and 10 sometimes.
To rectify the issue in the defective image file, Deployment Image Servicing and Management (DISM) tool will be helpful. Upon executing the command in the Elevated Command Prompt, you can fix the troublesome issue. To run this, follow the below steps –
- Restart your machine holding the Shift key down continuously.
- Windows will restart and boot directly to Automatic repair.
- From the blue screen, click – Troubleshoot.
- Select – Advanced options.
- Click – Command Prompt.
- In the black window, type command tool –
DISM /Online /Cleanup-Image /RestoreHealth. - Execute the command by pressing the Enter key.
- If any corrupted Windows image file is detected, DISM tool will fix that automatically.
- Once finished, restart the computer.
- Try carrying out Windows Update again.
10] Reset Windows Update components to fix 0x8007042b 0x2000d
Sometimes, buggy services may also cause 0x8007042b 0x2000d when installing Windows update in Windows 10 or 11.
To fix this obstacle, you will need to reset Windows Update components to default by executing a few commands. Follow the below process to accomplish this method –
- Click the magnifying icon from the Taskbar.
- Type – cmd.
- Select – Run as Administrator from the right side.
- Copy the following commands and execute by pressing – Enter
net stop wuauserv

net stop cryptSvc

net stop bits

net stop msiserver

ren C:WindowsSoftwareDistribution SoftwareDistribution.old

ren C:WindowsSystem32catroot2 catroot2.old

net start wuauserv

net start cryptSvc

net start bits

net start msiserver

pause
- Enter each command at a time.
- After resetting, try installing the update.
11] Undo recent changes in Windows
Error 0x8007042b 0x2000d may arise when a newly installed application makes changes in Windows.
However, you can easily resolve it by uninstalling the problematic program immediately and erasing all data. To do that, follow the below guidelines –
- Click the taskbar search and type – appwiz.cpl.
- Press Enter.
- In the Program and Features window, locate that application causing trouble.
- Right-click the program.
- Select – Uninstall.
- Follow the guidelines to erase all the program data.
- Restart Windows.
- Try carrying out Windows Update again.
12] Perform System Restore to solve 0x8007042b 0x2000d error
If removing the newly installed third-party application doesn’t solve error 0x8007042b 0x2000d in Windows, there might be something wrong with the Registry. Oftentimes a new program modifies some critical DWORD in the Registry causing irrecoverable problems.
Performing System Restore is the best way out in case of an irrecoverable issue as it will load Windows to a previous free of error state. To accomplish this task, follow the below guidelines –
- Open Taskbar Search pressing Windows key and Q together.
- Write – Recovery.
- Press – Enter.
- Click – Open System Restore link.
- Hit the radio button set for Recommended restore for loading back the most recent update.
- If you wish, click the – Choose a different restore point instead.
- Select – Next.
- Check the box set for – Show more restore points.
- Select any of the points you opt to restore.
- Hit – Next.
- Confirm the selection and click – Finish.
- Once restoring is done, Windows will reboot for instance.
- In the next startup, you will get a message confirming that “System Restore completed successfully”
13] Install updates using Windows MCT
If you have come to this point, the update error 0x8007042b 0x2000d in Windows is still in your system. Since the methods from the above didn’t work, you have to perform Clean installation of Windows for fixing this annoying issue. To accomplish, follow the below guidelines –
- Click this link and access the Microsoft website for Software Download.
- Click – Download tool now.
- After Downloading ends, double click on MediaCreationTool.exe (or similar) and install it to the system.
- Open the Windows Media Creation Tool and Upgrade this PC now radio button.
- Click – Next.
- Select – Download and install updates (recommended).
- Hit – Next.
- Click Accept to acknowledge all the terms and licenses.
- Check the box that says – Keep personal files and apps.
- Hit the – Next.
- Follow the On-screen instructions and finish installing Windows Setup.
Methods:
1] Disable all the windows features
2] Do a clean boot
3] Change the name of Migration directory to Migration.old
4] Remove all the window store apps
5] Run the SFC Scan to repair corrupted Windows components
6] Temporarily remove the problematic Hardware accessories
7] Remove Third-party anti-virus program
8] Install the previous pending updates
9] Repair defective Windows image files by running DISM scan
10] Reset Windows Update components
11] Undo recent changes in Windows
12] Perform System Restore
13] Install updates using Windows MCT
That’s all!!