Wiaacmgr.exe in Windows 10 seems malicious at first sight because of it’s .exe extension after the filename. Though it’s not a malware itself, often it acts like a virus by showing unusual behavior. This all occurs because of its executable nature. Usually, Developers or hackers can decode this type of file easily, as a result, it becomes an easy target to pass malicious codes to your system. In most cases, injected Trojan can harm your computer badly and lead you to several issues like high CPU usage, crashing memory, freezing screen.
Wiaacmgr.exe, i.e. “Windows Picture Acquisition Wizard” i.e. is one of the pre-installed programs that helps to detect when an external media device is connected to your PC. As it’s one of the fundamental files for Microsoft users, its errors tend to be annoying. They interrupt the usual processes and that can lead to further frustration. However, solving these problems is not a hard task, it only takes time. In some incidents, you would need the help of a Windows related professional though. But, those are the extreme cases where a virus or a malware has damaged the system. Regardless, the following guide will help you disable and fix Windows Picture Acquisition Wizard error in Windows 10.
Ways to Disable and Fix Wiaacmgr.exe in Windows 10
Before we begin discussing the various kinds of wiaacmgr.exe errors, it’s important that you must understand what it is.
Understanding wiaacmgr.exe
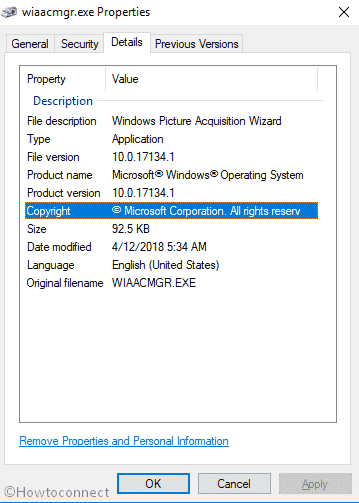
wiaacmgr.exe is an authorized file of Windows operating system that usually located under the System 32 folder within the Local Disk C. Its function is to detect when an additional media device is connected to the PC through the USB slot. The media device could be a digital recorder or a smartphone. This process also notifies the user about the media tool and helps in opening the files present in the respective device. wiaacmgr.exe displays the manager GUI and handles all the succeeding processes related to the media device.
What causes the problem due to wiaacmgr.exe?
The most common issue is the installation of a virus or malware program due to this file. Moreover, an overwhelming amount of junk files can also lead to a wiaacmgr.exe error. A breach in the security of the OS is another major cause for the file to get corrupted.
Mostly, Wiaacmgr.exe errors cause the disturbance when you connect a media device to your PC. As it’s a system file, the error may also pop up when you start or shut down your computer. You might encounter messages like “Wiaacmgr.exe file not found” or “Wiaacmgr.exe failed to load”.
Disable and fix Wiaacmgr.exe in Windows 10
As now you know what it is, let’s move ahead with the solutions. Here is How to disable and fix Wiaacmgr.exe in Windows 10 –
End task for wiaacmgr.exe
If you experience any unusual behavior from Windows Picture Acquisition Wizard, the first thing you should do is end the task.
Step-1: Do a Right-click on the Taskbar and Select Task Manager from the visible list.
Step-2: When it comes into the view, click on More details.
Step-3: Next, shift to the Details tab and locate wiaacmgr.exe. Perform a right click on it and Select End task.
Scan the system for virus
The wiaacmgr.exe file might be corrupted because of a Trojan attack. Usually, Viruses and malicious programs tend to enter the system along with downloads. Most of the time users neglect it as developers inject them with the same name as wiaacmgr.exe. They target specific programs and begin to spread to other ones after growing. In this condition, You have to scan your PC for viruses and malware to make sure there isn’t any. Here’s how –
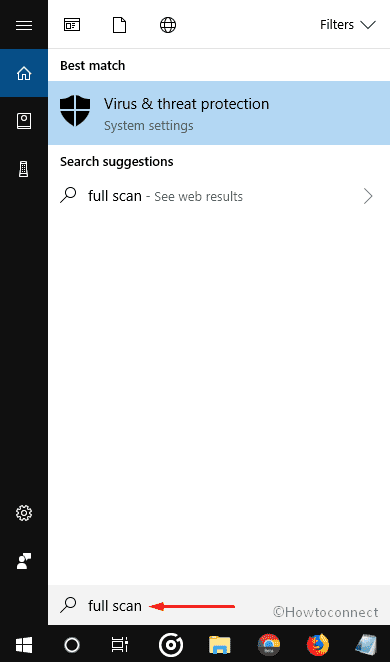
- Make a click on Cortana and type full scan in the search box. When the result shows up, hit Enter.
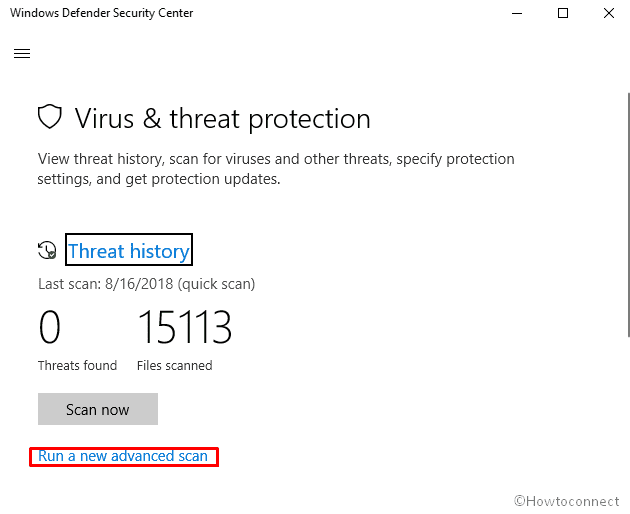
- On the following window of “Windows Defender Security Center”, select “Run a new advanced scan”.
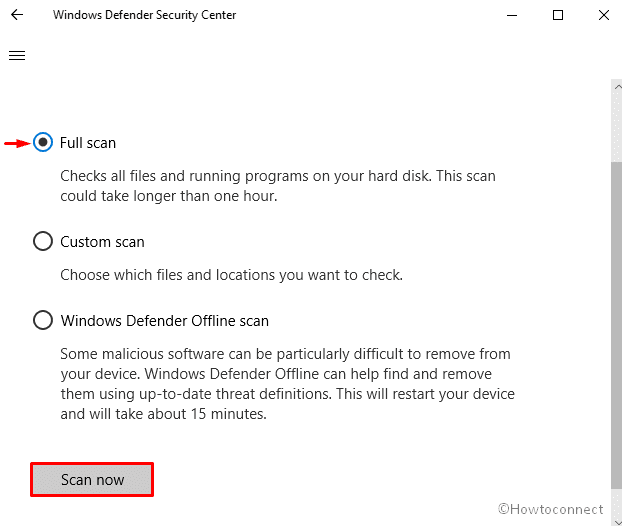
- Ensure that the radio button of Full scan is checked and then Click on Scan now.
Run Disk cleanup
Disk Cleanup is a vital utility of Windows operating system that cleans the unnecessary junk file from your computer. As Wiaacmgr.exe makes several items on your computer when infected by a virus, in order to remove them cleanmgr should work. Here is the process –
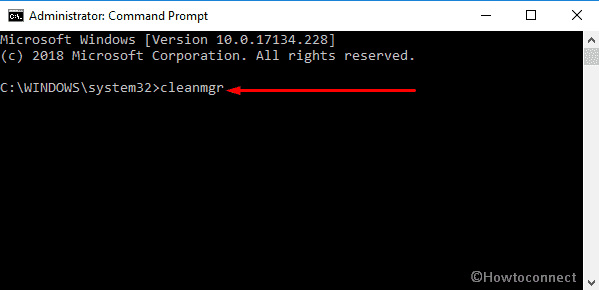
- At first run Command Prompt as admin.
- Once it is visible into the display, type cleanmgr after the blinking cursor of C:\WINDOWS\system32> and then Press Enter.
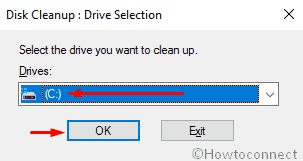
- Here, you will view a pop-up named Disk Cleanup : Drive Selection. Select the system Drive from the drop-down menu and click on OK.
Now follow the instructions in this guide – Windows 10 – How to Open and Use Disk Cleanup.
Perform SFC Scan
Corrupted files may cause issues related to Wiaacmgr.exe in Windows 10. In that case, System File Checker will help to remove them.
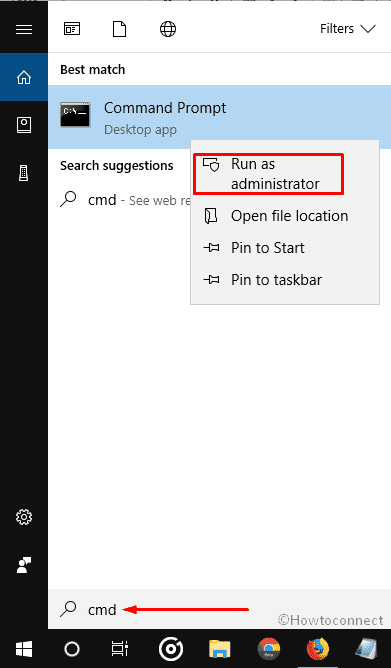
Type cmd in the Cortana search box. Once the result rolls up, do a right click on Command Prompt and Select Run as administrator.
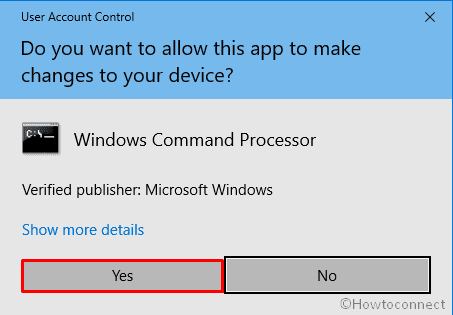
If a UAC prompts up, Click on Yes to give consent.
Next, Type down the following command and hit Enter –
sfc /scannow
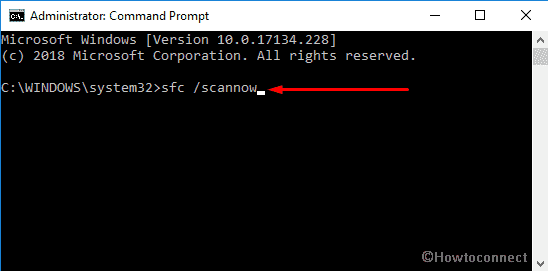
The process will take time. So be patient and wait until it ends up with a result.
Run DISM
DISM command helps to repairs all Windows components and often save your time of reinstalling Windows.
Open Run Dialog by Pressing Win+R together and type cmd.exe in the empty text box. In order to open Command Prompt as administrator make a combined Press of Shift+Ctrl+Enter.
Now, you will view a UAC. Click on Yes.
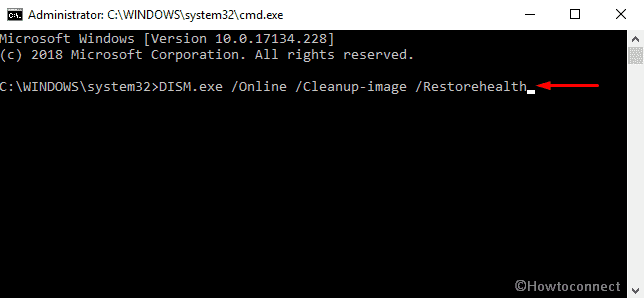
Once the command prompt comes into the sight, type the following text code and hit Enter –
DISM.exe /Online /Cleanup-image /Restorehealth
Update your Operating System
Updating Windows 10 might fix any issue related to wiaacmgr.exe. Microsoft Corporation regularly releases security and software updates to help the system remain in good condition.
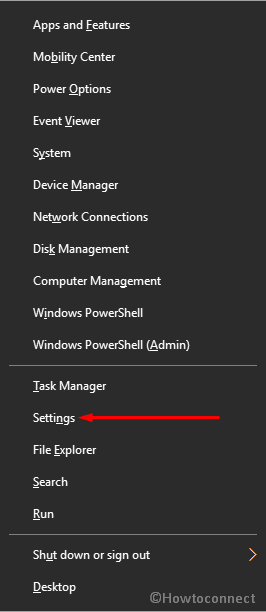
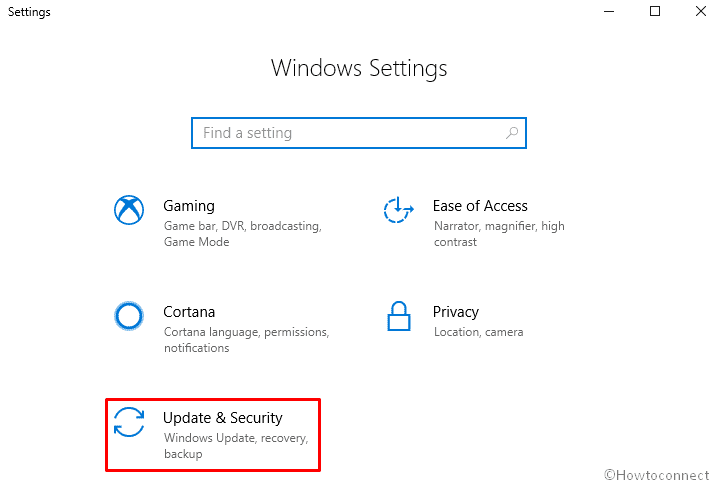
- Right click on Start button and Select Settings from the list.
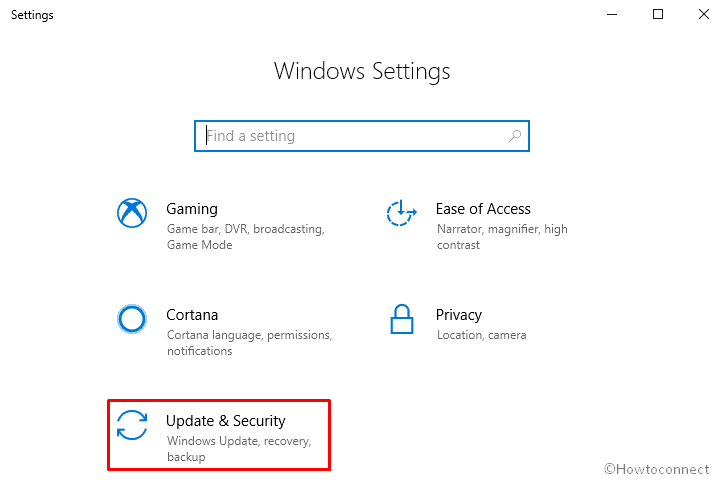
On the subsequent Window, Click on Update & Security.
Shift to the right pane and click on Check for updates.
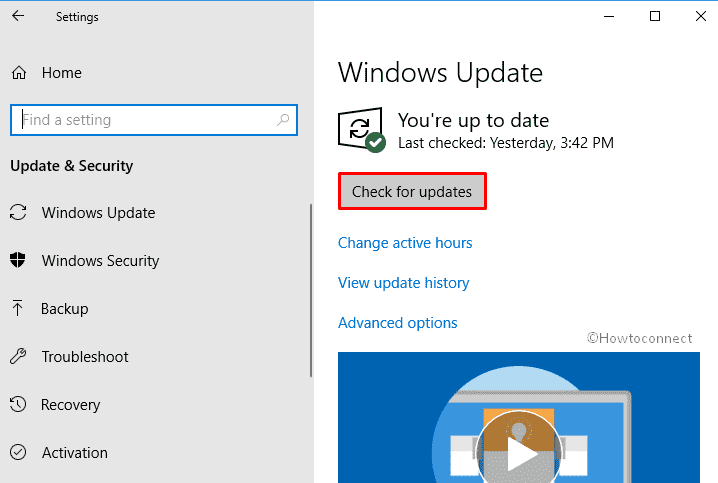
If there’d be any updates available, the system will download them automatically. Once these’are downloaded your issue should be resolved.
Reset the PC
If you are still getting wiaacmgr.exe in Windows 10, it’s better to return to its default state. Here’s how to reset your PC –
Make a joint Press of Win+I hotkeys to open Settings app and then click on Update & Security.
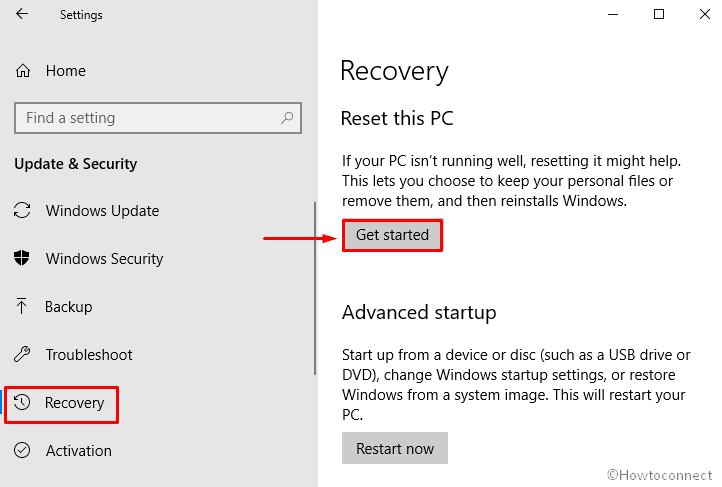
On the following Windows, click on Recovery from the left column and jump to the right pane.
Next, click on Get started located under Reset this PC.
Select either Keep my files or Remove everything according to your choice.
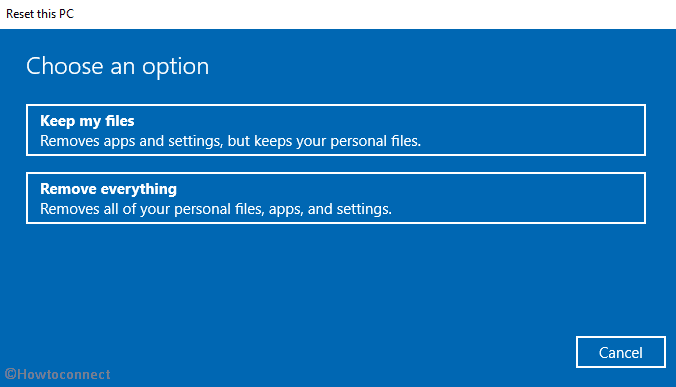
Complete the resetting procedure by following the onscreen guidelines. If you are a beginner you can follow this article – How To Reset Windows 10 Removing Everything, Keeping Files.
As you can see there are plenty of methods to solve wiaacmgr.exe in Windows 10. However, if your issue doesn’t get resolved after taking the help of, a clean install might be the last choice.
That’s all.