Windows 10 lets you Integrate Microsoft To-Do and Cortana. So you are able to use the built-in digital assistant to manage your plan of everyday work. This task management application is an ideal way to organize, manage, prioritize and remember the most essential day-to-day errands. You can now streamline and sync the list on Outlook, Cortana with Microsoft To-Do post this integration.
When you Integrate Microsoft To-Do and Cortana in Windows 10 it would help you manage your daily works list easily and effectively. However, Cortana, you can add tasks and task-reminders to the built-in application quickly and just about anywhere. You can use the MS To-Do app across the devices like PC, Android or iPhone with the Cortana voice assistant. Moreover, have the ability to easily access this listing tool over the web, you can be sure you don’t miss anything out. Read on to know how to Integrate Microsoft To-Do and Cortana easily in a few steps. Note that currently, this feature is available to the insiders and Regionally, such functioning is available only in Australia, India, US, and UK.
Way to Integrate Microsoft To-Do and Cortana quickly in Windows 10
Here is how you can Integrate Microsoft To-Do and Cortana –
When Office 365 or Outlook account is not connected to Cortana
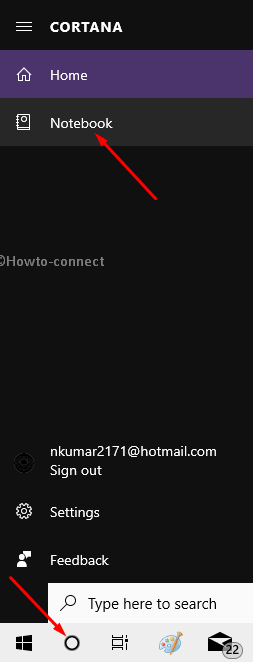
Step-1: Click on Cortana from the taskbar and let it appear. Select Notebook.
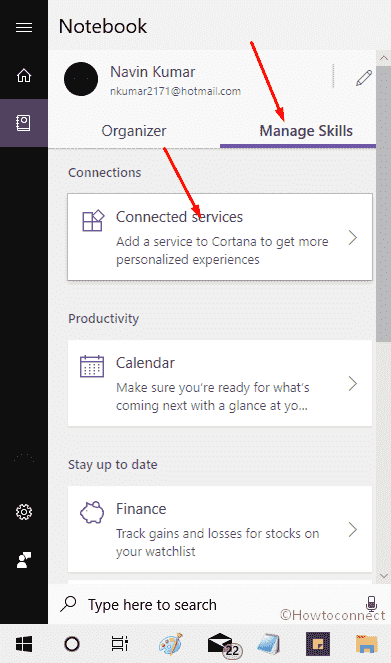
Step-2: Go to Manage Skills tab and choose Connected services.
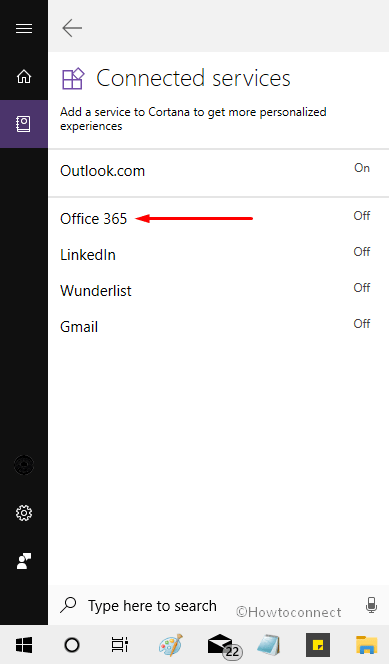
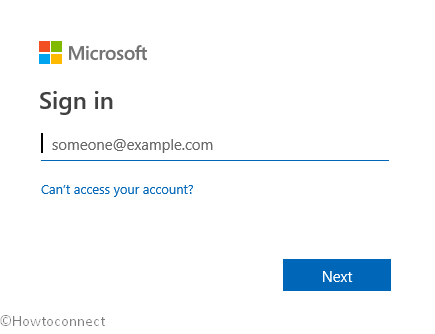
Step-3: Select the account type as below –
For Enterprise account- Office 365
For Personal account- Outlook.
Step-4: click on Connect.
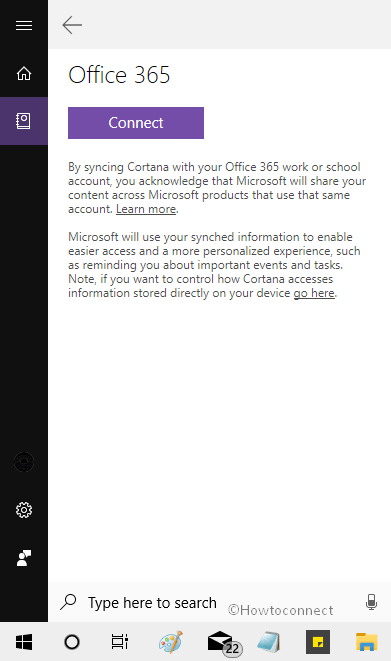
Step-5: If asked, complete the formality of signing in into the Outlook account.
This will sync Microsoft To-Do, Cortana and Outlook account.
When Office 365 or Outlook account is connected to Cortana
- Navigate to Cortana => Notebook.
- In the Organizer tab, select Reminder or List.
- Sign-in to the To-Do application with the same account as you set up with Cortana.
Finally, this will sync the Microsoft To-Do, Cortana and Outlook account.
Force Sync Microsoft To-Do
Sometimes, the changes made in Cortana or Outlook may take time to automatically sync with Microsoft To-Do. In such a case, you can force-sync.
- Open Microsoft To-Do app.
- Click on your Account name.
- Click on Settings.
- At last, select Sync.
Integrate Microsoft To-Do and Cortana – Some issues and Solutions
- Users might see ‘Too many reminders’ error dialogue while using Cortana. You can resolve the issue potentially by deleting a few completed tasks in Cortana => Notebook => Reminder => History.
- You may find duplicate notifications for the same reminder.
- The attachments added to Cortana might not sync with Microsoft To-Do. They might be accessible only in Cortana.
- For the best performance, users might have to disconnect Wunderlist from Cortana.
- Users cannot create location-based reminders in Microsoft To-Do. Users can create such reminders only on Cortana but can view them on Microsoft To-do.
More info on Integration of Microsoft To-Do and Cortana in Windows 10
- Right now, the sync/integration feature is available for limited regions- India, US, UK, and Australia.
- Currently, such sync is possible only on Windows 10 devices running on Insider build 18267 or higher.
- You cannot connect more than one account to Cortana right now. Hence, the simultaneous connection with multiple accounts or with both Office 365 and Outlook accounts will not be possible.
- You might get the same notifications from Cortana, MS To-Do and Outlook.
That’s all!