A yellow colored caution sign is displayed on the network icon in Windows 10 which represents Limited access of the internet. The sign also exhibits an exclamation symbol, referring to an inappropriate or inaccessible gateway. Hence, keeping this issue into account, this article will guide you to Fix Limited Network Yellow Mark in Windows 10.
It is believed that while setting up the IP address, you must have skipped the gateway and thus it results in the limited access of internet. So, with the assistance of a certain command, retrieve the gateway address first and then apply the same in the subnet. Apart from this, other easy and primary workouts should be carried and see if any of them works like troubleshooting, updating the network driver, and things like that.
Along with guiding you with the steps to Fix Limited Network Yellow Mark in Windows 10, we will also pen down the steps to remove the mark. We are mentioning to settle the matter in 6 steps here. One by one give an attempt to them and undergo which one fixes the “limited access”, depending on the interest of the system.
![]()
How to Fix Limited Network Yellow Mark in Windows 10
Step 1: Stop or Uninstall Additional Antivirus
Turn off third-party antivirus app like Bit defender or others. These sorts of apps contain somewhat settings that could block the network share on your machine. Restart the system and examine if your problem gets eradicated.
Step 2: Restart Network List Service
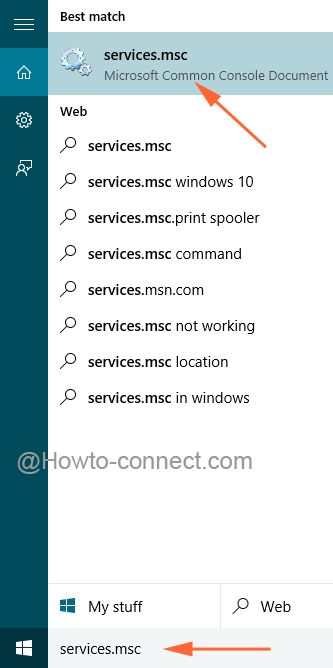
- In the search field of the Cortana, write the term, services.msc. She will soon spread out her bar with the appropriate result. Make a tap on it.
- A totally individual window of Services will emerge where look for the Network List Service.
- When you find it, conduct a right-click and affix a click on Restart option. In this way, the network to which the machine is associated with will get restarted.

- Now, try-out a small test and calibrate if the mentioned web page is accessible or not: http://www.msftncsi.com/ncsi.txt
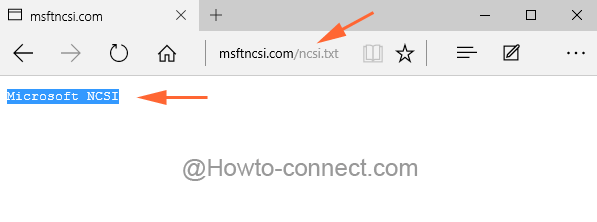
- If the connectivity exists, the page will exhibit only a clause written as Microsoft NCSI with no other printing characters. This indicates that you have got success to Fix Limited Network Yellow Mark in Windows 10.
- If you don’t find like above follow further.
Step 3: Troubleshoot
- Conduct a right-click on the network icon and pick up Troubleshoot problems.
![]()
- Soon the diagnostic will scan up for the issues and you will be listed the problems and their fixes with the lp of which you can fix Limited Network Yellow Mark in Windows 10.
Step 4: Turn off Firewall
- For a certain time, like for temporarily, turn off the firewall.
- To do so, fire up the Control Panel and shift it showcase the symbols in small view and move off with Windows Firewall.
![]()
- Upon the emergence of the same, perform a click on Turn Windows Firewall on or off link which is showcased at the left fringe.
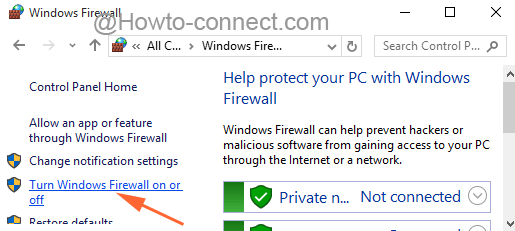
- This will bring the Customize settings into the light where choose the round cells to Turn off the firewall.
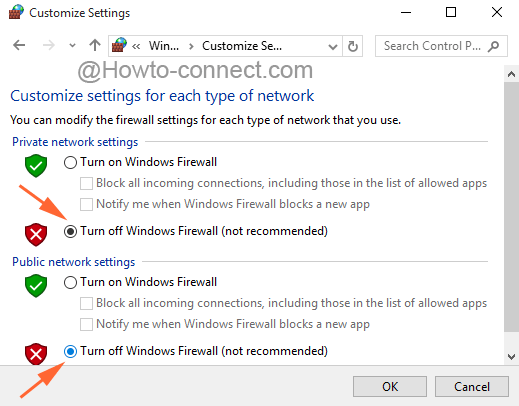
- To implement the changes, ensure to conduct a tap on Ok button.
- Restart and examine the issue.
Step 5: Update NIC Driver
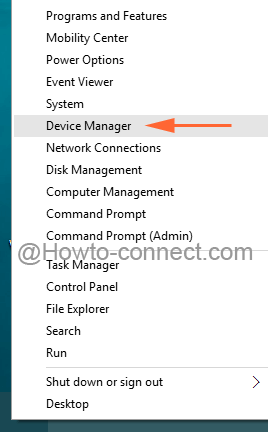
- Execute a right-click at the Start icon and fire up the Device Manager.
- When the device manager spread up on the screen, trace out the Network adapters and deliver a double click on it.
- Conduct a right-click on the network that is used by your machine and appoint a click on Update Driver Software.
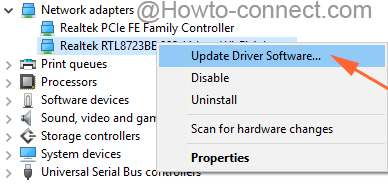
- If any related updates are obtainable, they will be processed to be installed.
- Restart the machine to see whether you are able to Fix Limited Network Yellow Mark in Windows 10.
Step 6: Add Gateway
- In the circumstance where you have not set up IP address automatically with the aid of DHCP, there are chances to miss out the Gateway. Most of the “limited access” defines the faulty or unreachable gateway.
- So, being not sure of the gateway, obtain it from the Command Prompt. So, make it visible on your screen using any of your methods.
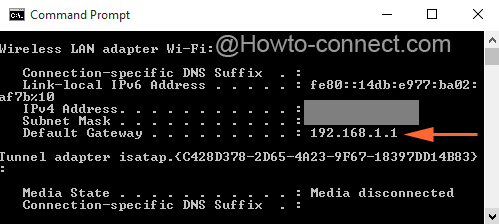
- Enter the term ipconfig after then hit Enter.
- Now find out your gateway address.
- And provide the same in the Network Properties.
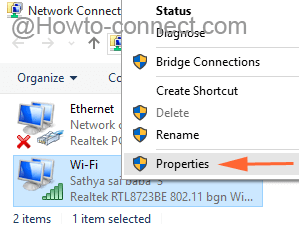
- Administer a right-click on the network icon to choose Open Network and Sharing Center.
![]()
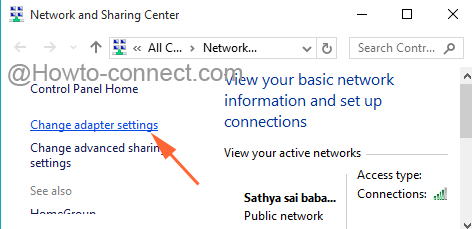
- Discover Change adapter settings link depicted at the left fringe, click on it.
- Look for the internet connection active on the machine and choose Properties through a right-click.
- Upon the emergence of the Network properties box, administer a double click on the particular component Internet Protocol Version 4.
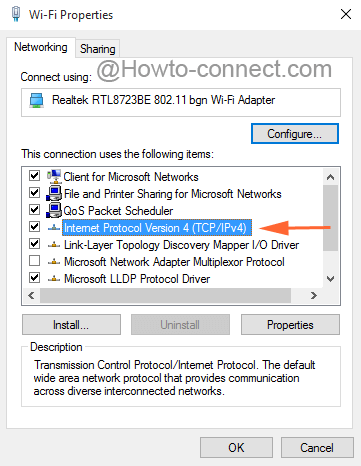
- Now, examine all the numbers carefully and put in the IP addresses of Gateway that was obtained from Command Prompt as shown in the above step.
- Tap Ok to Fix Limited Network Yellow Mark in Windows 10.
How to Remove Yellow Mark from Network Icon in Windows 10
The constant show of Limited Network Yellow Mark in Windows 10 makes you irritated. If you want to eradicate the mark, the Registry Editor will help you in doing so. Let us find out how it can be done –
- With Windows and R keys, extract the Run box and in the field enter the term regedit and tap the Ok button.
- Give affirmation to the UAC to open Registry Editor.
- Travel through this path:
HKEY_LOCAL_MACHINE\SOFTWARE\Policies\Microsoft\Windows\Network Connections
- Being into the Network Connections key, take attention to the other side and administer a right-click on an empty space and choose New => DWORD Value.
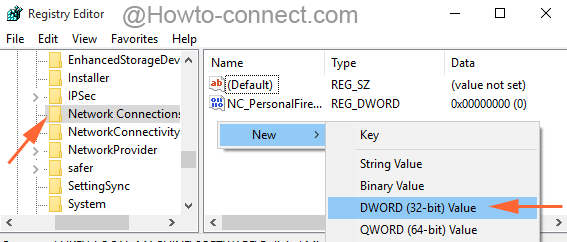
- Name it as NC_DoNotShowLocalOnlyIcon.
- Now, make a twice hit on the same to bring its Edit window and underneath the Value data, assign number 1.
- Click Ok.
- Close the Registry Editor and restart the machine to fix Limited Network Yellow Mark in Windows 10.
if these things are not working refresh your windows 10/8/7. sure then it will gone.