Network Discovery is a significant feature in Windows 10 but sometimes, unfortunately, it does not work greatly. For many, this option is greyed out or turns off automatically or completely missing. In a few cases, even after the feature is enabled, you notice that it is disabled in the Settings app.
Usually, when you access a trustworthy network (such as the Home), an option exists to keep it as private so that you can detect other devices. But if it is less reliable, you are likely to set the connection as public. And by doing so, you don’t let your computer be discoverable on that network.
At certain times, configuring network profiles fails to perform and you confront that the Network Discovery is Turned Off in Windows 10. So, when you are unable to run this feature, you seem to encounter the following issues –
Symptoms of the Issue
1. You cannot notice shared folders on a local network.
2. You cannot discover and browse any network share.
Reasons for Network Discovery is Turned off
Now, the issue persists to occur because of any one of the following reasons –
1. Certain dependency services related to Network Discovery are not properly configured.
2. Or when Network Discovery is blocked by Windows Defender Firewall or by other firewalls.
Let us walk towards all the promising solutions one by one.
Network Discovery is Turned off Windows 10
Solution 1 – Check and Fix Services
To fix Network Discovery is Turned Off in Windows 10, you should once check and change settings in certain services. So, follow the below-given steps and examine whether the services are set to Automatic and running.
In this concern, you may like to explore 5 Ways to Manage Services in Windows 10.
Step 1 – First of all, type services in the Cortana text field and click the same on the top.
Step 2 – This immediately launches Services window on the PC screen. So, moving ahead, locate the following 4 services and check them one by one –
* DNS Client
* Function Discovery Resource Publication
* SSDP Discovery
* UPnP Device Host.
Step 3 – What to check –
1. They should be in the Running status
2. Startup Type must be Automatic.
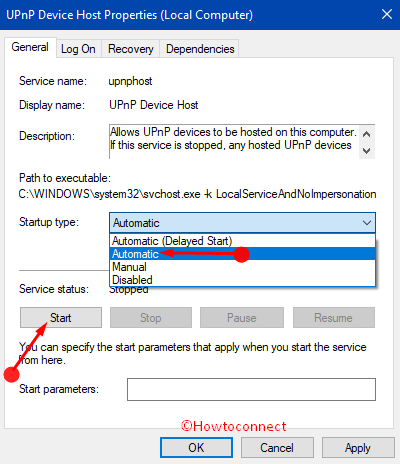
If you don’t find any of them running and set to Automatic then configure them right away. To do so, double-click that specific service and allow its Properties dialog to come into view.
Step 4 – Click the Start button on the properties dialog as shown in the below image. Then, press the drop-down of Startup type and pick up the option Automatic. Lastly, appoint a click on Apply and OK buttons to make the service changes effective.
Step 5 – Once you verify and correctly configure all the above-mentioned four services, you should not encounter Network Discovery Turned Off issue in Windows 10.
To know more about services, read How to Start, Stop, Configure Windows Services in Windows 10.
Alternative method to Change Services settings
Instead, you can also configure the above services using a command line. To use this method, perform these given steps carefully.
Step 1 – Type cmd on taskbar text field and right-click the result that you get on the top. Out of few options, make a click on Run as administrator.
For reference, you can also find more ways to Launch Elevated Command Prompt on Windows 10.
Step 2 – When you confront UAC prompt, click Yes to proceed ahead.
Step 3 – Now, use the below commands and don’t miss out to press Enter after inputting each command.
To start a specific service, copy/paste or type in and Enter –
net start servicename
Note – Kindly replace servicename in the above command with the original name of the service you are intended to start.
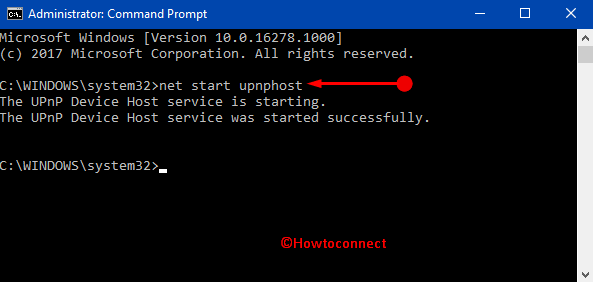
For example: To start the service namely UPnP Device Host, the command will be –
net start upnphost
To customize the Startup type of the service to Automatic, type in or copy-paste this piece of command –
sc config servicename start= auto
Note – Here also, ensure to substitute the servicename with the actual name of the service you prefer to configure.
For instance: To configure UPnP Device Host to automatic, the command line should be –
sc config upnphost start= auto
Solution 2 – Configure Windows Firewall
Step 1 – Press Start, type firewall and Enter and select Allow an app through Windows Firewall” from the Best match section.
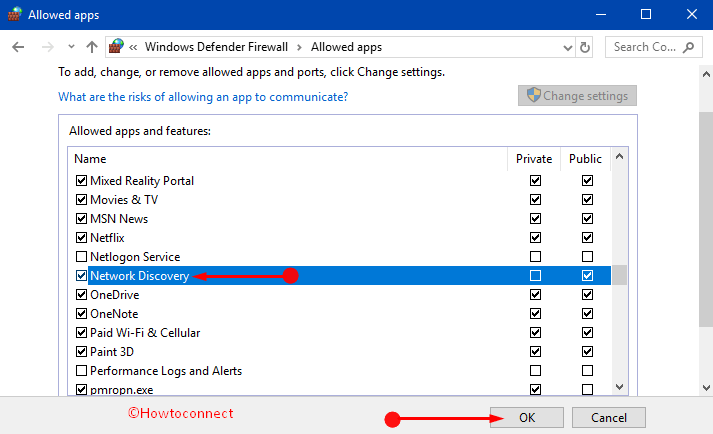
Step 2 – If the list seems to be greyed out, click Change settings button. Now, locate Network Discovery in that list.

Step 3 – Once you see Network Discovery, select it and click OK to save the changes you made to the feature.
Solution 3 – System File Checker
In case the above solutions to Network Discovery is Turned Off in Windows 10 didn’t seem to help you much, you can give a shot to system file checker. Running this command line detects and repairs the corrupted files if there are any. To know more about this built-in tool, follow SFC /Scannow, DISM.Exe, CHKDSK Windows 10.
Conclusion
Windows 10 operating system offers Network Discovery, a feature that strengthens the security of your device by letting you configure network profiles. But when Network Discovery is Turned off and doesn’t let you connect to other devices, you can solve the problem by attempting the above solutions.