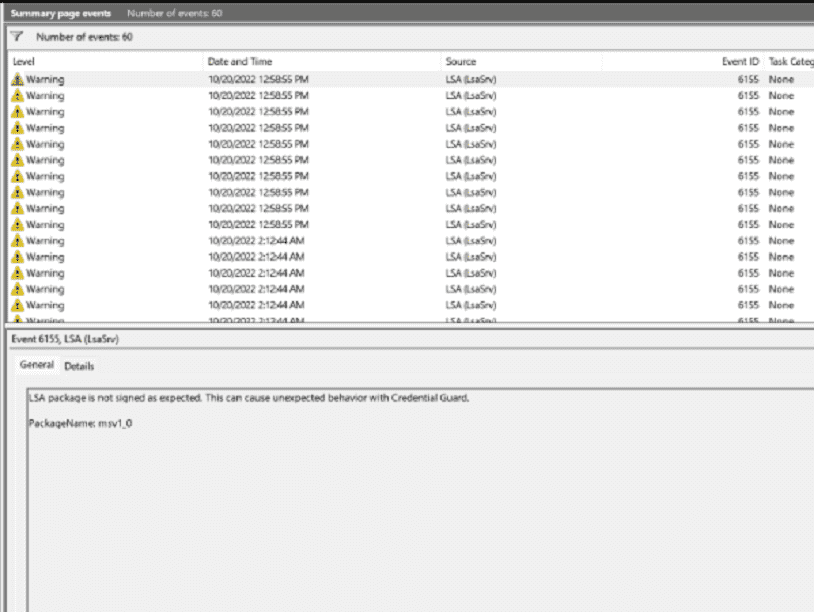
You might notice warnings having Event ID 6155 from a source LSA (LsaSrv) in Event Viewer. This warning is meant for error “LSA package is not signed as expected. This can cause unexpected behavior with Credential Guard. PackageName: msv1_0”. Let’s first see what this error says in simple words. The LSA aka Local Security Authority is an integral component of the Windows Client Authentication Architecture and its primary function is to authenticate users to establish logon sessions for the local computer. Moreover, the LSA is responsible for managing comprehensive information pertaining to various facets of local security on the computer. When LSA is unable to recognize and authenticate a user when signing in the error occurs.
LSA package is not signed as expected warning message can frequently appear at every login. Root causes of this issue include bugs in Windows update, incompatibility with third-party programs, and unnecessary changes in Registry. Credential Guard can also affect the Local Security Authority and prevent this component from working properly. See: Fix This change requires you to restart your device LSA Protection Error in Windows.
Table of Contents
LSA package is not signed as expected
Here is how to fix LSA package is not signed as expected Event ID 6155 in Windows 11 –
Uninstall Recent update
Most probably Event ID 6155 has made its entrance due to an unknown Windows bug but Microsoft has not acknowledged this until now. This bug comes through Windows update so uninstalling the recent update might fix the issue:
- Press Windows and I keys.
- Select “Windows Update” from the left panel of the Settings app.
- Go to the right pane and click on Update history.
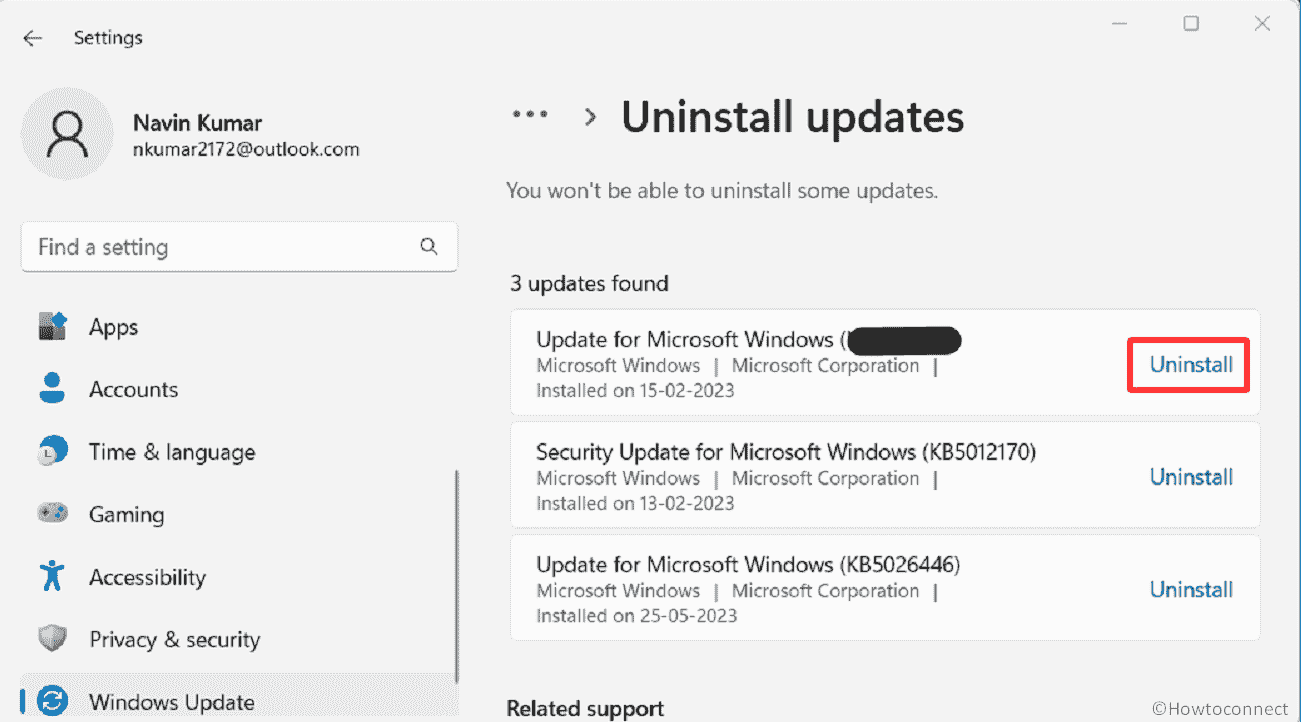
- On the coming page scroll down and click on Uninstall updates.
- Find the latest one, click on Uninstall, and confirm the popup.

- The computer will restart a couple of times and remove the patch troubling you.
Turn on LSA Protection via Registry Editor
The problem indicates the LSA protection is not enabled but you can turn it on through the Registry Editor:
- Click on Start and type regedit.
- Press Enter then select Yes on the User account control prompt.
- On the Registry Editor, go to the following registry string:
Computer\HKEY_LOCAL_MACHINE\SYSTEM\CurrentControlSet\Control\Lsa- Find the Value RunAsPPL and double-click on it.
- Set the value data as follows:
1 to configure the feature with a UEFI variable
2 to configure the feature without a UEFI variable (only on Windows 11 version 22H2)

- Reboot the device.
- In case, the Value RunAsPPL does not exist, right click on the right pane of the Registry Editor.
- Select New > DWORD (32-bit) Value.
- Name this value RunAsPPL and set the Hexadecimal to 00000002 before restarting the PC.
Read: Fix wdcsam64.sys Memory integrity Error in Windows 11 or 10.
Enable Local Security Authority Protection through Group Policy
If any issue happens in enabling LSA using the Registry there is another option and this is Group Policy Management Console. Move forward with the guide to turn the LSA on using GPMC:
- Press Winkey+R.
- Type gpmc.msc and hit Enter.
- In the Group Policy Management Console, create a new GPO that is connected at the domain level or linked to the organizational unit that contains your computer accounts. Furthermore, you can choose a GPO that is already deployed.
- Right-click on the GPO, and select Edit.
- Go to Computer Configuration > Preferences > Windows Settings.
- Then, right-click Registry, hover on New, and select Registry Item.
- This will open New Registry Properties dialog box.
- In the Hive list, navigate to HKEY_LOCAL_MACHINE.
- Find SYSTEM\CurrentControlSet\Control\Lsa in the Key Path list.
- Type RunAsPPL in
- On the Value name box, in the Value type box check REG_DWORD.
- For Value data box, enter:
To enable LSA protection with a UEFI variable – 1
To enable LSA protection without a UEFI variable – 2
(only implemented in Windows 11 version 22H2)
- Click on OK.
Disable Credential Guard
The error LSA package is not signed as expected Event ID 6155 itself refers that Credential Gurad may show unexpected behavior. Therefore, disable this feature using below method:
- Open Registry Editor and navigate to the following key:
HKEY_LOCAL_MACHINE\SYSTEM\CurrentControlSet\Control\Lsa- Go to the right pane and right-click on an empty space.
- Select New > DWORD (32-bit) Value Data.
- Name this LsaCfgFlags.
- Double-click on this Value.
- To disable Credential Guard, enter the value data 0.
- Click on OK and close Registry Editor.
- Restart your computer.
Install pending Windows Update
Since this occurs due to bug, it is likely to be fixed using a new Windows update delivered by Microsoft. The experts in the company systematically push the patches to deal with existing bugs and issues. Hence, install the updates if available and are in pending state using the below instructions:
- Click on the Search and type updates.
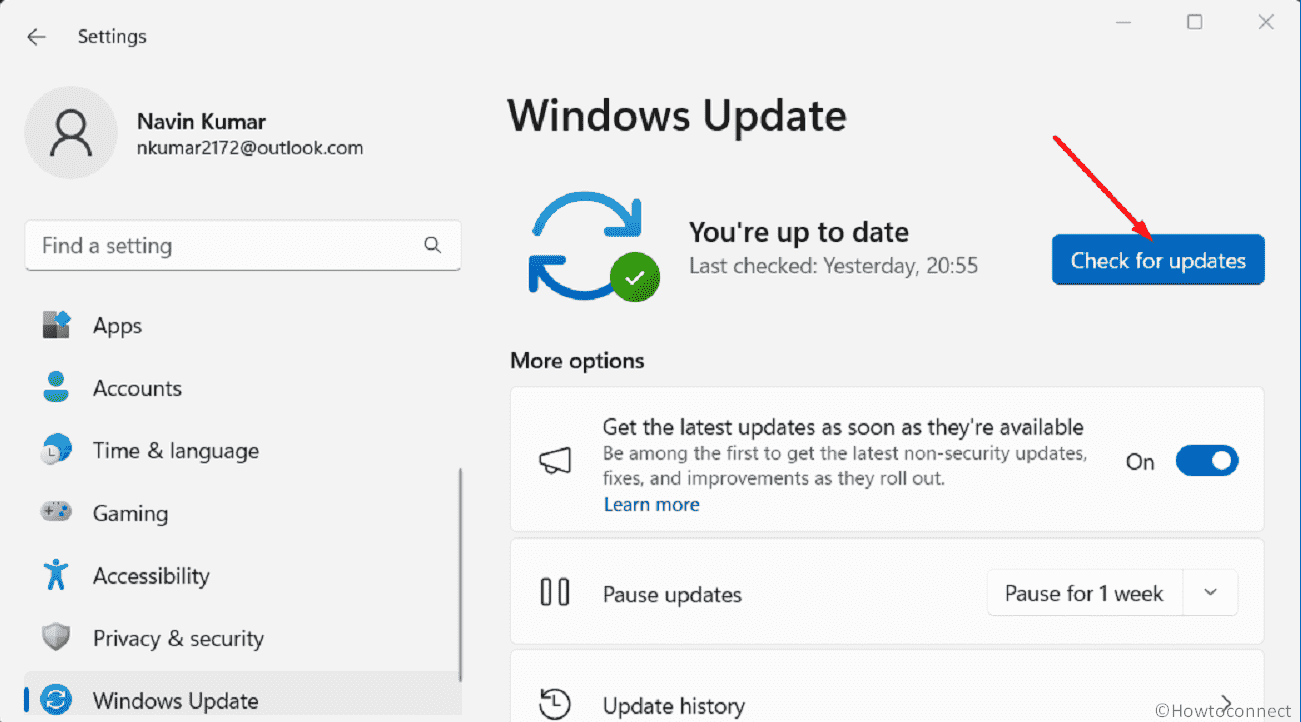
- When Settings open, click on – Check for updates.

- Once after system performs scanning and finds any patch, select – Download and install.
- Click on Restart now after a popup appears.
Perform System Restore
‘LSA package is not signed as expected. This can cause unexpected behavior with Credential Guard. PackageName: msv1_0’ is likely to appear after recent unwanted changes in registry. To revert back the variation, System restore is the best possible method in Windows. So head to the steps:
- Click on the Start button from the taskbar and type rstrui.
- Press the Enter key to launch the System Restore wizard.
- Check the option – Choose a different restore point and select Next.
- Click on a date and time when the error did not start occuring.
- Then, click on Next.
- Review the date and time you have selected and click on Finish.
- On the Warning dialog box, click on Yes.
Methods:
Uninstall Recent update
Turn on LSA Protection via Registry Editor
Enable Local Security Authority Protection through Group Policy
Disable Credential Guard
Install pending Windows Update
Perform System Restore
That’s all!!
