Procedures to Fix Windows Modules Installer Worker High CPU Usage in Windows 10 with steps. – Windows 10 encounters with a common issue of high CPU usage that freezes all other processes of the PC. When users check Task Manager, they find the culprit is Windows Modules Installer Worker. This is a system process that consumes more than 50% of CPU. Also, in most cases, this process puts an extreme load on the system that makes disk usage 100%. So, to come out of this problem, we present you with certain solutions. Read a similar guide on How to Check Which Process Is Using More CPU in Windows 10.
Windows Modules Installer Worker High CPU Usage in Windows 10 is a common issue that troubles the users by freezing almost all the processes of their PC. Well, many users tried to resolve the problem by restarting the computer but the issue of high CPU usage does not fix by itself.
Solutions to Windows Modules Installer Worker High CPU Usage in Windows 10
Check for Windows Update
Usually, higher power consumption indicates that Windows Update is in progress, so first, confirm it by following the below steps.
Step 1 – Click Store icon that you see on the taskbar. Click on user account picture followed by Downloads and updates.
Step 2 – If any apps are being updated, you will notice their download in progress.
Step 3 – Moving ahead, press Win&I keys and on the Settings application. When multiple categories show up, click Update & security.
Step 4 – By default, Windows Update will be visible, so, in its right pane check if any updates are in progress.
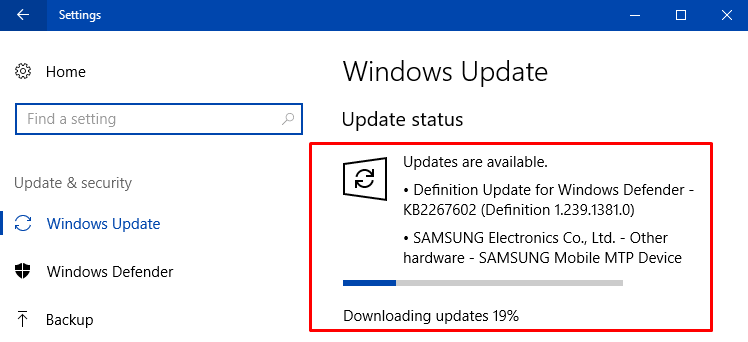
Step 5 – If updates are in progress, wait for updates to come to an end and finally, verify if the CPU and high disk consumption are still high.
You can also Pause Windows Update on Windows 10.
Disable Automatic Maintenance
Step 1 – Type Control on Cortana search box and when she shows Control Panel as the Best match, click on it.
To know more ways, read How to Open Control Panel on Windows 10 – Instant Ways.
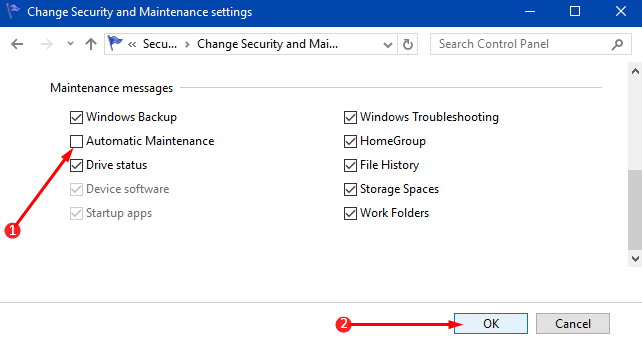
Step 2 – First, make the icons view small, then search and select Security and Maintenance. On the next screen, you will notice few options on the left sidebar, click Change Security and Maintenance settings.
Step 3 – Deselect Automatic Maintenance and lastly, click OK to disable the service.
Run DISM and System File Checker
Step 1 – On the taskbar search area, type the command cmd and when Cortana displays Command Prompt on the top, execute a right-click on it. Few options will come up on Cortana, click Run as administrator.
Explore different ways to Launch Elevated Command Prompt on Windows 10.
Step 2 – On the Command Prompt window, type the below-mentioned two commands one after the other. Also, assure to press Enter after you type each command.
Sfc / scannow
Dism / online / cleanup-image / restorehealth
Step 3 – Wait for the scan to complete. Finally, restart the PC and verify the CPU and high disk usage consumption.
Follow how to run the tools SFC /Scannow, DISM.Exe, CHKDSK Windows 10.
Change Startup Mode for Windows Installer Module and Windows Update
Step 1 – Click Windows logo icon and type services. Soon the same will display on top, click on it.
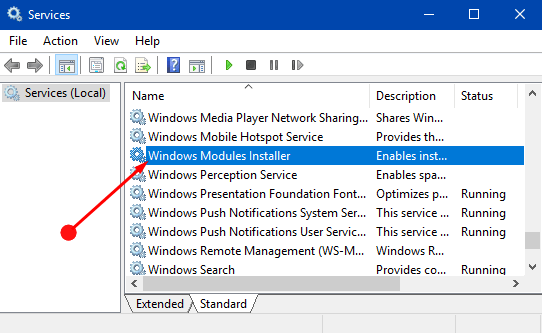
Step 2 – On the Services window, search Windows Module Installer and once you notice it, conduct a double-click on it.
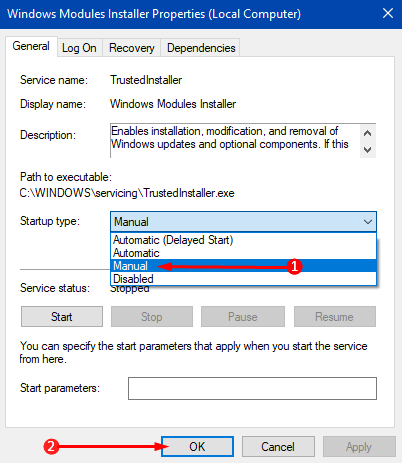
Step 3 – When its Properties window appears, click the drop-down of the option Startup type. Few options will appear, select Manual and click OK to save the modifications.
Step 4 – Again, head back to the Services window, locate and perform a double-click Windows Update.
Step 5 – On its Properties box, click drop-down of Startup type. Choose Manual, click OK and let the changes be effective.
Perform a Clean Start
Step 1 – Click Windows icon and type msconfig. System Configuration will show up as the result, click on it.
Step 2 – Stay on the General tab and click Normal startup. This is the first option in the tab.
Step 3 – Now, switch to Services tab. An option Hide all Microsoft Services will be noticeable at the extreme bottom, select it. Another button with a name Disable all will be visible, click on it.
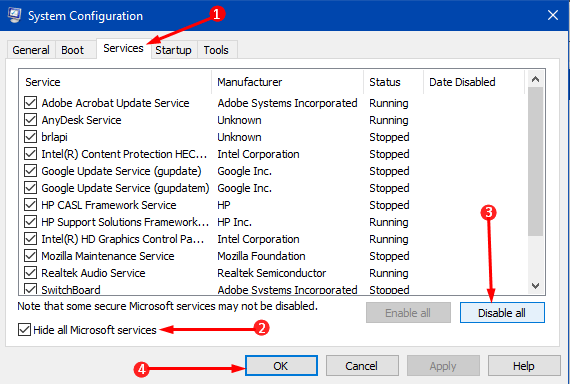
Step 4 – Lastly, click Apply and OK buttons one after the other and then reboot the computer.
See the details of How to Clean Start Windows 10 PC in this guide.
Run Windows Update Troubleshooter
Step 1 – Jointly press the keys Win&I and when Settings application opens up, click Update & security.
Step 2 – On the left pane, select Troubleshoot. Jump to its right pane search and select Windows Update.
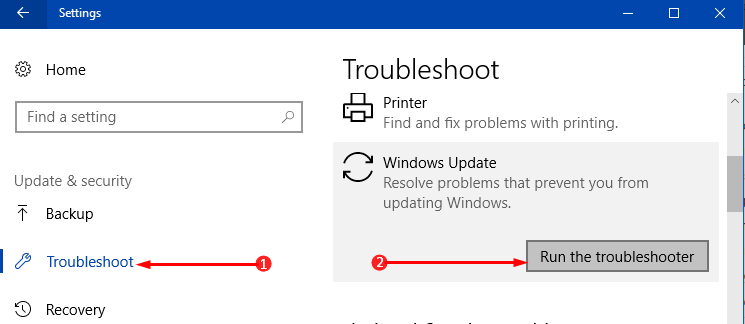
Step 3 – Run a troubleshooter button will pop-up, select it, and let the wizard diagnose the issues. After the scan gets over, see if it fixed Windows Modules Installer Worker High CPU Usage in Windows 10.
For reference, pursue our guide on Use Common Windows Update Troubleshooter on Windows 10, 8.1, 7.
Conclusion
Completing the above workaround will definitely fix Windows Modules Installer Worker High CPU Usage in Windows 10. If you have more solutions to settle down this problem. please leave us a comment.
Very nice solution. It helped me out. By studying I also got a site where got some more tips related Windows Modules Installer Worker. Thanks for your effort.