Error 0xc1900101 0x20004 is a crappy error which occurs when the user attempts to upgrade their existing Windows versions into Windows 10. The users are experiencing this error when the installation process goes to 25% of the whole process. Generally, the system copies the installed files to the destination partition at this stage of the installation process. Suddenly the process gets stuck when the copy progress is 84% showing an error message on the screen. The full note is somewhat as follows:
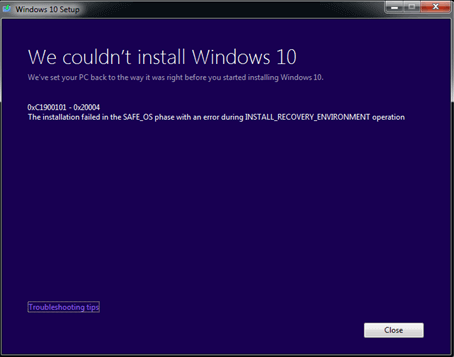
“Error 0xC1900101 – 0x20004
The installation failed in SAFE_OS phase with an error during INSTALL_RECOVERY_ENVIRONMENT operation.”
As a matter of fact, the installation process stops in the middle and users repeatedly fail to install the upgrade even after using the “Windows Media Creation Tool“. You may need to know about the ways to Fix 0xc1900101 0x20004 Windows 10 as it has become the talk of the time now. How much annoying it is when you see that your installation is stuck every time at 25%! Of course, it sounds pretty disgusting and so let’s go little deeper into this problem.
IT experts carried out a thorough investigation of the error and they have found out that, the BIOS & SATA settings are responsible for this error. As the issue is not only troublesome but also restricting the users from upgrading themselves to Windows 10, we shout to talk about the issue and try to resolve it immediately. Users need an immediate solution for this error.
Let’s move on to the discussion about How to Fix 0xc1900101 0x20004 Windows 10. Before you proceed towards the solutions, ensure to save a back up of all the crucial files as well as critical data. You can either store them to an external “USB Flash Drive” or to a drive disc.
How to Fix 0xc1900101 0x20004 Windows 10
The ways to resolve 0xc1900101 0x20004 Windows 10 is not so complex as the error is. You can fix this error by following simple instructions very easily. There are two solutions prevailing to resolve this issue. As we have come to know already that BIOS and SATA are responsible for this error, we will go for fixing these two things as a part of the resolution.
Solution-1: Detaching all SATA Cables
As the installation process is commonly done online as well as the necessary data and information are already stored in the system, there should not be any problem in unhooking the SATA cables. This will not involve any data loss and we recommend you to unplug all the external devices too. External devices are like USB drives, USB HUBS, and printer.
So, start the installation process again after successful detaching of all the SATA cables. Unplugging the cables may need some guidelines as any of the mistakes can cause serious damage to the computer and that will be more difficult to recover. If you are not fully sure about the unhooking process, see the instruction manual provided. You can also hire professionals to unhook too in case of inability.
We expect that solution-1 has worked in your computer to Fix 0xc1900101 0x20004 Windows 10. If you still get to see the error, try out the next workaround.
Solution-2: Disable Network Adapters
For many, disabling everything under Network Adapters worked wonders and they did not get stuck in the installation process with errors. But merely disabling it through system tray and Network and Sharing Center does not resolve the issue. You have to do this through Device Manager and let us go through the steps now.
Step 1 – Open Run dialog and copy/paste the below command in its text field and click OK to open Device Manager.
devmgmt.msc
Step 2 – On the device tree, locate and double-click Network Adapters to expand it. Now, execute a right-click on the individual entries one by one and select Disable device.
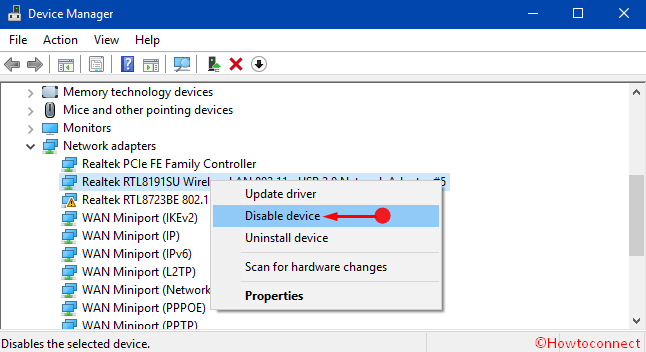
Now give an attempt to the installation and hopefully, the process should not get stuck with an error 0xc1900101 0x20004.
Solution-2: Clear CMOS
The task of clearing CMOS in the desktop is easier than that of the laptop as the hardware is enclosed in laptops. For the desktops,
Step-1: Cut off the entire power source of the desktop and unplug all the power cords.
Step-2: Open the casing carefully. You may face difficulties in opening the casing as lots of precious things are inside and any of the mistakes will cause additional damage. Follow the instruction manual from the maker or searching in Google will also provide you all the necessary information regarding this issue.
Step-3: When you finish opening the casing successfully, look for the flat battery on the motherboard. Use manual for finding the location of the battery.
Step-4: Remove the battery carefully and wait for about five minutes. After that, reset the battery again in the place on the motherboard. Put the casing back as well as tight all the screws you opened before.
Step-5: After fixing all the parts in places start the computer and start the installation process again.
We expect that you can now install the upgrade without any hassle.
Conclusion
As a Microsoft user, you have the right to upgrade your prevailing Windows to Windows 10 easily. The 0xc1900101 0x20004 error can make your process worse and restrict you from upgrading. Therefore we have discussed the causes and the solution to bypass this specific installation error. We can expect that you can upgrade and enjoy Windows 10 effortlessly and if you are aware of some other workarounds, do write them to us.