You will see 15 Ways to Defrag Computer in Windows 10 with instructions here. Using a hard disk for a long makes a laptop sluggish because the drive stores data in a logical order with the help of spinning platters. If you delete, the hard disk automatically replenishes the space right after writing a new one. But due to fragmentation, sometimes files in the block get split and the same data got saved in a different section of the platter. As a consequence, when you request to read that file, the disk runs around and navigate multiple locations for getting it. The computer goes slow and sluggish making you unable to work smoothly as a resultant. To escape from such situations, defrag is a pretty handy method and Windows provides a built-in tool to deal with.
Defragment is a system maintenance utility and it should be run when you don’t get the expected computer performance. Though the system Defrags Windows 10 once in a week automatically, you can do it manually too if the device becomes tardy. Generally, the method should be carried out before 10% fragments occur in the hard disk to make laptop faster. Contrarily, Defrag a Solid State Drive (SSD) can be destructive and cause an exaggerated effect on the durability of the same. The main factor is SSD doesn’t use the spinning platter to store data. Therefore, the fragmentation of data into different portions of its flash memory doesn’t have the same effect as HDD.
Table of Contents
Defrag Computer Windows 10
Here are 15 Ways to Defrag Computer in Windows 10 –
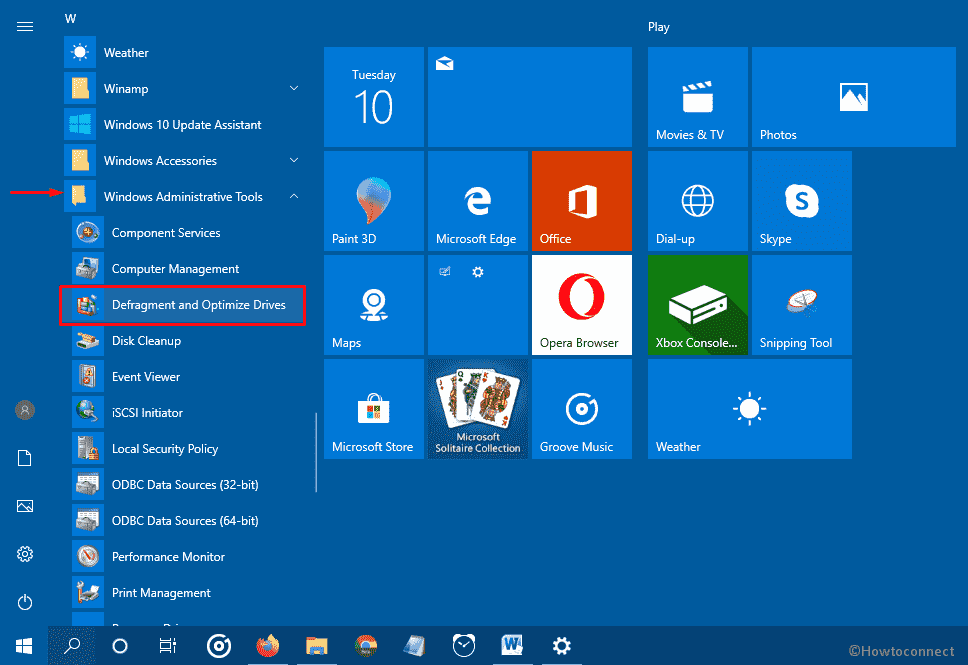
1] Explore Start menu to optimize drive
In Windows 11
- Click on Start from the Taskbar.
- Select All apps.
- Go down on the list and click on – Windows Tools.
- A window from Control panel will be launched; double click on Defragment and Optimize Drives.
- Select (C:) drive. (C: should be the installation drive)
- Click on – Analyze.
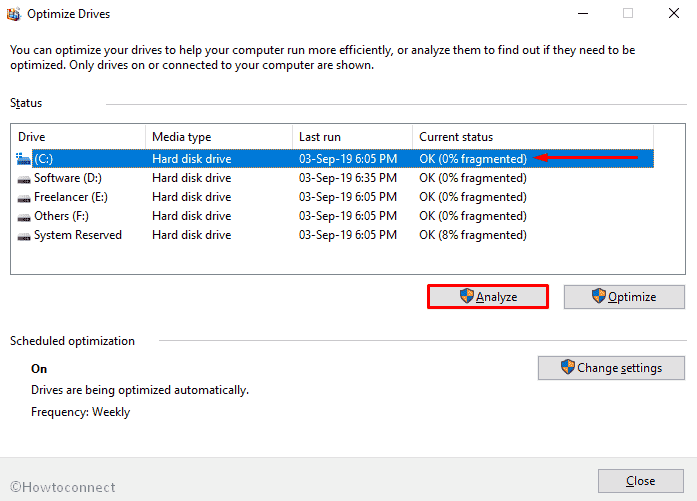
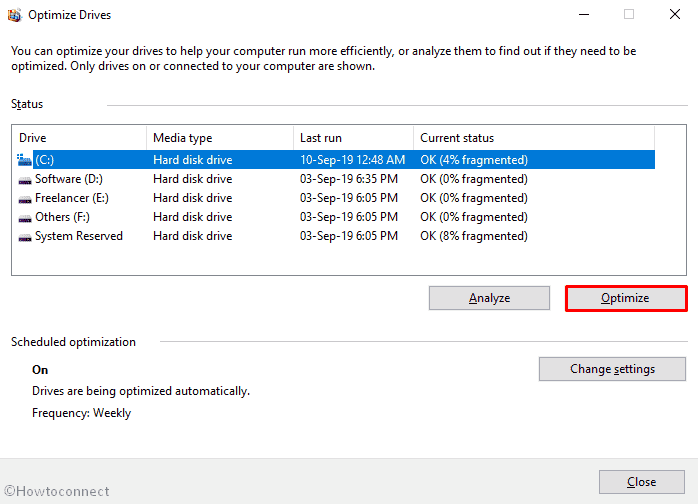
- Wait for some time and let the system show up how much percent of the hard drives are fragmented.
- After finishing, click Optimize.
For Windows 10 –
2] Use Windows search
- Click the search icon located in the Taskbar and type defragment.
- When the result comes into the view, either click on Defragment and Optimize Drives or hit Enter.
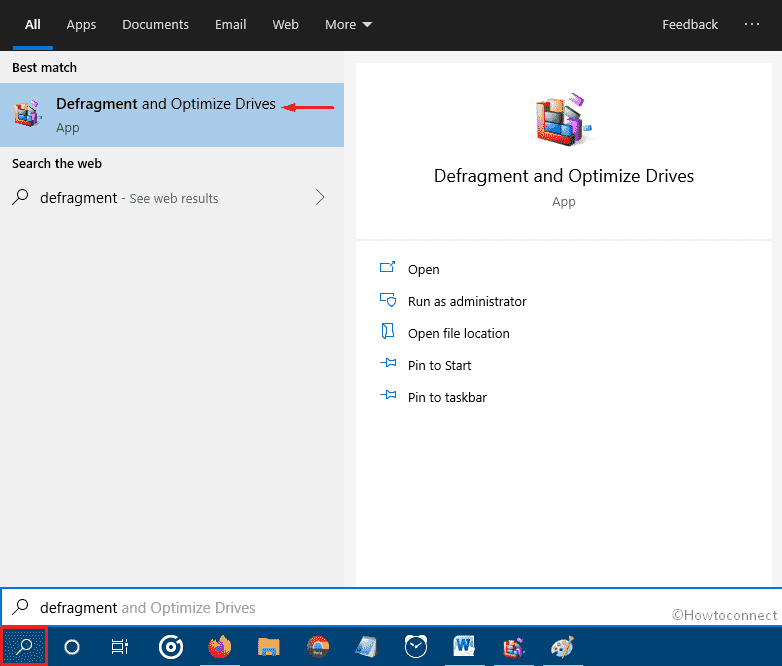
- From the Optimize Drives window, select any drive you want to defrag and click Optimize button.
3] Do it with Run Command
- Press Windows key and R at the same time to open Run Dialog box.
- Upon coming up, write dfrgui in the text area and click the OK button to open Defragment tool.
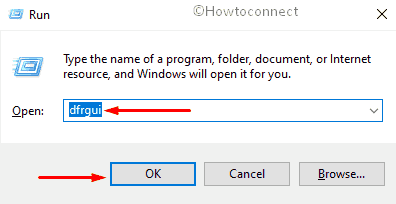
When Optimize Drives appears, select a drive followed by clicking the Optimize button.
4] Take the help of Cortana assistant to Defrag Computer in Windows 10
To use this virtual assistant, you need to set up Cortana first. Also, make sure your device is connected with the internet.
- After setting up things, click the Cortana icon located in the Taskbar.
- When it shows up, click the microphone sign and say Hey Cortana, open Defragment and Optimize Drives.
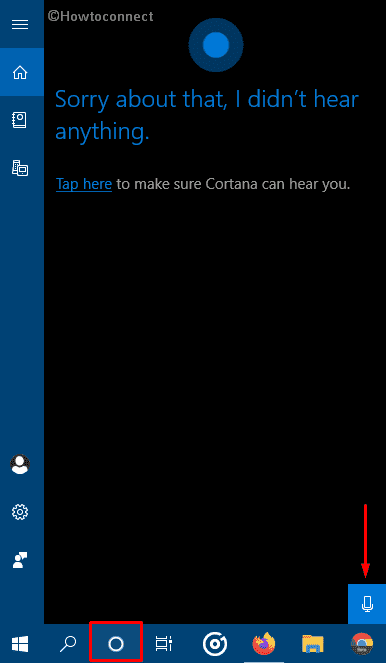
- Cortana will immediately launch the named program.
- From the opened window, select a preferred drive and click Optimize.
5] Go through Control Panel items
- Right-click on Start button and select Run from the Power user menu.
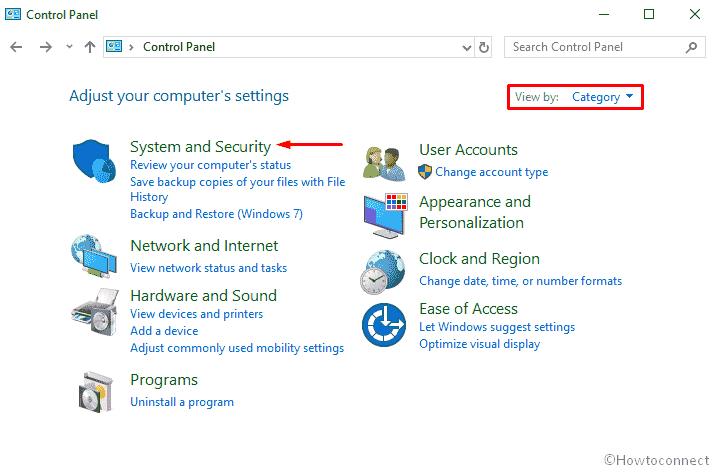
- Type control in the text field and hit Enter from your keyboard.
- When Control Panel window becomes visible, set the View by type to Category. You are able to get help from here – How to Make Windows 10 Control Panel Icon Size Bigger.
- Select System and Security.
- On the consequent page, move to the right-pane and click Defragment and optimize your drives link located under Administrative Tools.
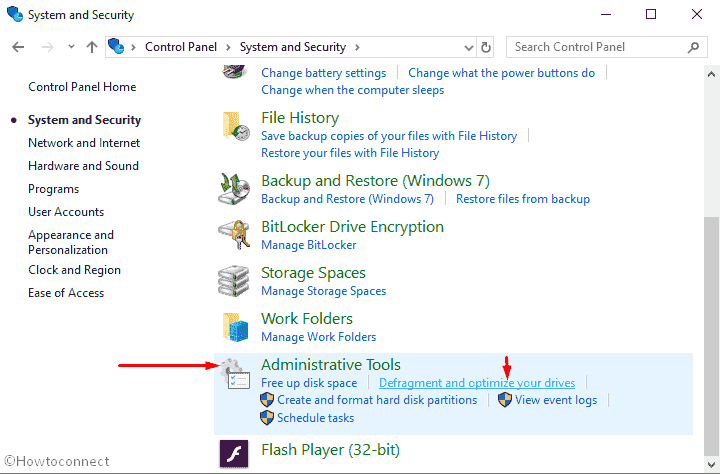
- Thereafter, choose a drive Optimize drives window and click Optimize to start the defrag.
6] Utilize the search option of Windows Settings app
- To open Windows Settings, press Win+I simultaneously.
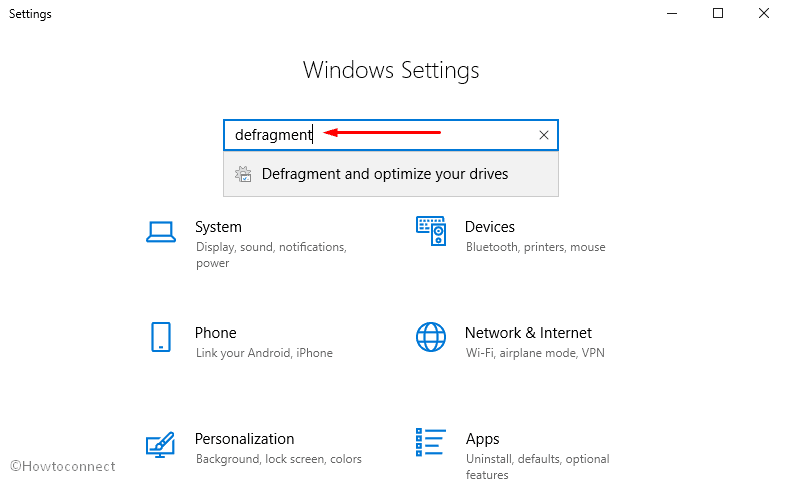
- When the home page of Settings app becomes apparent, click the search bar located on top.
- Type defragment there and once the result appears, click Defragment and optimize your drives.
7] Defrag Windows 10 with Task Manager
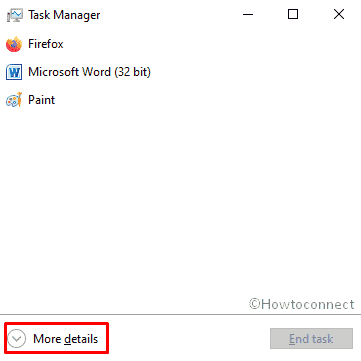
- Press Ctrl+shift+esc at once to open Task Manager.
- Click More details if the current wizard is not expanded already.
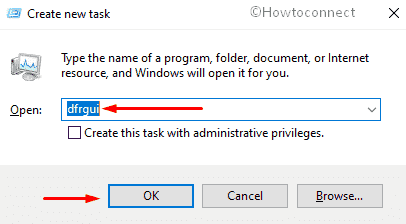
- Click File from the Menu bar and select Run new task.
- On the forthcoming wizard, type dfrgui and click the OK button.
Later on, select a drive you want to defrag and click Optimize.
8] By way of Command Prompt
- Click start button and write cmd.
- When the search result appears, select Command Prompt from the top.
- On the black window, type dfrgui and hit Enter from your keyboard.
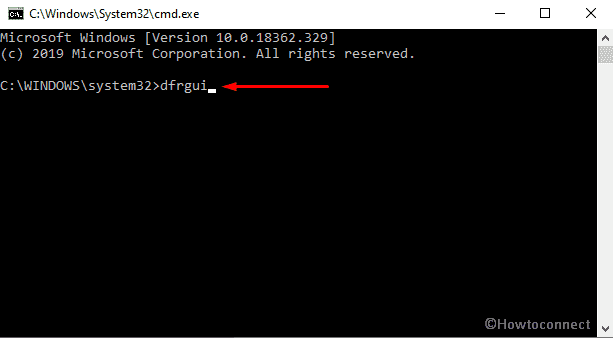
- Once you see Optimize drives in the screen, pick a drive and then click Optimize button.
9] Defrag Computer executing Windows PowerShell
- Press Win+X and click Windows PowerShell from the Quick Link menu.
- The program will take time to become ready to execute the command. Once you view a blinking cursor on it, type dfrgui and press Enter key.
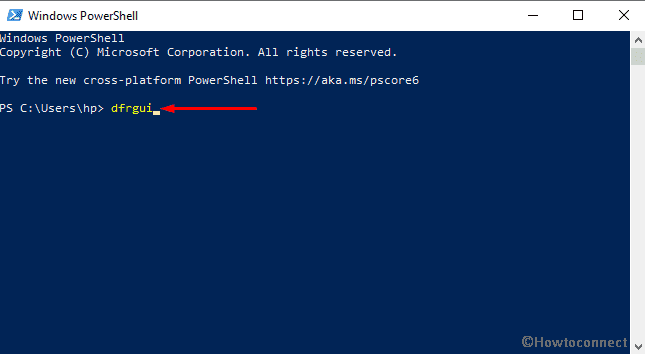
- From the current window, choose a preferred drive and hit the Optimize button to Defrag Computer in Windows 10.
10] Optimize drive through File Explorer
- Click the folder icon from the Taskbar or press Win+E to open File Explorer.
- Select This PC from the left overlay.
- Next, right-click on the drive you want to defrag and select Properties.
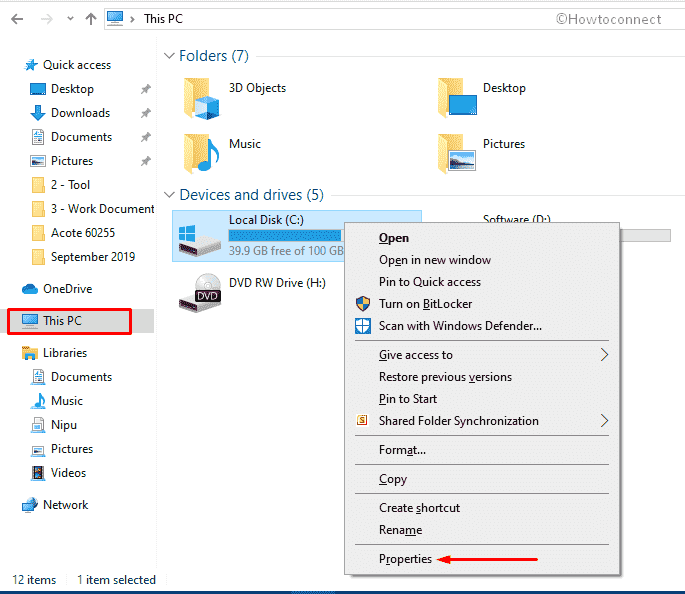
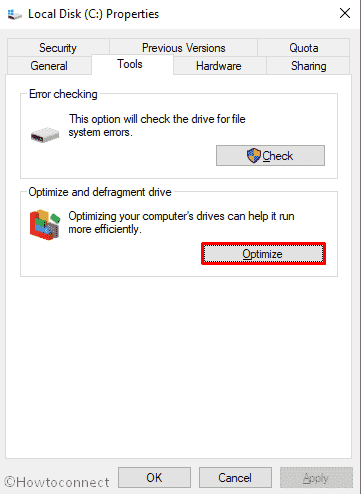
- When it comes into the sight, shift to its Tool tab.
- Hover the cursor to Optimize and defragment drive section and click the Optimize button located under it.
11] Surf into System32 directory to run the executable file
- At first, open Run Dialog box and type the following in the text area –
C:\Windows\System32
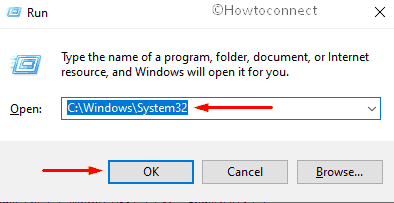
- Hit the OK button to reach out to System32 directory.
- Once there, press Ctrl+F to activate the search bar and type dfrgui.
- When the result becomes visible, double-click on dfrgui.exe to open defragment tool.
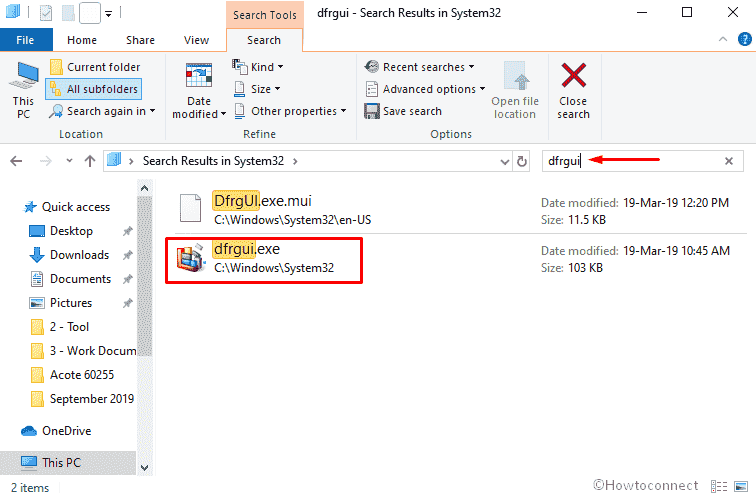
- After appearing, choose a drive and hit the Optimize button.
12] Bring the address bar of File Explorer into service
- Press Windows key and E together to bring up File Explorer.
- When it shows up, move your cursor to its address bar and click on it.
- Remove the highlighted Quick access text and type dfrgui there.
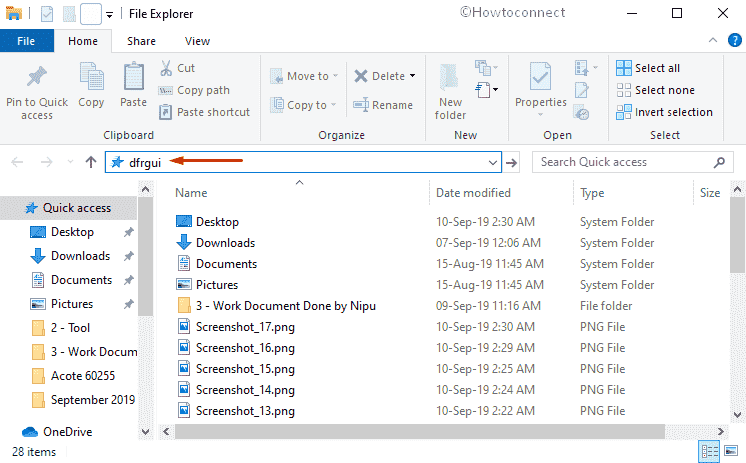
- Finally, hit Enter to open Defragment and optimize drives.
- From the subsequent window, pick out a driver and then click Optimize to Defrag Computer in Windows 10.
13] Pin Disk Defragmenter in Taskbar
- Press Win+Q altogether to bring forward Search option.
- Type, defragment in the specific field.
- When the consequence shows up, right-click on Defragment and optimize drives then select Pin to taskbar.
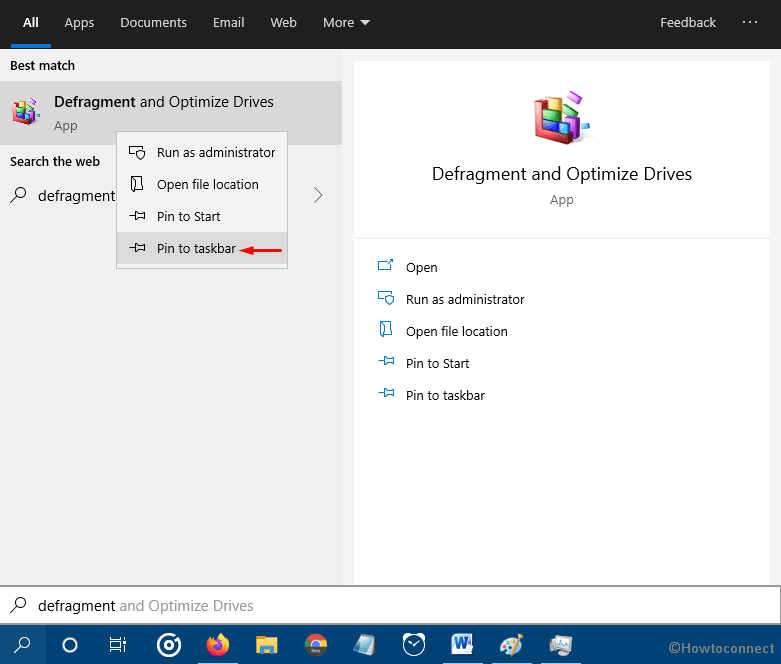
- Now, you will notice defrag icon in the Taskbar. From now, whenever you need to open Defragment tool, just click on it.
- You can also Pin this maintenance tool in the Start menu by following similar method.
14] Create a desktop shortcut to open defragment tool
- Head over to Desktop screen by pressing Win+D hotkey.
- Right-click on a void space and select New => Shortcut from the appearing context menu.
- When Create Shortcut wizard turns up, copy the following location and paste in the given area –
C:\Windows\System32\dfrgui.exe
- To continue the process, click the Next button.
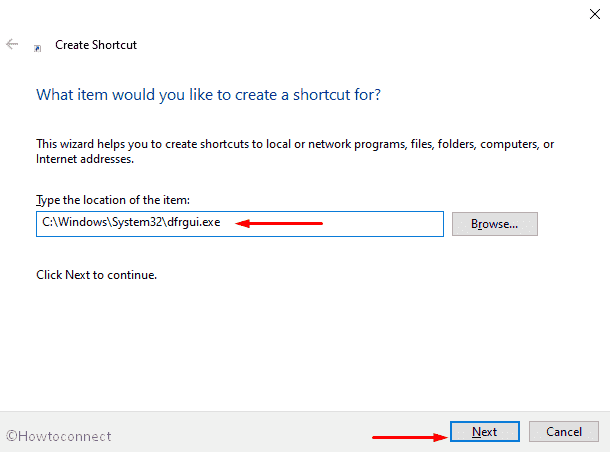
- On the next page, provide a suitable name and then click Finish.
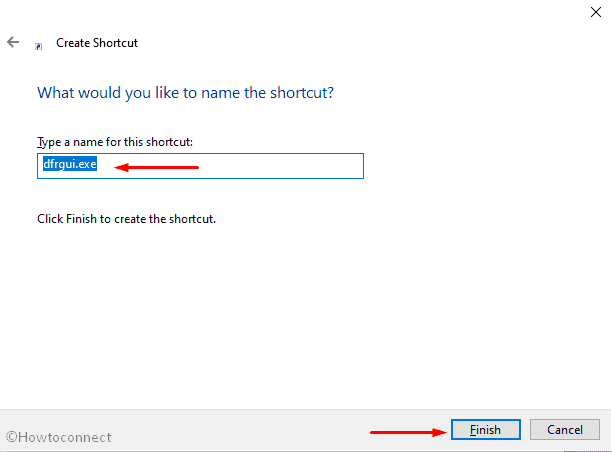
- In the future, whenever you need to open Defragment tool, double-click on the shortcut you just created.
15] Generate hotkey to quickly Defrag Computer in Windows 10
Step#1: To generate hotkey, follow the previous method to make a desktop shortcut first.
Step#2: Once created, right-click on the same and select Properties.
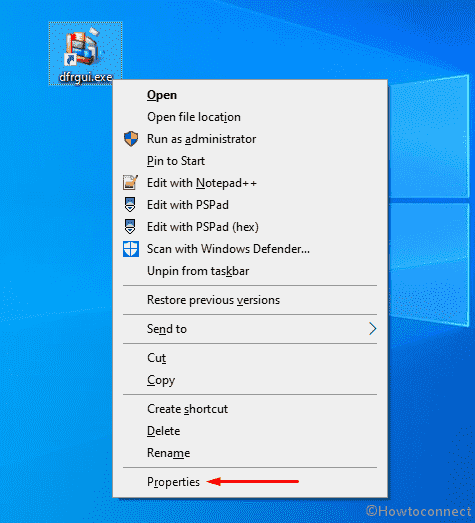
Step#3: A wizard will come up with the Shortcut tab opened. Hover the cursor to Shortcut key option and click on the box located beside it.
Step#4: Press a key you prefer to open Defragment tool and the system will assign Ctrl+Alt before that.
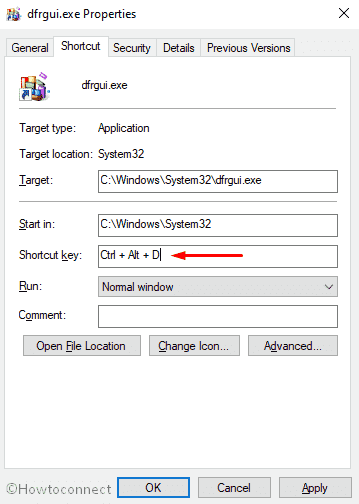
Step#5: Finally, Once you are done, click the Apply button and then OK to save the changes.
Methods:
1] Using Defragment and Optimize Drives tool
2] Through Windows search
3] With Run Command
4] From Cortana assistant
5] Via Control Panel
6] Through Search bar on Windows Settings app
7] With Task Manager
8] Using cmd Command
9] With Windows PowerShell cmdlet
10] Through File Explorer address bar
11] From System32 directory
12] Using File Explorer
13] Pin Disk Defragmenter in Taskbar
14] By creating a desktop shortcut
15] Using Hotkey
That’s all!!